Help System Search
HomeTeamsONLINE Sports Websites for Teams, Leagues & Schools
You can use your own domain name with your HTO site.
Step 1: Tell us your domain. Contact Support with the domain name you want to use, and we'll add it to your account and get it ready.
Step 2: For All-Star and Champion users, we can purchase and manage the domain for you and take care of the rest.
If you manage your own domain, open your Domain Setup page. It shows the exact records to enter, with copy buttons, and what's left to do.
Or update these two records at your domain company:
- www record: set the type to CNAME with the value hto.hometeamsonline.com
- Main domain record, shown as @ (sometimes blank): set the A record to 174.138.109.213
Leave everything else as it is, especially your email (MX) records. These changes do not affect your email.
Once saved, your secure padlock (HTTPS) turns on by itself. DNS changes can take a few hours.
In Cloudflare ? Set both records to DNS only (gray cloud), not Proxied, and turn Domain Forwarding off. Both override these records.
We support a single domain. Extra domains can be forwarded to it.
DNS - ADVANCED
It is not possible to update additional DNS or MX records for an HTO managed domain. If you need more advanced DNS settings, you'll need to take over the domain.
To add a game, go up to the Teams & Schedules tab and select Schedule & Results
- click the Add a Game button
- enter the date, opponent, and any other details
- click the Submit & Return to Schedule button to save the changes, or click the Submit & Add Another Game button to enter more games.
To add an event, meeting, or practice:
- go up to the Teams & Schedules tab and select Schedule & Results
- go down and click the Add an Event or Practice button
- enter the date, time, event name, and any other details
- click the Submit & Return to Schedule button to update the site
The date should now display in the schedule.
If Domain Forwarding is on for your main domain at your domain company, it overrides those records and the domain will never finish connecting.
To point extra domains at your website, ask your domain company to forward them to your main domain.
You can highlight and copy your Spreadsheet, then paste it into any text area and your formatting should stay similar. Note that this sometimes copies hidden code which can cause HTML issues. Try using the "Clean HTML" button to strip out the code.
You can also use the File Manager in any text area to upload your file and insert a link to it.
To remove the Music Player module (All-Star):
- Go to Page Editors > Website Home and click the X-Grid tab on the far left.
- In the PAGE LAYOUT, click on the Music Player module, drag, and drop it into the grey field at the bottom of the MODULES box on the left.
- Click the green Click Here to Save Your Layout Changes button to make your changes live.
Use the Scheduling Wizard to easily create a Round Robin schedule based on the information you add!
The Scheduling Wizard will easily do half of the work for you. Once the Scheduler has processed your details, download the results into an Excel spreadsheet. From there, you can make any tweaks and changes until the Schedule is perfect for your organization.
You can use the Import Tool to quickly add the Schedule to your Administrator site. (go to Teams & Schedules > Import and click the Help tab on the far right for more information on Importing.)
Please note the scheduling program is offered as a free Beta version, with limited Support.
Only the Owner of a website can change a Site ID.
To change the Site ID:
- Go to Account & Upgrades > HQ Details
- In the SITE SUMMARY box on the right, beside Site ID, click the change> link.
- The system will send a confirmation email that will include a code. Check your email, copy the code, and enter it into the Confirmation Number field. Click Confirm Administrator.
- Enter your New Site ID and click Change Site ID.
Note that some file paths may not update after this change. We suggest viewing your Visitor's site and if necessary, recreate any links, images, or music that break due to changing your Site ID.
Changing the Site ID changes your site's web address, so visitors that have your site bookmarked will need to update their Favorites.
To remove the verification step in the Guestbook:
- go up to the Community tab and select Guestbook
- click the Options tab on the right
- select the Posting Options section
- click the "Post Immediately" setting
- exit and confirm
The Guestbook will now immediately publish all new posts.
To check your package pricing:
- go up to the Account Info & Upgrades tab and select Upgrades & Renewals
- you can edit a package using the Setup Teams box on the left
- the Package Cost should update on the right
Once it looks good, you can click the button on the right to process any payments and save the changes.
To change the display for the Visitor's schedule:
- go to the tribar menu > Teams & Schedules > Schedule & Results and click the gear tab.
- select Schedule Display and toggle CALENDAR or LIST VIEW. After the 'updated' message displays, X out of the menu.
Tips:
- in the Calendar view, only months with games or events scheduled will be clickable.
- mobile devices will only display the List view.
- contact Support if you'd like your Schedule to be color coded.
To refer your friends & fellow sports admins (& earn credit towards your organization's renewal or upgrade!):
- Click the person icon in the upper right-hand corner & select My Account.
- Click the refer a friend button & complete the fields.
When your friend purchases a membership with HTO, your organization will get a credit good for 10% of the price of the package your referral purchased, rounded up to the nearest $5.
To change the way your Schedule displays:
- Go to Schedule > Schedule & Results > gear icon on the far right
- Click Schedule to:
- default display format (calendar or list view)
- default sort
- what events display on Schedules
- default mapping site
- labels for OT & 2OT columns
Custom Date Range
Use the following URL to create a New Custom Remote Web Link in your Navigation Links which will only view a specific range in the current season:
http://HTOsports.com/teams/default.asp?u=USERNAME&t=c&s=SPORT&p=schedule&dateFrom=mm/dd/yyyy&dateTo=mm/dd/yyyy
Username and Sport need to be updated to match your account.
The from and to dates need to be specified for the range.
When you update a photo on your site, your browser sometimes holds on to old images (called "caching") even after you've changed it. Keep in mind that this is only an issue on your computer - other visitors should see the new, correct image. Eventually your browser will update the images, but this may take several days.
To force your browser to update with the latest images:
- Hold the "Shift" key on your keyboard while clicking the browser "Refresh" button (usually found near the web address at the top) in order. (Many browsers also use Ctrl + F5 as a shortcut to do a full refresh).
- Try closing all browser windows and re-opening, or try rebooting your computer.
- Go to your browser settings and check to see if you can delete temporary files (clear cache).
Contact support if the issue persists.
To make a domain request, click Contact HTO and change the department to Domains before typing your message.
Refer to the FAQ for more information.
Notes:
- We are unable to register or Transfer domains into our account that end in .ca.
- We are only able to purchase Transfers on the following domain extensions:
.com
.info
.net
.org
.biz
.us
The Rookie membership level does not include any storage space. As a result, there is nowhere to store images to upload to your site.
To upgrade your membership and add photos:
- Go to Schedules > Teams & Packages & click the question mark icon on the far right.
- Use the steps for your type of website to upgrade.
To change the time for a game or event:
- go to the Teams & Schedules tab and select Schedule & Results
- click the Info button for a game or event
- change the times, then scroll down and click the Update Game button
The schedule will now display the new times.
To enter scores:
- Go to Schedules > Schedule & Results and click the scores button for any game.
- Enter the scores and click save.
Additional details can be entered into the Game Summary, Play-by-Play and Special Settings* buttons. Forfeit settings can be found under the Special Settings section.
Hockey Tip: SO is for Shoot Outs. Enter SOG (Shot on Goal) in the stats*.
*minimum Prostyle membership level required
To set a game as a forfeit:
- go up to the Teams & Schedules tab and select Schedule & Results
- click the Scores button for the team's game
- click the gray Special Settings tab
- in the drop-down menu select which team forfeited
- go up and click the green Save button to update the result for this game
If one team has forfeit, they get a loss and the other team gets a win in the standings
If both teams forfeit, both teams get a loss in the standings
If you would like forfeited games to be hidden from a League's schedule module, or you would like the forfeited games hidden from the team's schedule, please contact support.
To delete a game or event:
- Go to tribar icon > Teams & Schedules and select Schedule & Results
- Locate the game or event you want removed & click the trashcan icon on the right.
To renew your membership:
- Go to Teams & Schedules > Teams & Packages and use the SETUP TEAMS box to confirm your membership level(s) and setup.
- When you're ready click the gold BUY NOW button to be brought through to the payment page.
Once your payment is processed, your new expiration date will be displayed in the PACKAGE COST box.
Notes:
- all memberships must be renewed, even websites that are at the basic Rookie level. Basic Rookie level accounts may not need to submit billing info depending on your setup.
- by default, your SETUP TEAMS will be set to your most recent membership level.
- the BUY NOW button will only appear when your membership is within 30 days of expiring.
Logos and Flash banners
When you upload a standard logo, the max dimensions are 300x200. Tall logos can stretch your Flash Banner area, creating empty space above and below the banner.
- To upload a logo that will fit perfectly with the banner, use an image editing program to resize your banner to 75 pixels high. When the logo is uploaded it will not add empty space.
Large/ Full Page Logo (Banner)
To upload a larger logo, select the FULL PAGE WIDTH LOGO (no animated banner) option on the right before you upload the new logo. If your logo does not fill the page, make sure the logo is at least as wide as your website, then upload the logo again. This time, choose "xlarge 1200 x 1500" from the dropdown before uploading. If this still does not work, contact support.
Pro-Style and better membership levels can insert a clickable link to a Word, Excel or PDF document into any text area. To create the link, click Edit to open the text area you wish to display the link in and use the following steps:
- In the text editing toolbar, click the File Manager icon and click Upload Files.
- Click select files to choose the file. Click done - refresh.
- Now that the document is in your File Manager, click to select it and click Insert Into Page to add the link.
- Be sure to click the Save button for the text area to make your changes live.
The text area will now have a link to the file.
Go to the Schedules > Schedule & Results, then click the Info button next to the game you wish to edit.
The GAA statistic is dependent on the length and number of periods per game. This can be customized under Account Info & Upgrades > HQ Details.
Soccer
Contact support to customize the GAA and SA calculations to go by the number of games played regardless of whether minutes are entered for the player stats. This is useful if you want to display the minutes, yet still calculate per game.
You can set the stats manually by not entering the minutes.
Empty Net Goals
While you would enter the point in the scores, you would not enter it as GA for the goalie in stats.
In order for a player to show up in the Stat Leaders sidebar, they must have at least 1/3 as many attempts as the leading player. Attempts are different for each sport, such as Games Played or Plate Appearances.
Some sports require Games Played, so if you have not checked the G box for each player in the stats, the leader board will not calculate correctly. Entering bulk stats creates a similar issue - the leader board will not update properly if you have entered "season totals" stats into any game in the current season.
This is typically an issue at the beginning of the season when the players haven't had many attempts yet.
- Goalies are not limited. Contact support to limit goalies, such as by 1/3 Minutes.
- Contact Support to change the minimum requirements (1/2 attempts, 1/4 attempts, etc).
To apply team-level restrictions:
- Go to People > Manage People & click Team Webmasters at the top towards the right. When the Team Webmasters display, click the gear icon in the upper right-hand corner.
- In the Manage Staff Options dropdown, click Team Restrictions – Roster, Team Restrictions - Schedule, or Team Restrictions - Scores to apply restrictions that block team-level admins.
- When you've applied the restrictions you'd like, X out of the popup and click ok to refresh.
You can change the website URL by changing the username.
To change the username:
- go up to the Account Info & Upgrades tab and select Account Info
- the Account Summary box on the right has a "change" link which will email a confirmation number to you (to prevent someone else from changing your login)
- you can change the username once the confirmation number has been verified.
You can also purchase your own domain name by going to Account Info & Upgrades tab and selecting Domains.
If your teams do not play against each other you can keep them from sorting by the record by placing each Team into a group.
To place each team into its own division, go up to the tribar icon > Teams & Schedules tab and select Teams & Packages. Once the page opens, go to the SETUP TEAMS Tree and click on Add Groups. Enter a group for each team (one name per line) and click the Add groups button. After the new groups are listed, you can click on a team, select Move Team, and choose which group to move the team into. Once everything looks good, click the green SAVE SETUP button to update the site.
You can also click on the League name, Group name, or Team name to open up the action menu. From the action menu you can Add, Delete, Move, Copy, and Rename teams and groups.
The HQ Schedule will only show events assigned to the entire HQ. Team events can be viewed by using the Teams: drop down to choose a single team.To move an event to a different team, click the Info button for that event, go to the Assigned To: drop down and select a different team before clicking the Update Event button below.
Making my Team Events Show
To show all team events in the HQ schedule,click the Options tab on the right. In the Schedule Display section, set "" to "Yes".
- this affects both Visitor and Admin sites
Note: If you have a lot of team events, the HQ Schedule may become cluttered. You may also have to edit all of your team events so that the team name is listed in the event title. The Schedule Display tab has options to list team names in the event title, and show HQ events on the team schedules.
Mini-Schedule
There is an option when editing the Mini-Schedule on the Page Editors > Home Page to show the Team Events on the Home Page.
To edit and insert an image into a text area:
- click the Image Manager button in the toolbar to open the thumbnail window
- click an image to get a menu, where you can set the size and alignment before inserting.
To edit an image that has already been entered:
- select the image and click the Image Properties box to re-size, add a border or set alignment so that your text will wrap around the image.
Tips:
- Images added using the Add Photo button are automatically sized and aligned to the right (Main Text A /Main Text B on the Home Page)
- When resizing, set the width only. Delete the width or leave it blank.
- Making a image larger can decrease its quality
Images on their side (MAC)
MACs sometimes flip photos for you to be on the correct side. When you upload them, they will be on the side the photo was taken. These images must first be rotated using an image editing program before uploading. it is not possible to rotate images after upload.
If the site pages do not work properly, make sure that cookies are enabled in your browser.
Here is a helpful link:
Cookies Help
Apple (MAC) computer and iPad users can use all of the features in the site, including the newest verisons of the text editors.
A receipt is automatically emailed to the address listed as the Billing Contact or Website Owner.
In the music is playing too fast, it's possible that the audio file's bit rate is conflicting with the flash player.
Please review the video instructions on the upload page for more help. It explains a program you can download and make sure you set it to the right bit rate.
We hope you are enjoying our scheduling program: HTO Scheduling Wizard.
Scheduling is a complex problem, and our Scheduler uses a unique calculation method to get a result you can use as a starting point. The final page lists a "Quality Factor", but you can also Re-Create or Start Over to see if you can get a better Quality Factor.
Once you get a result you should review it. You can click the Download link to save the schedule into an Excel spreadsheet, then use Excel to make the rest of the scheduling changes. We also recommend having all the Team Coaches review their part of the schedule for any discrepancies.
The scheduling program is offered as a free Beta version, with limited Support.
Advanced
Use this special URL for Over 40 teams:
http://www.hometeamsonline.com/sportswebsites/default.asp?p=scheduler&maxTeams=40
(Change the # of maxTeams at the end to push the limits)
Note that the more teams, the less accurate the schedule is likely to generate.
To change the background color, go up to the Layout & Media tab and select Colors. Go down to the Advanced section, click on Logo Background, pick a color and click OK. Make sure to click the green Save button to update the site.
To make your site not searchable:
- go up to the Account Info & Upgrades tab and select Account Info
- go down to the "Show Team in search:" option and select "NOT Searchable"
- go up and click the green Save button to update the site
The site will not come up in any HomeTeamsOnline searches.
Go to Website > Store. Click the edit button next to the product and input your product details. Use the examples below to add a text box, a dropdown list, and even to add several choices for one product. (Click Update Product to save then preview your site to see how the input options appear on the web page.)
Note that by typing into "Product Options" you automatically add an input box for that product (to show choices for size, color, etc.). For example, ONE text entry box would be added if you typed:
Specify Size (S,M,L,XL,XXL) and Color (Black, White or Red)
However a dropdown list will be added by following the format shown in these examples:
Size // S,M,L,XL,XXL
Color // Black, White, Red
You can add more than one dropdown list by placing && between options:
Size // S,M,L,XL,XXL && Color // Black, White, Red
To change an account from a League to Team, first remove all but one Team from the Setup Teams tree on the Setup Teams Page. When there is one active team left, press the Options tab on the top-right of the Setup Teams Page and you will see an option to convert to a single-team account.
If you have any issues after converting, contact Support with the details.
To delete a player:
- go up to the Rosters & Staff tab and select Roster
- click the player's Remove button on the right
- click the Permanently Delete link to erase the player
If there is no archive button for a player, contact your league administrator to delete the player. Note that this permanently erases that player's record and stats. If you want to keep the records choose to Archive the player instead.
To delete a player:
- go up to the Rosters & Staff tab and select Roster
- click the "- teams -" drop down and select a team
- click the a player's Remove button on the right
- click the Permanently Delete link to erase the player
Note that deleting a player permanently erases that player's record and stats. If you want to keep the records choose to Archive the player instead.
To restrict Teams from deleting or editing the rosters, click the league roster's Options tab, select Roster options and set "Teams can add/update/delete PLAYER INFO" to "No".
To change the Game Type for any game to Rainout, Canceled, or Postponed:
- Go to Schedules > Schedule & Results and click the info button for the game.
- Use the Game Type dropdown to make a selection. Click save to make your changes live.
Note on Suspended Games:
Setting a game to "Suspended" will also display in red on the schedule. Keep in mind that a suspended game is a game that was already started, but had to be stopped and continued at a later date.
A postponed game is a game was never even started, but will take place at a another time.
We use PayPal to make it safe and easy for visitors to make payments.
Champion Users can activate PayPal on Registration Forms, the Store Page and Donation/Fundraiser Page.
For specific details, read the PAYPAL FAQ
To activate PayPal, click the Payment Options button in the Payments section & enter your PayPal email.
You can create a PayPal account here.
Contact PayPal for detailed information on the different account types that are offered.
- Registration Forms can also use Authorize.net, Sage Payment Solutions, or Stripe to process payments if you prefer not to use PayPal.
To pay by check, click a link to fill out and print a form to include with your payment: (HTML) | (PDF)
Notify support that the check has been sent - this will allow us to put a hold on your expiration until your Check has been received. Your subscription will be renewed when we receive the payment.
Double headers should be scheduled as two games on the same day. Give an approximate start time for each game. Comments can also be placed in the game preview.
There are three options at the bottom right of the Schedule page:
- Subscribe to calendar updates will automatically update your Outlook 2007 or iCal schedule when the site is updated.
(New changes will typically take about an hour to update when you subscribe)
- Export Calendar (Outlook 2007-iCal) downloads a file you can import into Outlook 2007 and iCal.
- Export Calendar (Outlook 2000-2003) downloads a file you can import into older versions of Outlook.
Troubleshooting
- If the subscribe option is not visible, set your Time Zone using the Account & Upgrades > Site Details page.
- If you have any difficulty, save the schedule file onto your computer. Then, in Outlook, go to File > Import & Export and select "Import an iCalendar/vCalendar file" to import the file.
-The exported schedule will show all games and events in the current view. If you are showing league events on teams or team events in the league, they will export.
- If you get a blank pop-up in Safari iPhone, click your Bookmark icon, then press Done to get the pop-up
If you are unable to edit or delete a Custom Page, there may be hidden HTML code causing the conflict. Click the Source button in the text editing toolbar to directly access and update or delete the hidden code that may freeze your Custom Page.
If the issue persists, copy the page to a MS Word or text document, then contact Support to delete the frozen Custom Page.
To connect a HTO team site to a League site, have both the League and Team Administrators send an email to [email protected] with their approval.
If you need to link a non-HTO site to your HTO League, you can go to the League Administrator Home Page and press the "Info-Website" button for the Team. Enter the URL into the "External Website" section.
You can also create a site for the Team that will be automatically linked from this "Info-Website" page. Press the button in the middle of the page to create an account for this Team.
If you're at the All-Star or Champion membership level, HTO will take care of your domain for you. Click the Contact HTO icon in the hamburger menu to reach out to our Domains department for assistance.
If you're at the ProStyle or Rookie membership level, feel free to use the domain company of your choice and purchase your domain. Contact support to cross-reference the domain you've purchased and for details on updating your settings with your domain company.
To add custom JavaScript code to your text areas:
- edit the text area
- click the HTML button in the toolbar to switch from text editing mode to code editing mode
- add the custom JavaScript code
- check for typos or code conflicts
As a precaution, we recommend saving the entire HTML source of the text area on your computer. Then, when you want to make changes, copy your local copy to the code editing screen and make your changes.
Go up to the Rosters & Staff tab and select Roster. Click the "View Past Players" link at the bottom right corner of the page to see all your archived players.
Click on the "Info" button for a player and set their active toggle from "Inactive" to "Active" to move them into the current roster.
We do not support server side scripting in the user file space.
You can instead create scripts in your own web space with another provider, then put our features inside an iframe within your own custom site.
When activated, the Chat tab can be found at the bottom of any administrative page.
By default, the Chat feature can be used to communicate with the people who have been invited to help manage your website.
If players & coaches are invited to manage their own contact info, they will be able to see & respond to messages posted to them. Changes to the Schedule can be automatically posted here.
Keep in mind that the chat is public. Do not post any messages here that do not pertain to people who are a part of your organization.
If you are not pleased with our service, we would be happy to refund your money within 30 days.
After entering a successful Website Password, the system stores a cookie in your browser so it will not ask you for the password again. When you log out of the site and the browser clears it's cache, the cookie gets deleted so the next person gets asked for the Website Password.
To test your password protection, close all your browser windows and clear your Cookies. Then re-open a browser and attempt to access your Visitor's site again.
With the User Poll feature, you can create a question and list several answers to choose from. When someone answers the question, the User Poll turns into a chart showing the poll results. The information is saved in their browser cookies so they cannot vote again.
Our statistics are based on professional sports.
Many sports have a Stats Glossary at the bottom of the page when editing stats. You can look up how different stats are calculated in the Stats Glossary.
Certain stats are calculated from the number of innings/periods per game. You can change the number of periods per game by going to the Account Info & Upgrades > Account Info page.
Contact Support for more help.
There are several ways for people to find your website:
- go to www.HomeTeamsONLINE.com and enter your team name in the Find Teams field at the top
- click the purple view button on the far right and copy the URL to send in an email
- have a domain* that goes directly to your website
*Champion & AllStar memberships include a free domain. ProStyle & Rookie membership levels can use their preferred domain company and purchase their own domain.
The browse by location search can be found one of two ways:
1. Click Search at the top of HomeTeamsONLINE.com
2. Click FIND TEAMS at the top of HomeTeamsONLINE.com, then click browse map in the box that appears.
To list your team in the "Browse by Location" search:
- go up to the Account Info & Upgrades tab and select HQ Details
- go down and set the "Show Account in search" option to "Searchable"
- go up and click the green Save button to update the site
In order to keep this information accurate, your city must be recognized by the system. If your city is not recognized, enter another nearby city. Contact support if the issue persists.
To edit a game or event:
- go to the Teams & Schedules tab and select Schedule & Results
- scroll down to the game or event you want to update
- click the Info, Scores or Stats button to change the details
- click the Save or Update button to update the site
Make sure that your games are not entered as Events or they will not have the Scores button.
Editing, deleting or moving game and/or events in bulk.
Contact Support if you need to change your schedule in bulk such as:
- Deleting a season to remove all info instead of changing the season to archive.
- Moving info to a new season
- Making a bulk change to all games after a certain date
To create smaller gaps between lines of text, hold down the Shift key on your keybaord and press the Enter key to enter a line break instead of a new paragraph.
To keep track of the Points, you can just enter the baskets made. You can put the total points under Free Throws, as they are worth only one point. Or, you can enter a regular Field Goal for every 2 points.
If you cannot see the links in your site, you should change their color under Layout & Media > Colors. Make sure that the "Link 1" and "Link2" colors are visible against the background color.
The links in the Standings on League sites are blue by default. There is no way to change the color at this time.
To display a video from YouTube, view the video at YouTube.com and click the Share button. Next, click the Embed button and click SHOW MORE. Be sure that the Use Old Embed Code* box is not checked and copy the Embed code.
Finally, log into your Admin site and use these steps:
- Navigate to and open the Text Area you'd like the video to display in.
- In the text editing toolbar, click Paste Code (or Plain Text) (clipboard with 2 red arrows).
- In the popup, paste the Embed code you copied from YouTube and click OK.
- Be sure to click Save for the Text Area to make your changes live.
*The Old Embed Code will prohibit videos from displaying on most mobile devices.
Please note that we are not affiliated with YouTube. You are free to look further and choose your own video sources. The steps above should work with any Embed code.
OBP Formula: (Hits + Walks + Times Hit by Pitch) / (At Bats + Walks + Times Hit by Pitch + Sacrifice Flies)
A common confusion is wanting to add OBE ( on base by error ) or FC ( fielder's choice ) into the calculation for OBP ( on base percentage ). Since these situations would normally result in the batter getting out, they are not included in the calculation.
For more info, review section 10.05 of the MLB official rules:
http://mlb.mlb.com/mlb/downloads/y2008/official_rules/10_the_official_scorer.pdf
Here is a wiki article also explaining more information:
http://en.wikipedia.org/wiki/On-base_percentage
If you have a single Team site, and would like to track information on more than one Team, you can convert your site to a multi-team site.
To convert to a multi-team site:
- Go to Teams & Schedules > Teams & Packages.
- In the SETUP TEAMS box on the left, click Convert to Multi-Team at the bottom of the box.
- Complete the details and click Convert to Multi-Team.
The system will setup the team(s) using the details you enter.
Note that you can convert and track info for up to 4 teams without charge, as long as the teams stay at the Rookie level.
When you convert your site, all of your information will be saved to the team you select. If needed, add more Teams using the same Setup Teams box.
Keep in mind that your renewal rate may change based on the number of teams and the package(s) you are using. The price of your renewal can be seen towards the bottom of the PACKAGE COST box on the right. For information on League pricing, see the League Pricing page.
If you would like to contact a Team or League, you will have to find contact information on their site.
Often teams create a contact page or list contact information on the "Coaches" page. You can also look to see if the have a Guestbook where you can leave a message.
We do not give out any contact information. If a team chooses to be private they can hide all contact information from their site.
To copy information in a Text Area to the News Archives for saving:
- Click the wrench icon for the Text Area.
- Next to Archive, click Copy to News & Clear.
- Click Save Options
Visitors can view your News page to see archived information, and Admins can go to Page Editors > News to view the articles.
If you do not see the "Stats" buttons next to your Games, it may be because:
A. You have a ROOKIE account. Upgrade to PRO-STYLE or better to gain access to Statistics.
B. You have entered your Games as Events. Events only have the "Info" button, no Scores or Stats.
C. You are using an "HTO SPORTS" template. We create stat programs for sports based on the demand. We currently have stats for Baseball/Softball, Basketball, Football, Hockey, Soccer, Lacrosse and Volleyball. Otherwise, you can enter your statistics into your Game Summaries, or create a Custom Page for statistics (ALL-STAR).
D. You are part of a League that has disabled the ability to edit statistics. Contact your League Administrator to double-check.
To add an RSS feed, we recommend sites like the following which generate embeddable code: Magic-RSS
You can fill out the information, then save a copy of their source code locally on your computer.
Magic-RSS has two options: PHP Script and JavaScript.
Only the JavaScript version will work on your site.
Any future changes to the page must use the backup copy of the code. Otherwise you will get duplicate copies of the stories when viewing.
Once you have the code, you can paste it into a text area using the Paste Code button in the toolbar. If you are using Internet Explorer on a PC, you'll first have to press the "View HTML Source" button in the text options before pasting any code.
To find your Site ID (formerly known as "username"), go to Account & Upgrades > HQ Details and see the SITE SUMMARY box on the right.
To change your personal password:
- Go to the RESET YOUR PASSWORD page, enter your email address and click SUBMIT REQUEST.
- Check your email for the message from HomeTeamsONLINE and click the link to be brought to the PASSWORD RESET page.
- Enter and confirm your new personal password and click RESET PASSWORD AND LOGIN.
To remove the Website Password:
- Go to Account & Upgrades > Website Password
- If the password is in section (1), click change link to remove it
- If the password is in section (2), click remove link instead
- Click the green Save Settings button make your changes live
Zeroes are not shown in the stats to minimize the clutter, and to help fans focus on the stats with data.
To show zeroes for empty stats instead of blank boxes:
- go up to the Teams & Schedules tab and select Schedule & Results
- click the Options tab on the top right
- in the Stats Display section, set "Show Zeroes in stats" to "Yes"
- close the options window and confirm
You can also display any hidden columns by setting "Show All Stat Columns" to "Yes"
The site helps you post banner ads or text-only ads. When posting a new ad, first enter the sponsor's web address after the "http://" in the link field, then select whether this will be a text or image ad. If it's a text ad, checkmark "Text Ad" and enter the text, then click the INSERT Ad button. If it's an image ad, checkmark "Image Ad" and click the Upload an Image File button to transfer the image. After the transfer completes, click the "Close Window" link, then click the INSERT Ad button to update the site.
Check out related topics for more info on adding Sponsors to your site.
If your browser asks for the Password again and again, it probably is not accepting Cookies. Cookies are used by the system to save information (like a reminder to the browser that you have already entered the password).
Check your browser's security settings and make sure that cookies are enabled. Contact support if the issue persists.
WRONG SEASON
If you can't find a game or event in your Admin Schedule, you may have entered it into a different season. To fix this, pick another season in the Season drop-down menu and update the Schedule view. When you find the Game/Event, edit it and change the Season drop-down to the current season.
- You view/change your current active season under User Info & Upgrades > Season Info & Update. There is also a link to change your season in the ADVANCED SETTINGS tab at the bottom of your Admin Schedule Page.
- Your Calendar View may show dates from other seasons, if they happen on the same months of current season dates.
TEAM EVENTS in a LEAGUE SITE
Team events are hidden from the full view. When you assign an event to a team rather than the entire league/program, you'll only see this event on the visitor site when you pick one team in the Select Team dropdown menu.
- You can change your team events to show in the league view in the ADVANCED SETTINGS > SCHEDULE DISPLAY tab. A green "updated" will appear, confirming the change.
- You can press "Edit" above the Mini-Schedule on the Home Page Editor to check the setting to Show Team Events.
We do not have an option for creating Intro Pages, but it is possible if you have the capability to design an HTML page. You will also need a domain to direct to the intro page.
First create an HTML file with your desired content, such as your Logo or a Flash movie. An important part of your intro page is a link to your main HTO home page to visit your actual site after viewing the intro (or have an auto-redirect). You can then upload this into your File Manager (Layout & Media > File Manager) or another hosted location. Get the full URL path of this file so you know how to access it directly.
Then, you'll need to set up domain forwarding within your domain account to go directly to this file. This will force people to go to your custom intro page before visiting your site.
- If HTO is managing your domain, contact us with the name of your Intro Page file.
By default, all domains registered and managed by HTO will display your URL in the address bar (All-Star/Champion).
If you follow the steps under the help topic "making my domain go to my website", your domain will be in the URL.
To enter a substitute player in baseball or softball:
1. Go to Teams & Schedules > Schedule & Results and click the Stats button for a game.
2. Click Batting and use the Line Up column to click the dropdown for the player. Use the numbers under SUB with a ~ to the left of the number.
Note: the ~ will only show on the Administrator's page. When visitors view the Box Scores page the Line up will display the substituted player's name as indented and listed after the starting player in that slot.
Scores are updated by going to Schedules > Schedule & Results and clicking the scores button to the right of a game.
If a game does not have a scores button, it's possible the game was not entered correctly or your league has locked score entry. Contact Support or your league for more assistance.
To display Canadian weather on the home page, activate the the weather module and click the "switch to Canadian weather" link, then select the closest city. Click the green Save button to update the site.
Contact support to set the Store, Donations Page or any Registration Form to use Canadian currency.
#showhelp-882-notitle#
You can add live streaming video feeds to your HTO site using third party services like the following:
http://www.ustream.tv
These sites provides code that you can paste into your text areas to display the feed. You can then copy the code and paste it into a text area using the Paste Code button.
Players must be in the roster with the correct positions in order to appear in the statistics. You can add multiple positions for each player.
If you do not see a player, press the "Add Players to Game" button when entering the stats. For players with several positions, you may have to press this button several times.
To convert music from a CD to MP3 format using Apple I-tunes, see our Managing Music FAQ .
LEAGUE Admins can allow or disable all team website editing.
To control the Team's ability to edit the Schedule, go to Teams & Schedules > Schedule & Results > Options Tab > Team Posting Rules.
To control the Team's ability to edit the Roster, go to People > Roster, click the gear icon in the upper right, then click the Team Editing tab.
Note: you can also disable Teams from adding scores for only a specific game by clicking the Scores button to the left of that game > Special Settings tab > Lock Scores on This Game check box.
TIP: When Teams enter conflicting scores, the Scores button for that game will turn bright red on the league admin Schedule & Results page.
For more details, see the SCORE POSTING RULES FAQ.
- Contact support to make an exception and enable editing for a specific team.
Player stats are updated automatically when you enter the stats after a game. In order to enter stats for a player, they must be in the roster and assigned the correct positions.
The player profiles display the current season stats for each player. They show the results for each game, with the totals at the bottom. There is a drop-down in the top right to choose a particular season, or you can choose career to view the old version that shows all season and career totals.
Contact Support if you would like to display past season stats as well.
You can disable out of stock items in the Online Store instead of deleting them.
To remove an item from purchase:
- go up to the Community tab and select Store
- click the Edit button for the out of stock item
- go down and check the box next to Disable Purchasing
- go up and click the green Save button to update the store
We recommend placing a message such as "Out of Stock" in the Product Description field to let customers know why this item is unavailable for purchase. When the product becomes available in stock again, simply uncheck the Disable Purchase box and remove the "Out of Stock" message in the Product Description.
We can add a Newsletter Signup link to your Home Page that will let visitors enter their name & email into a new category in your Contact Lists.
You can customize the link text & form message, or create an image for the sign-up link. Send any custom messages, images, & additional details to [email protected]
Customizations - Contact Support to:
- Hide the team drop down that is shown for leagues
- Show a phone field to gather phone numbers from users
- Change the title of the popup
All emails will be added to one contact list. Unfortunately multiple email lists are not available at this time.
If someone surfs to an incorrect or missing page, they will be redirected to www.HomeTeamsOnline.com instead.
This usually happens when:
- a webmaster has changed their USERNAME. This changed the page addresses, so anyone using an old bookmark or link would go to an incorrect page.
- a site has been downgraded to ROOKIE, so Pro-Style or higher pages (like the photo gallery, custom pages and registration forms) will link to your home page. You will re-activate these pages by renewing your site. Contact Support to retrieve any information if you do not plan on renewing.
* Keep in mind that being redirected does not necessarily mean that your site is deleted or downgraded. Minor site issues can cause you to be redirected to HTOsports.com as well. If you notice any issues with your site, contact Support and we'd be happy to look into the issue for you.
To add a header or footer to a page, contact support and let us know which page(s) you want a customized header or footer on, as well as the text you want displayed.
As of X-Grid, this can be changed on your Admin Site under Layout & Media > Colors
Contact support to copy the Location information from one of your accounts to another.
Let us know the USERNAME for the account with the Location information and the USERNAME for the new account you would like to copy the information over to.
If you can see an image, it can be copied, such as using Print Screen, or even taking a photo of the screen with a camera.
Other than preventing public access by password protecting any page with photos, there is no way to keep your images secure. Here are a few extra measures of security we can add to your images:
A. Contact Support to disable Right-Clicking on your site. This will prevent the option to "Save Image" to their computer.
B. Portraits and Photo Gallery Photos can be viewed in a new window, which can be right-clicked. Contact support to disable this window.
- Mobile devices often have other methods of saving images. This cannot be prevented at this time.
Events assigned to the league will only appear in the main schedule on the league site.
New events are assigned to the league by default. To add an event to a specific team's schedule, click the "Assigned to:" drop down and select a team before submitting. Note that by default the new event will not display on the league schedule, only on the schedule of the team it was assigned to.
To display team events on the league schedule:
- go up to the Teams & Schedules tab and select Schedule & Results
- after the page opens, click the Options tab on the right
- Click the Schedule Display tab
- set "Show team events on HQ site" to "Yes"
- exit the options and confirm
Team events should then display on the main schedule.
To add one or more teams:
- Go to Schedules > Teams & Packages
- Scroll down to the Setup Teams box on the left and click Add Teams
- In the popup, type the Team names (one per line) and click Add Teams
- Depending on your package credits, click the green Save button or the gold Buy Now button to the right side of the page.
If you are prompted to click the Buy Now button, note that changes or additions will not be saved until payment is received.
The All-Star package includes a User Poll module which displays a single poll on the home page. Additional polls can be added by using the embed code from sites like the following:
http://www.zoomerang.com/free-account-online-polls/
http://www.free-website-polls.com/
Contact support if you want further help.
When adding a game or event to your schedule, the date/calendar pop-up checks the date setting on your computer. If you cannot select the proper year, make sure the date on your computer is set correctly.
For example, if your computer's date is set for the year 2000, the pop-up calendar will only allow you to schedule Games/Events up to 2003.
To check the date on your PC, double-click the clock in the taskbar (bottom right corner of your screen) and set the correct month and year, or use the Internet Time tab to synchronize your computer with an internet time server.
You can also manually enter dates into the text area without using the calendar tool.
All leagues start with an All-Star 30-Day free trial so you can check out features like Custom Pages and Player Attendance. If you want to try out the Champion membership level features including Registration and Donations, feel free to upgrade your trial!
To upgrade:
- Go to Schedules > Teams & Packages and in the setup teams module, click to select Champion.
- In the Package Cost module, click to continue trial and click save at the top of the page.
We hope you enjoy the features and use the 30-day free trial to determine which package works best for you. If you need an extension, please contact Support.
To manage the membership level on your account:
- go to the Account & Upgrades > Teams & Packages
The SETUP TEAMS box on the left will change depending on your account type:
- Teams can upgrade or add space.
- Multi-Team HQs (Sports, Leagues) can edit teams and the HQ site, including upgrading, renaming, or creating divisions.
- Multi-Sport HQs (Schools) can add teams and sports (HQs). Once added you can jump to any team or HQ in your account to edit its details.
Any adjustments to your account renewal price will be reflected in the PACKAGE COST on the right.
- click + show details for more information, including partial year upgrades discounts, and savings based on the number of teams.
Changes that do not affect your cost can be saved immediately. If you make changes that require an added purchase, or that must be done through a billing account, the SAVE button will change to show the required action.
Click the help icons on the Teams & Packages page for more details.
Site Content Ownership Policy
The Owner of the website is the person who's email address is listed under the Owner/Webmaster tab on the Site Admin feature. Only the owner of a website can choose to transfer ownership to another admin.
Anyone who has been invited to become a part of your organization has access to information about your website based on their role. Once they've accepted their invite, they can login and make changes and updates to the features you've given them access to.
When a website subscription is disputed by two parties who both demonstrate claims to the site content, the site may be shut down partially or fully until the two parties agree to an action for the website.
Sites with the All-Star package (or higher) have a Music Player with a volume control. With the Pro-style package you can upload music to a text area using the File Manager button, but music uploaded this way will have no volume control.
CKeditor:
When using the File Manager > Click file > Insert Into Page option in the CKeditor, a Flash Module is created for your music. This module does not include features for volume control.
Embedding a Music Player Module: When pasting code from an external music site, the music will play in their custom music module. Most of these sites have a music player module with included volume control. To make any changes to their music module, contact the company for support.
If we have registered your domain as part of your ALL-STAR or CHAMPION package, we will automatically renew the domain when you renew your subscription with us. Contact us before your renew if you need to change your domain name. We registered your domain only if you sent us an official request, which we replied back to with a notice that your domain has been registered.
If you registered your domain through UseYourOwnTeamName.com, your domain will AUTOMATICALLY renew, unless you picked the option to turn off the auto-renew when registering your domain. Otherwise, you'll need to log in and renew the domain manually.
IF YOU DID NOT CHOSE MANUAL RENEWAL, BUT YOU DON’T WANT TO BE AUTOMATICALLY CHARGED FOR RENEWAL, LOG IN TO YOUR ACCOUNT AND CANCEL THE AUTOMITIC RENEWAL BEFORE YOUR DOMAIN EXPIRES.
Contact us before it expires if you are ALL-STAR or CHAMPION and you’d like us to take over your domain to renew it for you.
TEAM sites within a LEAGUE account can now enter league games by assigning the games against two competing league teams.
To turn this feature off:
- go to the Teams & Schedules tab and select Schedule & Results
- click the Options tab on the right
- in the Team Posting Rules section, set "Teams can schedule inter-HQ games" to "No"
- close the options window and confirm
If you experience issues when making updates to a Text module on a Mac, such as the Return key not moving your cursor down to the next line, use the drop down in the bottom left-hand corner to change to the TinyMCE editor.
To enter team penalties (in sports like Football):
- go to the Teams & Schedules tab and select Schedule & Results
- scroll down and click the Scores button for a game
- go down to the Team Stats tab and enter the penalties on the right
- enter the other game details and click the green Save button
That game will update with the new information.
Go up to the Layout & Media menu and select Navigation Links. Once the page opens you can rearrange the links in the green area by dragging them to new positions. Make sure to click the green Save button to update the site.
All-Star and Champion users have the capability to add new Custom Page links. Rookie and Pro-Style users can create links to remote web addresses.
Internet Security and Virus Protection
Internet security is extremely important. Make sure that you have anti-virus software installed on all your computers and it is kept activated and up to date. Here is a list of Microsoft’s anti-virus partners:
www.hometeamsonline.com/antivirus/
Keeping your Password Safe
Anyone with the administrator password has complete administrator rights over your site. It is important to keep this secure.
Read our FAQ about keeping yourself protected and your personal info secure.
You can enter end times for both games and events in the Teams & Schedules > Schedule & Results pageso they display in the headings of the Box Scores and Game Previews. Additionally, end times will also display after exporting to Outlook.
To hide or show end times:
- go to the Teams & Schedules tab and select Schedule & Results
- click the Options tab on the right
- in the Schedule Display section, select "Show End Time" or "Hide End Time"
- close the options window and confirm
The schedule will now use the option you selected. This will also affect the Mini-Schedule on League Home Pages.
The "Number of Visitors" hit counter tracks sessions. A common way to start a new session is to close all browsers, or switch to a different web browser.
If you leave your computer on with your browsers open and later surf back to the Home Page, this continues the same session so you will not add a new “hit”. New visitors surfing the Home Page create a new session because they have never been to your Home Page before.
There are many files that can be uploaded to your text areas, such as:
.MPG .WMV & .AVI video
.XLS .XLSX spreadsheets
Word & .PDF Documents
.MP3 Audio
.JPG .JPEG .GIF & .PNG images
If you have HTML EMBED code for a module, se a Script Area (Advanced) module.
CK Editor
For Images, use the Image Manager button in the toolbar. Upload the image, select it and click the Insert Into Page button.
For Files, use the File Manager button in the toolbar. Upload the file, select it and click the the Insert Into Page button.
For code, click the Paste Code (or plain text) button or the View Source "HTML" button.
To access the code for a text module, click the Source button.
Keep in mind that even when you log out of a visitors site, pages you recently viewed may still be accessible on your browser.
Use your browser's settings to clear the cache.
Contact support to to add a column for Point Difference (PD/GD/RD – depending on the sport) to the Standings.
This value (PF - PA) is used by default to determine tiebreakers.
Unfortunately, Your Team Look is no longer in existence and can no longer be contacted.
HTO has released many new Style and template tools to create many of the same customizations once offered by Your Team Look.
If Your Team Look code is currently on your site, your Site Layout and Navigation Links pages are disabled by this 3rd party code. We recommend contacting Support by clicking the Contact Us button to the bottom left of every page on your Network site to request that the code be removed so that you can edit your website using the HTO tools in place.
Support will be happy to guide you through the transition process and using the HTO tools to customize, edit, and update your website.
Basketball points are entered as 2FG, 2FGA, 3FG and 3FGA when entering stats.
By default, basketball stats do not display 2FG and 2FGA. They are displayed as FG and FGA, which is a total of both 2 and 3 points made and attempted. Keep this in mind when reviewing your basketball statistics.
Basketball stats now have 2 categories: “Per Game” and “Totals”
Simply click the links above the table to switch between them.
Per game stats may display as decimals.
IMPORTANT NOTE (league websites only):
If users have “bulk stats” entered they will not be able to switch to Per Game stats while viewing the “Team Stats”. It will automatically switch to “Total” and there will be no link to view per game unless they switch back to “Player Stats”.
bulk stats = when you switch to "Season total" stat entry w/ the link on the bottom right.
If you need to delete the stat record for a player for a game, erasing a number in a stat column will set that stat to 0, but it will not clear the stat record for the player.
The only way to fully delete a Stat record it so use the trashcan icon that is to the right of the stat entry. Once you've deleted all of the Stats needed, click the green save button to make your changes live.
You can always go back and enter these stats again later if you need.
To assign a player in the game stats, check the “G” column. This tells the system that they played in that game.
- Picking a position (without checking "G") WILL NOT assign the player to the game. Make sure to check the “G” box for each player.
To un-assign a player, press the “Del.” button to the far right. This deletes all their stats and removes them from the game.
This section is designed to give you quick help, and can be found at the bottom of every admin page.
You can finish the sentence and the system will search for related topics. For example: I need help with “photos” will list topics like "uploading photos".
If you do not find a helpful topic, try typing your question differently, or refer to the “Related Topics” at the bottom.
Recent Updates show recently added or changed topics, often referring to new or updated features for your HTO site!
Detailed in-depth FAQs can be found under Help Index button (bottom of page). The FAQs are great for troubleshooting or learning all the details about a specific feature.
To activate the Standings module:
- Go to Website > Home Page > X-Grid tab.
- In the MODULES box on the left, click the ADD+ button to list the modules, then scroll down to the Standings module and click ADD+ to add the new module to the MODULES box.
- Drag the Standings module to any open space in the PAGE LAYOUT, then click the green Save Your Layout Changes button.
When adding or updating games in a league schedule, the week will default to the current week. This means that after saving the schedule the system displays the current week, even if you were editing at a defferent one.
To change this setting, go to the Schedule & Results page and click the Options tab on the right. In the Editing Defaults section, click the "Loop to Selected Week after Save" setting. The schedule will now default to the week you were viewing.
This is a great way to easily go back and forth in your schedule to edit the current week.
There is no option to download stats at this time, but you can instead copy them into Excel:
To copy stats to a spreadsheet progrm (like Excel):
- left-click and scroll across the entire stats table (try to start outside the table so that you copy the table and data)
- press Ctrl + C to copy the data (Command + C on a MAC)
- open Microsoft Excel and press Ctrl + V to paste (Command + V on a MAC)
- highlight all the cells in Excel and Right Click > Format Cells. (Ctrl-click on a MAC)
- under the Font tab, make sure the text is black, and under the Fill tab, change the fill to white.
- you can also copy the Stats Page title and paste it above the table
Make sure to save the file before exiting the site.
The Lacrosse statistical and scoring module is activated when you sign up and choose 'Lacrosse' from the Pro Stats Sports list. Choosing a different or generic sport at signup can give you a different stats package. Contact support if you are not seeing the correct stats.
Set the number of points for assists under Teams & Schedules > Options tab > Stats Display.
We have found this Wiki page helps explain Fielder's Choice:
http://en.wikipedia.org/wiki/Fielder%27s_choice
If you look at the section "Impact on statistics", it says:
A batter who reaches first base safely as the result of a fielder's choice is not credited with a hit or a time on base; however, his turn at the plate is recorded as an at bat and plate appearance. Therefore, a player's batting average and on-base percentage decreases as a result of reaching first base via fielder's choice.
You can also find this information confirmed in section 10.05 of the MLB official rules. If this is a common confusion amongst your players, you may want to add a custom page with rules and you can link to resources such as this to help educate your players and coaches. The PRO-STYLE package does not include Custom Pages, but you can create a section on the Home Page instead.
To wrap text around an image in a text area (CKeditor):
- edit the text area
- select the image so it has a dashed border around it
- click the Image button in the toolbar
- set the Alignment to "Left" or "Right" to move the image left or right
- nearby text will wrap around the image
- click OK to set the image
- make sure to click the green Save Changes button to update the site
Editing the HTML Directly (Advanced)
CKeditor - Press "HTML"
Your code will look like this:
<img height="282" width="205" src="LINK">
Modify it like this:
<img height="282" width="205" src="LINK" align="left">
the "LINK" is the actual URL of your image.
"align=left" aligns the image to the left allowing text to wrap around it. You can also align=right, top, bottom, middle, baseline, texttop, absmiddle and absbottom”. Experiment with different alignments for different results.
In Soccer, one Goal = 2 points and one Assist = 1 point. Contact support if you need a different point value for Goals.
Set the number of points for assists under Teams & Schedules > Options tab > Stats Display.
- To enter Penalty Kick Goals and Penalty Kick Attempts (PG and PA) for Goalies, click a game's Stats button, click the Goalie link, then enter the PG and PA on the right.
After signing up you'll arrive at your HTO Center . The best way to become familiar with your new site is to activate Getting Started Checklist by clicking the blue person icon at the top right-hand corner & selecting Checklist.
Starting with Pick a Style, the clickable Checklist follows a logical path for setting up your new website & assures that you access every feature your membership level has access to. When you click on a feature, the Checklist will slide out of the way & you will brought to the page for that feature.
Once you're on the page for that feature, click the question mark icon on the far right to access an overview of the page along with tips, tricks, & further details on successfully using the tools on the page.
When you're ready, click the blue person icon to activate the Checklist. Move on to the next feature & click the question mark on the new page.
Use the search help section at the bottom of every page to search for keywords & phrases to get even more detailed information about a task or topic.
To convert a team event into a game:
- go to the Teams & Schedules tab and select Schedule & Results
- click the Info button for an event (like a tournament posting)
- scroll down to the Event Type drop down
- click the "Convert this Event into a Game" link to the right and confirm
The event will turn into a Regular Season game. The game can then be changed from Regular Season to any other game type, but not back into an event.
TIPS:
- For leagues, you can first assign a league event. When you are ready to convert to a team game, assign the event to one team, then convert the event to a game for that team.
- With this you can setup tournament events with little or no game information, then convert it to a game once you know which teams are playing.
To create an icon for mobile devices, send the image you'd like to use as a square image that is 260px by 260px to [email protected].
Contact Support to modify the Stat Leaders. You can remove stats, add stats or even create new formulas as long as they are based on existing stats or game types.
The Stat Leaders lists players whose total games is at least a third of the lead player's. For example, for baseball batting stats, a player must have at least a third of the Plate Appearances as the lead player. For pitching stats - 1/3 Innings Pitched.
The requirement for Plate Appearances and Innings Pitched can be modified (1/4 instead of requiring at least 1/3 the number of Plate Appearances or Innings Pitched, etc.). Make sure to include any formulas and specific details when you contact support.
- The requirement can be changed to any fraction. (1/4 for less restrictions, or 1/2 for more) Changing the fraction will affect the restriction in every stat category.
- It is not possible to split the leaderboard into multiple game type groups like standings.
- In Multi-Team accounts, the leaderboard separates by Division. It is not possible to separate by subdivision at this time.
Contact Support to setup:
- Custom Flash banner: First upload the flash file under Layout & Media tab > File Manager and contact support with the file name and the details of where you want the file (like replacing the default flash banner). You would need to design these elements on your own using the Adobe Flash Program.
- Custom logo: The logo normally links to your Home Page, but we can change the link to go to any URL web address. We can also update the team name or message that appears when you mouse over the logo.
To modify the Overtime (OT) label (to "5th period" for example):
- go up to the Teams & Schedules tab and select Schedule & Results
- click the Options tab on the right
- in the Schedule Display section, change the text in the "Label for OT column" field and save
The overtime colum will now display the new label.
Contact support if you need to:
- Hide the Teams dropdown menu from the Scores page.
- Have the score boxes only show current team stats
- Change "Game Summary" text to something else
- Re-organize the modules on the Boxscore Page(example - move Game Summary above the Stats)
League / Multi-Team only:
- Default the page (the "Select Team" drop down menu) to one specific team.
Admin Schedule Page > Options > Sched. Display
Default the page to a certain game type.
Switch game previews from Google Maps to MapQuest.
Show end times.
Start day (list or calendar).
Remove the links to preview (Sched. & Home)
League Specific Settings:
Show All Weeks by default.
Default to one team.
Show team events (like practices) on full league sched.
Show league events on team schedules.
Show League Games & Events only.
Change the "Select Team" label to read something different
Change the date format in the list view to "Month D, YYYY"
Contact Support for any of the following changes:
Hide Drop Down Filters: Game Type, Location, Order, Season and/or Team.
Show specific Game Type Labels only.
Set the default sort order.
Set default starting address for the map.
change the highlight/font colors in the calendar
Schedule List only:
Add new custom column (Data in column will be created from info entered into the Game or Event Preview).
Add, switch or adjust the columns.
Team Settings:
Change the display style to match the League Format.
Set weekly view or full view
The staff can link a Custom Page to the top or bottom of an existing page in cases where you exceed the text limit. After creating your custom page, contact support to connect it to the existing page.
Contact support to hide any or all of the following:
- Printable Page link(s)
- Glossary link(s)
- the Sharing links at the bottom of a particular page
To remove the Sharing links from ALL pages, go to the Layout & Media tab > Site Layout page and uncheck the "Show Site Sharing Links at the bottom of all pages" option at the bottom.
Players that have played on multiple teams will have combined stats on the stats pages. You can contact support to separate their stats by team. Players will then get listed per team when viewing the full league stats.
If an update does not show up on your site preview, even after you saved it properly, try refreshing the page.
- when viewing the Preview Site page, press Ctrl + F5 on your keyboard, or hold the Shift key down and press the refresh button
If this doesn't work, this may be due to a caching issue. We recommend using Google to get up to date steps for clearing the cache in different browsers.
You can also try visiting the site in a different web browser to confirm it is a caching issue. If the site displays properly everywhere else, it's a cache issue with the first browser.
Contact support in the issue persists.
On the Community > Banner Ads Page, the "Remaining Pages (Rotating Ads)" link at the bottom creates a pool of ads for the rest of the site pages (any page not listed). This will randomly pick 4 banners from the pool of ads to display each time the page is loaded. Press the "Add a New Ad" button to upload a banner to the pool of rotating ads.
- If you have less than 4 ads, this will not work properly. Make sure to have at least 4 ads.
- If you already have an ad in the Sponsor Page, you can add it to the pool, but DO NOT check "display this ad on Sponsors Page", since that will display a duplicate ad.
- Contact support if you want to set this on all pages, or all pages except the Home Page
ProStyle level memberships can use the Pitch Count (PC) stat for baseball and softball. To access this Stat:
- Go to Teams & Schedules > Schedule & Results and click Stats for the game in question.
- Click Pitching and locate the PC column. Enter the details and click Save Pitching Stats.
This is a cumulative number that will add up for Pitchers and be reflected on the stats pages.
Tips:
- Activate the HTO Pitch Tracker module on the Home page to automatically display the Pitch Count. See the X-Grid help for more details.
- Rookie membership level teams will have access to this stat only if they are a part of an upgraded League.
- If Pitch Count (PC) is never entered, this stat will not appear.
Contact support to display rotating ads only on the top, or only on the bottom of the pages.
Contact support if you would like your team name centered in your banner instead of right aligned.
Contact support if you would like to change the font size in your mini-schedule. Let us know what font size you would like it to be.
Contact support to:
- Hide your team logo or sponsor ads
- Replace the logo with custom logo on printable pages (Upload the files under Layout & Media > File Manager, and tell us the name)
- Replace the bottom logo with a white one, removing the black bar
Contact support if you would like your website to align to the left instead of being centered.
To rename the OT and 2OT columns:
- go up to the Teams & Schedules tab and select Schedule & Results
- click the Options tab on the right
- in the Schedule Display section, change the text in the "Label for OT column" and "Label for 2OT column" fields, then save
- close the options window and confirm
This will change the Box Scores and Last Game (team sites) on the Home Page.
TIP: you can also contact support to make the values entered in the 2OT column add up in a custom column in your standings.
To change the site width:
- go up to the Layout & Media menu and select Site Layout
- scroll down to the Site Page Width section
- enter a number (like 800 pixels) and click the green Save Site Width button on the right
If the site does not get smaller, there may be an object (like a large picture) that is stretching it wide. Contact support if you want further help.
Contact support to make the logo link to another address instead of your home page. Make sure to include the new URL web address in your message.
Contact support to rename the "Game Summary" tab (seen after clicking the Scores button for a game).
To to change the profile picture size limits:
- go to the Rosters & Staff > Roster page
- click the Options tab on the right
- in the Profile Options section, change the Width and Height numbers and save
You should now be able to upload a larger picture for each player. When uploading the larger photo, make sure to select a size larger than the "player/coach: 200 x 400" so the new image isn't resized smaller.
Contact support if you want further help.
Contact support to make a form send you a copy of each registration receipt it sends out.
Contact Support to display only your team's player stats in the box scores.
Contact support to display a player's profile information in the home page Stats Leaders section.
Contact support with a list of any divisions you want hidden in the Stat Leaders.
Contact support to hide the team names in the Stats Leaders.
Contact support to have the Stat Leaders display full team names.
Contact Support for the following changes:
- set the league mini-schedule to display only League Events (no games)
- display league events on the the team mini-schedules
TIP:
Go to the Teams & Schedules > Schedule & Results page, click the Options tab on the right and select Schedule Display to:
- set team events to show in the default league view
- make league events to carry down to the team view
- hide all team games in the schedule
Note that these changes do not affect the Mini-Schedule.
Contact support to have the VS label changed to @ for away games in the mini-schedule.
Contact support to make the Mini-Schedule label say 'Schedule' instead.
Contact support to display only certain game types (like Playoffs, Tournaments, etc.) in the mini-schedule.
Contact support to display a team's mini-schedule in the same format as the league mini-schedule.
If you have any pages on your site password protected, we can remove or change the verbiage of the link that says "Click here to request the password".
Click the Contact Support link at the bottom of this page to submit your request to remove or change the link.
To make the "Home" navigation link go to a different page, contact support with the URL web address of the other page.
Keep Right
The Home link is unique in that it has a default check box to "Keep Right".
- Contact Support to move it to the left with the other links.
-You can also Contact support to make other links keep right like the Home Link
If you would like to prevent visitors from being able to zoom in on pictures by clicking on them, contact support.
To disable Player Profile Portrait Zooming:
- go up to the Rosters & Staff tab and select Roster
- click the Options tab on the right
- once the window opens, select the Profile options section
- set Image Click to Zoom to "No"
- close the options window
To remove the 'Bio' and 'Highlights' labels:
- go to the Rosters & Staff > Roster page.
- click the Options tab on the right.
- click the Profile Display tab.
- set "Show headers for Bio/Highlights" to "No". The setting will automatically save and apply to your site.
- close the options window and click OK to confirm.
To change the default column titles for the Roster:
- Go to People > Roster and click the gear icon on the right. Select Roster Display.
- Scroll down and update the Team, No, Name, Hometown, and/or Yr columns. When the green updated message flashes, you're okay to X out of the popup.
Note that this update is reflected only on the visitor's site. The admin site will still display the default column titles.
To hide the Weight column :
- navigate to Rosters & Staff > Roster .
- click the Options button on the right .
- click the Roster Display tab
- set "Show Weight Column" to "No"
- close the window and click OK to confirm .
To change the label for the Year column to display other information:
- navigate to Rosters & Staff > Roster
- click the Options button on the right
- click the Roster display tab
- change the 'Yr' Column Label text and save
- close the options window and click OK to confirm
This will only change how the label displays on the visitor site. You will still enter the information in the Class/Year field on the admin site.
Records Page Customizations:
- If you would like to change the 'Individual Records' label to another title, please contact support.
- If you would like to change the 'Team Records' label to another title, please contact support.
- Contact support to set digits per stat category.
Contact support to change the "City, State Zip:" label to something else.
Contact support to change the "Email:" label to something else.
Contact support to change the "Name:" label to something else.
Contact support to have the online registration View Printable Form button say something else (like Print Registration Form).
To change the number of players displayed on the Stats page:
- go up to the Teams & Schedules tab and select Schedule & Results
- click the Options tab on the right
- in the Stats Display section, click the "Players Per Page" drop down and select a number
- close the options window and confirm
The Stats page will now list that many players per page.
To display stats for all game types:
- go up to the Teams & Schedules tab and select Schedule & Results
- click the Options tab on the right
- in the Stats Display section, set "Game Type Filter" to "All Game Types"
- close the options window and confirm
The default is Regular Season. Regular Season games include the four types with "Regular Season" in their name, and "Tournament (Season)". All other game types are not counted in the standings.
The Stat Leaders on the Home Page has its own settings. Go to Page Editors > Home Page and press Edit above this module to change which Game Types are counted.
Contact support to change the default sort order on the Stats Page.
The system hides a stat column if there are no entries for the stat for any player. Entering a stat value reactivates the column.
Note: to delete any stat, you must press the "Del." button to the far right of a player to remove all their stats. You can then re-enter only the stats you need. Simply deleting the number from the box will change the stat value to 0.0 in the system.
If there are certain stats (such as stat calculations) that you are unable to remove and you would like to be hidden from the Stats page, please contact Support with the details.
We can also hide certain stats only on certain pages. Contact support for the details.
Contact support to change the default game length for soccer games.
To display the 2FG stat:
- go up to the Teams & Schedules tab and select Schedule & Results
- click the Options tab on the right
- in the Stats Display section, set "Show separate 2FG Stat" to "Yes"
- close the options window and confirm
The Stats will now display a 2FG section.
Contact support to set different game lengths for different teams. Make sure to specifiy the teams and different lengths.
You may want to transfer a domain you own to our ownership.
*This is not necessary to forward your domain to your HTO website
*Before you start a transfer process, contact support to review the details.
*Expired or recently registered domains cannot be transferred.
Domain FAQ
1 - You must contact your domain company and complete the following:
(a) Disable Privacy Settings (So that transfer emails are not blocked).
(b) Make Sure the Domain is Unlocked.
(c) Obtain the Authorization Code or EPP key.
(d) Ensure that the email address in your domain account is accurate and up to date.
2 - Once the above steps are done, send us the Authorization Code. We will then initiate the transfer after the Authorization Code is sent to us.
3 - You will then receive an email from the domain company with the Transaction ID and Security Code. Please forward this email to [email protected].
4 - After we notify you that we have processed the new codes, contact your original company and ask "can you manually accept this domain transfer?"
(a) if possible, you can complete the process immediately.
(b) Otherwise this will process in 5-7 business days.
Contact support to set a custom address as the default start address for Google map directions.
To set a deadline for teams to enter scores and stats:
- go to the Teams & Schedules tab and select Schedule & Results
- click the Options tab on the right
- click the Team Posting Rules tab.
- click the drop-down menu to the left of where it says "Input deadline - for team scores/stats/info entry"
- select the number of days you will give your team to enter their data for each game before they are locked out for that game.
- the setting will update automatically after making your selection in the drop-down menu.
- close the options window and confirm
The maximum number of days you can set for the deadline is 21 days.
A Google Maps link is available in any future game/event on the game's preview page. In order for the map to appear, the game or event must be assigned to a location with full address information entered. Note that Google maps no longer allow their maps to be displayed in a frame. This means you must click a link in the preview to open the map in a new window instead of viewing the map in the preview screen.
To add an address for a map link:
- go up to the Teams & Schedules tab and select Locations
- go down and click the Add New Location button
- enter the location name, address and zip, as well as directions
- click the Add Location button to update the site
- repeat these steps for any other locations
When adding a game or event, you can then select which location and directions to show.
Customizations:
- If you would like to use MapQuest instead of Google Maps, change the setting in the schedule's Options tab (Schedule Display section).
- If you have locations set up in your schedule, and you would like for there to be a default starting address when a visitor clicks the location link, contact support with the address.
To display league events in the team schedules:
- go up to the Teams & Schedules tab and select Schedule & Results
- after the page opens, click the Options tab on the right
- click the Schedule Display tab
- set "Show HQ events on team sites" to "Yes"
- the setting will automatically save and apply to the site
- exit the options and confirm
Team schedules should now display events assigned to the league.
The Schedule Page will display Regular Season and League game types by default.
To change the default game type on the schedule:
- go to the Teams & Schedules tab and select Schedule & Results
- click the Options tab on the right
- in the Schedule Display section, click the "Show this game type (default)" drop down and select a type
- close the options window and confirm
The schedule will now display that game type.
- In the Stats Display section, you can also change the default game type for the Stats Page.
- In the Editing Defaults section, you can change the default game type when adding new games.
The default is Regular Season. Regular Season games are all games with "Regular Season" in their name and also "Tournament (Season)". Also note that, by default, the scores for games that are not Regular Season game types will not affect the win/loss record in the standings.
- Contact Support to change the game type default on Player Profiles.
To rename the Team column on the Players page:
- go up to the Rosters & Staff tab and select Roster
- click the Options tab on the right and select the Roster Display section
- enter a new name for the 'Team' Column label field and save
- close the Options window and confirm
The Team column should display the new name you entered.
Contact support to hide the team filter on the Scores page.
Contact support to hide the season filter on the Scores page.
To hide the Team column, go to the Rosters & Staff > Roster page and click the Options tab on the right. In the Roster Display section, set "Show Team Column" to "No", close the window and confirm.
Contact support to hide certain teams from the "Select Team" drop down list at the top of the Players page.
To rename the "Past Players" link:
- go up to the Rosters & Staff tab and select Roster
- click the Options tab on the right
- in the Roster Display section, change the text for the 'Past Players' label, then save
- close the options window and confirm
The link will now display the text you entered.
To include inactive players in the player search:
- go to the Roster & Staff > Roster Page
- click the Options tab on the right
- click the Roster Options tab
- set "Allow Inactive Players in Search Results" to "Yes". The setting will automatically save and apply to your website.
- close the Options window and click OK to confirm.
Inactive players will now appear in searches.
Contact support to change the default season in the player profile pages.
Contact support to remove the team filter from the stats page.
Contact support to show only teams on the Stats page "Select Teams:" drop down list.
Contact Support to make the View Registrants tab only list registrants who have paid through PayPal.
To download or print a PDF Score Sheet :
- Preview your site and go to the Schedule page .
- Click on the game you'd like to print Score Sheets for and in the upper right-hand corner , click the Printable Score Sheets link .
- Use your preferred program to open and print the sheets .
To print Players on the Score Sheet , go to Teams & Schedules > Schedule & Results > Stats beside the game and :
BASEBALL/SOFTBALL ( up to 12 Players on the Score Sheet ) :
- Click the G box for Players
- To use the previous lineup , go to Options tab > Schedule Display > Use Previous Lineup
HOCKEY Shows up to 18 Players . After 18 Players , none will show .
- Check GP in stats to assign under 18 players .
BASKETBALL , LACROSSE* , & SOCCER*
Auto-populates ( *if less than 25 Players )
FOOTBALL
Use the drop down in the upper right-hand corner & select
Note : go to Schedule & Results > Options tab for more settings . It is not possible to modify the score sheets at this time .
In addition to right-clicking highlighted text, you can copy and paste using the keyboard.
Tocopy and paster using the keyboard:
- highlight the text you want copied
- hold down the Ctrl key on your keyboard, then hit C on your keyboard to copy
- place the cursor where you want to paste what you copied
- hold down the Ctrl key on your keyboard, then hit V on your keyboard to paste
The text should appear where you placed th cursor.
You can customize the default Flash Banner by going up to the Layout & Media tab and selecting Banner & Logo.
To upload your own custom Flash banner:
1. upload the .SWF file using Layout & Media > File Manager Page
2. Go up to Layout & Media tab and select Banner & Logo.
3. Click the Options tab on the top right
4. in the Flash Display section, enter the width, height and name of the file (save after each entry).
- Leave height and width blank to use default proportions
The system will replace the default Flash Banner with your new settings.
Note: This replaces the Flash, but does not change your logo. Full Page Width logo will hide your Flash, so choose Rookie Flash instead. Delete your logo if you want a full-page width Flash with no logo.
-Contact Support for assistance with inserting flash into a text area.
You can have as many domains as you need forwarding to the same site pages. For example, HTOsports.com and HomeTeamsONLINE.com both forward to our Home Page.
We can only manage one domain as part of your free domain credit, so additional domains will have to be managed on your own. Check with support if you think you might have any additional domain credits.
If you wish to register an additional domain, you can set that up though a domain registrar such as godaddy.com or networksolutions.com.
If you do not have a particular domain company you want to work with, you can use this site to register your domain:
UseYourOwnTeamName.com
Domain registration here is about $15/year.
After registering, you will have to direct the domain (See: using my current domain company with HTO)
- This is also good if you just prefer to have your own domain, whether to manage on your own to set up additional features like POP-3 email accounts to send and receive emails with your domain.
After this has been set up, you will not need to take any further action with the domain until it is time to renew it next year.
Contact support to hide the links to other forms at the top of a registration page.
If we registered a domain for you as part of your free domain credit , we are the owners of the domain . If you need to take control of the domain you will first need to create an account with the domain company of your choosing . We recommend GoDaddy .com for speed and ease of process :
- Initiate a Transfer with the domain company of your choosing
- Once the Transfer is Initiated on your end , we will receive an email with some codes that you will need to enter to Authorize the Transfer
- Once the domain is in your domain account , it is imperative that you change the contact information on the domain from ours to yours . This will ensure that you have full ownership over the domain as well as keep you compliant with ICANN regulations .
To create a "Playoffs" stats page in the navigation bar:
- log into your site
- go up and click the Preview Site button
- surf to the Stats page
- click the Game Type drop down and select "Playoffs"
- copy the URL web address in the browser's address bar
- switch back to the administrative pages
- go up to the Layout & Media tab and select Navigation Links
- in the New Custom Link section on the right, enter a title like "Playoffs Page" into the Link Label field
- select "Remote Web Link" for the link type, then paste the URL address you copied into the Web Address field
- click the Add to Links button to create the link in the green section above.
- once it looks good, make sure to click the Save button to update the site
The navigation bar should now have a link to the Playoffs Page. This link will automatically display the playoff stats when you click it.
Make sure to assign all Playoff games as a "Playoffs" Game Type when adding them.
Contact support if you need assistance with this.
Change a video size by changing the settings at YouTube or by editing the embed code. See YouTube's Help for their tools.
To change the settings in the embed code:
- Open the text module for editing & click the Source button.
- Locate the iframe code for the video & update the height & width. Click Save.
<iframe src="http://www.youtube.com/embed/filename" title="YouTube video player" frameborder="0" height="390" width="480"></iframe>
Update the red numbers. Both numbers will need to be edited so the video doesn't look distorted.
If you DO NOT want your video to automatically resize when viewed from a mobile device, click the Source button to update the code & add the red text:
<div class="noVideoWrapper">
<iframe src="http://www.youtube.com/embed/filename" title=......>
</div>
Other than the schedule notifications, we do not currently have any features to notify your visitors of recent changes or updates to your site. This includes features such as sending emails or notifications to your users or "NEW" flags on new items. This is a popular request and our developers are keeping this in mind for future development.
* You can send an email out to a contact list whenever adding or updating a game or event by using the "SEND UPDATE EMAIL
(when game is saved)" section at the bottom of the game/event edit screen.
Contact support to change the name that appears at the top of a page. Specify the new name in your message and check it for typos.
* Navigation link titles can be modified under Layout & Media tab > Navigation Links
* Custom Page titles are based on the name of the custom page, which can be changed by updating the Navigation Link to the page.
If the text is too small or you wish to make your site bigger and easier to see, you can adjust the ZOOM in your browser.
In Internet Explorer: On the very bottom right corner, it should say "100%". Click the corner to zoom in or pick a bigger percentage.
In Firefox: View > Zoom > Zoom In.
This will make the site's text and elements larger.
The OTL stat for goalies is a checkbox to indicate a loss during overtime and/or a shootout. OTW is the same, but to indicate a win.
Set the number of points for assists (and other Stat-related options) by going to Schedule > Schedule & Results > gear icon > Stats Display.
To add a custom footer to a registration form:
- create a custom page and add the footer content there
- once the custom page is done, edit the registration form
- click the Edit Footer Message button and add the following:
Custom Page:Custom Page Name
(Replace the Custom Page Name with the actual name of your Custom Page)
The registration form will display your custom page context at the bottom of the page.
The "Sharing" links at the bottom of your site let visitors go to their own Facebook or Twitter accounts to share your website
You can also add your own Facebook or Twitter feeds by using their tools to create embedable code. Use Facebook and Twitter's help system to locate and create the code.
After obtaining the code, go to Website > Home Page > X-Grid and activate a Script Area module. Paste the code from Facebook or Twitter into the module and click save to make your changes live.
To add a Nav Link to your social media accounts, go to Website > Design > Navigation Links and click the question mark icon on the right to view the help. Use the info in the Light Grey Custom Link section to learn how to create a Remote Web Link.
Click the Options tab on the right to customize the schedule. The Schedule Display section has several settings:
Default View (All Weeks / Current Week).
- Can also be set on Admin Site in the Editing Defaults Tab.
Customize which Game Types appear by default
Filter the default team or division (leagues)
Filter team/league events
Set the day the week starts on
Contact Support to:
Customize the Column Types:
- Default: Away/Home/Time/Location. Also Available: Date/Opponent/Score/Away/VS/Details. Can also be changed in Admin site
- Add a new column which shows Game Type.
- hide @ symbol
Create a Custom Column
Contact support to set your "preview" text areas for your games and events so that they appear in the full schedule list instead. We can customize a column for you where this info will appear in the list. (EX: list Officials, Referees, Umpires etc.)
A common example of this would be to number your games. You can list a number in every Game Preview, and we can make this appear in the Schedule List under a "Game Number" column.
Contact support to setup an Inactive Teams folder on your Setup Teams page. Teams moved into the folder will not be visible in the standings, but can be selected on the Schedule, Scores and Players/Roster Pages (under a heading of "Inactive Teams").
This is helpful for seasonal leagues that rotate teams and divisions off the current standings.
- Links to inactive team websites will not be viewable (they will redirect to the main league page).
- Inactive teams may be at the Rookie level only.
Contact support if you require a copy of our W-9 form.
Both the Store and Fundraising pages use PayPal for email notifications, so you would log into Paypal to setup any BCC addresses.
You can also use an email program like Outlook to create a distribution list which automatically sends out email copies whenever an email is received.
To move a Game or Event to a different season:
- Go to Teams & Schedules > Schedule & Results and click the Info button for the Game/Event you wish to move.
- Use the Season dropdown to select the Season you wish to move the Game/Event to and click Submit & Return to Schedule.
If you wish to move a large number of Games or Events within a specific date range to a different Season, support may be able to help. Click the Contact Us button at the bottom of your HTO Network pages and send us the details.
To add a custom footer to all of your pages:
- create a new custom page with the title "Template Footer"
- enter the footer content that you would like to display on all your site pages
- once it looks good, contact support so we can display the Template Footer at bottom of your pages.
Contact Support to change a label on your Home Page (like Record, Playoffs-Tournaments, Schedule-Scores, Sponsors, Stat Leaders, or Last Game).
We can change the text to read something different for you if you send us all the details.
- If you are using the "image" style labels, we will have to switch you to text labels, which will slightly change the look of the text.
Contact support to customize the "Points for Forfeit Loss" or the "Points for Win by Forfeit" in the standings.
You can adjust your lineup by going up to the Teams & Schedules tab > Schedule & Results > Options tab. In the Editing Defaults section, you can set "Default lineup for new games" to "Auto-fill with last lineup" or "Start from scratch".
You can also preload the lineup on scoresheets by going into the stats for that game and manually setting it. If the lineup is set for a specific game, that will take priority over the default settings.
Inserting Code
Send an email to support with your Google Analytics or Google Site Verification code, and we'll insert it in your site for you.
- Analytics should start showing data within 48 hours.
Troubleshooting
If you're getting no data several days after creating a Google Analytics account, the Google code may be incorrect.
Create an analytics profile for a new domain, paste the HTOsports.com/YourSiteID address from your admin home page, click the continue button, select "A single domain (default)", copy the code, then click the Save and Finish button.
- It is not possible to upload a file for Google Site Verification. We only support entering the code at this time.
Google AdWords
Unfortunately AdWords code does not work consistently with HTO sites, and is not supported at this time.
To set up a recurring event (like a practice):
- go to the Teams & Schedules tab and select Schedule & Results
- scroll down and click the Add an Event or Practice button
- enter a date and click the "Set up as a recurring event" link
- enter the date range, days of week and click the Add Date>> button
- you can select a specific date (like a holiday) and delete it
- enter the other event details and click the Submit & Return to Schedule button
Your events should display in the schedule. Note that events can only be deleted one at a time. Contact support to change or delete dates in bulk.
Multi-team and League sites have the ability to create team pages so each team's coach can login and enter their own scores. The team pages are included so you won't be charged for them.
To create a team login page:
- log into the site
- go down to the Team Links section and click the Info-Website button for a team
- click the Create a Website for this Team button
- fill out the information
The scores entered on a team site will update both the team and league Score pages.
There are various settings to customize team score entry:
PRO-STYLE (or higher) Football sites have Team Cumulative stat entry fields on the Admin Schedule Scores Edit Page.
You can enter your Team Stats on the Scoreboard page. If the team stats do not match the player stat totals, a mismatch displays in red. The red numbers reflect the player stat totals.
If you enter player stats first, the Team Stats will auto-calculate for you except for Time of Possession, First Downs, 3rd Down, 4th Down, and Penalties. They must be entered manually.
Team Entry
(For leagues sites and team sites within a league)
There are entry boxes for both the Home and Away team's information (football teams often use this data to know how good both the offense and defense are).
If both teams have Team Totals entered, it will use the home team's data for Home stats, and away team's data for Away stats.
- Turn Overs and Sacks Allowed will update from the opposing defensive team.
For more details, read the TEAM SCORE ENTRY FAQ
You can add directions to each location in the Teams & Schedules > Locations page. Edit a location, type the directions into the Directions box and click the Update Location button.
To add these directions to the schedule export:
- go to the Teams & Schedules tab and select Schedule & Results
- click the Options tab on the right
- in the Schedule Display section, set "Include typed directions in subscription notes" to "Yes"
- close the options window and confirm
Future events in the exported schedule will show the directions in the subscription notes.
- Only effects future events in the downloaded schedule. Events must have a location assigned, and the location must have typed directions.
To set a deadline for score and stat entry (like 7 days past each game):
- go to the Teams & Schedules tab and select Schedule & Results
- click the Options tab on the right
- in the Team Posting Rules section, click the "Input deadline - for team scores/stats/info entry" drop down and select a number of days
- close the options window and confirm
Keep in mind that you can only lock a date within 21 days. If you need to lock it at a later date, come back within 21 days to set the lock.
Note that this is only for leagues who have created team websites so that each team can edit their own scores (and/or Stats for upgraded team sites).
AUTO-UPDATE OPPONENTS SCORE
By default, teams can post scores for each other. When a team posts the scores, they will update the other team and the league site as well. The other team can then review the stats entered for them, and report a dispute if the numbers are incorrect.
EACH TEAM ENTERS THEIR OWN SCORE
With this option, each team can still enter the scores for both teams, which will update on their site and the league site only.
- The record will update for only the teams that entered their scores.
- When the opposing team edits the scores, they will still have empty boxes to enter the scores. If they attempt to enter something different than what was posted by the other team, it will notify them. If they save the disputed scores, the game will go into dispute.
- On the League site, the Scores button will either be pink or yellow (Home or Away) if only one team has entered the scores. When both teams enter the scores, the button will turn green.
- The league administrator can edit and finalize scores for both teams..
The system is designed to display only one season at a time, so if your organization has different divisions with overlapping seasons (like Spring and Fall season with an overlapping month), the new season dates won't display until you update to the season.
Options:
- If your seasons overlap, it's better to have a year-based season for all groups/leagues rather than individual seasons for each. For example, you can set your site in "2020" rather than "Spring 2020" or "Fall 2020". You can then have all of your Spring, Summer, Fall and Winter seasons active all year, and there will not be any issue with the overlapping dates.
Support can help you organize your teams into divisions so that they are easily identified in the Standings
- You can also separate your groups/divisions into different websites. If you have already entered schedule info for the teams, contact Support for more details and advice.
If you have an All-Star or Champion website and we are managing your domain name, contact support if you would like your domain name redirected to a page other than your Home Page. Be sure to include the URL of the page you would like the domain name redirected to.
If you manage the domain on your own, you'll have to contact the company you registered the domain through. They can provide assistance with setting up the domain forwarding to go to the specific URL you need.
(Baseball)
When entering your Fielding Statistics, you can enter multiple positions, but they must be entered one at a time. Enter the first position, then, after saving, all players are available to enter additional positions if needed.
The Games Played box (G) is a check box for adding stats. Make sure to check this box for each player you will be adding stats for. If G isn't checked, the stats will not get counted in the stat leaders module and other calculations.
- Use the "Check G for all players" option to quickly add all players to the stats.
- To properly remove the G box and remove the game stats for a player, you must use the "Del." button to the far right to remove the stat record for that player for that game.
To set a 5th period for Volleyball, rename the OT labels:
- Go to Schedules > Schedule & Results & click the gear icon on the right.
- In the popup, click Schedule. Scroll down to update the Label fields for OT/2OT & click save.
Click to X out of the popup & refresh with the new settings. The scores entered into the OT column will now display as 5th period scores & also change the Box Scores and Last Game modules on the Home Page.
This site was listed in our recommended 3rd party plug-ins, but is not longer running so we removed it. If you are currently using a plug-in from this site, we recommend that you use the Debug link at the bottom of your Home Page Editor to remove the code.
(If your page wont load properly, the debug link is in the loading message)
Contact Support if you need assistance.
To adjust the Roster options, go to Rosters & Staff > Roster. Click the Options button on the right and then click the Roster Options tab.
Default Sort: change the way the players sort (default is number)
Reverse Sort: Reverse the sorting
Allow Inactive Players in Search Results: Choose if Inactive Players show up when searching players
Show Printable Page link: show or hide the option to print the Roster Page
Leagues/Multi-Team account options
Teams can add/update/delete PLAYER INFO: choose what info can be edited from team websites
Show Division/Team Filter: remove the Select Team dropdown, forcing only the default view of the players.
Rosters & Staff > Roster > Options tab > Profile Display
Link team name: allow a clickable link to the team's site within the Profiles.
Show/Hide Emails: Default player emails are public. Change this setting to hide them from public view.
Height/Weight/Birthdays/Home Town/Year: choose to show or hide these columns.
Hometown/Year: rename these columns so the info you enter appears as a different header (You'll have to change the Profile and Roster labels separately). Ex: change "Hometown" to "School".
Bio/Highlights: show or hide these text areas. Hiding them reserves them for internal use.
Headers: show or hide the headers for these two text areas.
Game Type: The default game type for the career stats (default is All Game Types)
Default Career Stats: By default it will show the players current season stats. Changing to Career will show all seasons by default.
Top of Season Sort: change the order in which the stats sort.
Contact Support to
-Show Mobile Numbers on the Visitor Site
-Make the secret profile data appear on the Visitor Profiles for you (Administrators) only.
To adjust the Player Profile options, go to the Rosters & Staff > Roster page, click the Options tab on the right and select the Profile Options tab.
Profile Picture dimensions: modify the default size of your player portraits.
Image click to zoom: enable or disable the ability to click the portrait to open a window with the full size image.
show all stat columns: click YES to show even the columns which do not have stats entered.
Show Glossary Links: show or hide the link to the Stats Glossary for your sport.
Show Printable Page links: show or disable the printable Page link for the Profile Pages.
Advanced Options
Contact Support To:
- Change Birth Date Format
- Set default stats season
- Add custom Positions
- Make certain fields required to save
- Customize shirt/shorts/pants size options (internal use only)
Every machine on the Internet has a unique identifying number called an IP address. It is like a street address for your computer.
- To find your IP address, you can do a Google search for "my IP Address"
In regards to your HTO site, IP addresses are tracked for various reasons.
- We track your IP when sending an email though the contact form.
- IP addresses can be locked from the hit counter, preventing new hits from certain computers. Just press EDIT above this module under Page Editors > Home Page
- IP Addresses are tracked for anyone who posts a Guestbook message. This is visible in your admin Guestbook Page.
We also track the most recent login IP info. Contact support if you need to know the IP addresses for the computers that have recently logged into your admin site.
If you need to reverse look up an IP address, this is a useful site:
http://www.geektools.com/whois.php
When logged in to the main Sports HQ account for your league or multi-team site, there will be a drop down menu just below the tabs and nav bar at the top. Selecting another account within the -Teams- drop down will automatically log you in to that account.
- If you choose a team that does not have an account, a Help Menu will appear with the details.
- the drop down menu will not appear for the team administrators, only the main HQ administrators as they work on the team pages.
To add a table to a text area, click the Table button in the toolbar, enter the table properties, and click Ok to insert a table (3 row, 2 column example below).
| Team | Record |
| TEAM A | 45-5 |
| TEAM B | 5-45 |
- Right click a cell and select Cell > Cell Properties to set properties like the text alignment, text color and cell background color (to create the "Team" and "Record" headings in the example above).
- Table Properties will allow such options as the default cell width (200 pixels) the border size (3) and add a caption (table1)
- You can also add a cell, row or column.
- Text can be modified using text options (blue Team & Record headings)
We recommend the CKeditor to customize tables.
You can set up Quick URL's to point to a particular page on your website. In order to set them up we must be managing your domain or your personal domain is pointing to our DNS. To create a quick URL it simply requires adding the page title after the URL.
Example:
www.4csports.com/about
(This would link to the About Page for this account)
See the list below to create your quick URL to a any of these pages:
About
You can also link to a file by putting a ? after the /
EX:
www.MyDomain.com/?MyFile.jpg
- Go to Start > All Programs > Accessories > Paint.
- On your keyboard, hold down the Ctrl key and press V to paste your screen shot.
- Then go to File > Save As.. to save the file as a JPEG.
Once you have the file, email [email protected] for help with the issue and attach the screenshot.
For more information, go to www.take-a-screenshot.org or try searching the internet.
Before deleting any Home Page content, make sure to save a backup on your computer in case you need it later.
To save a backup:
- edit the text area
- click the HTML button in the toolbar to switch from text editing mode to code editing mode
- copy all the HTML code.
- on your computer, open a text program (like Microsoft Notepad)
- paste the code, and save the document
- once the backup is made, delete the content in the text area
- click the green Save Changes button to update the site, and confirm
If you attempt to delete all of your content, a warning message will appear to prevent accidental deletion. Once content is deleted from your Home Page text areas, is cannot be recovered.
All-Star and Champion users can archive their Home Page text areas into the News category "Home Page Archives"
Football is a Pro-Stat sport which includes full stats calculations, as well as a unique Team Stats section when entering scores.
Customizations
Contact Support if you would like to change Assisted Tackles so that they only count as 1/2 a tackle.
Contact support to add custom positions to your site or suggest standard positions that should be added.
Contact Support to change the way dates are displayed in your site. This can be for the Mini-Schedule, Schuedle, Birth Date, etc.
Include specific details on where the dates should be changed and what format they should have. We can change it in one place or set the format for all dates.
Examples:
May 1, 2012
4/1/2012
To display only the final scores:
- go up to the Account Info & Upgrades tab and select Account Info.
- set the Periods per Game to 1
- click the green Save button to update the site.
Contact Support if you need the periods for stat calculations.
Contact support to change how the stats are sorted on the Stats Page.
Sort by Name / Number
Football and hockey sort by player number by default. All other sports sort by player name by default. We can switch this for you if needed.
Due to issues with spam we have disabled accounts from being created from China. If you are in China and wish to create an account, please contact support with your name, email, a username and password so we can create an account for you.
Remove Padding
Contact support to if there is extra padding space in your text area or a "line" on one side of an image that you can't remove. Sidebar text areas have the padding removed by default, with a check-box at the bottom to add or remove padding.
Adding more Padding
Contact support if your images and text sections are up against the very side and you would like to add more padding.
There is a column when editing Game Scores on soccer accounts for entering the goals for Penalty Kick (PK) Shootouts. The column shows after the final score. If the score is tied the program will check the PK scores to determine the win. The visitor site displays the PK scores in parentheses after the final scores.
Contact support to replace or change any word on the website. We can potentially change any word on your site and replace it with custom wording of your choice (to an extent). Send us the details and our developers can review your request.
To cancel a game or event:
- go up to the Teams & Schedules tab and select Schedule & Results
- go down to the game or event
- click the Delete button on the right and confirm
To include notifications, first click the Info button for that game or event, checkmark the "SEND UPDATE EMAIL (when game is saved)" option and select your recipients. Deleting the game will send out notifications with the word "CANCELED" to your recipients.
To set up multiple email addresses for a player, separate the addresses with a semicolon (;) and a space like this:
[email protected]; [email protected]
- This is one way to send schedule updates to more than one email address per player
- The character limit is 100 characters.
Hockey Leagues can customize the point value for Win, Loss, Tie, OT Loss or Forfeits. It is also possible to reset to the default point values.
To customize the values:
- Go to Teams & Schedules > Schedule & Results & click the gear icon on the right.
- Click Standings & update the fields. Click the X when you're finished.
For other customizations for the value of points, contact Support.
Using an iPad
You can edit the site using an iPad, as long as it has the latest OS (5 or better). The iPad version should not matter.
If you are using iOS4 or older, the text editors will default to HTML code. Our default CKeditor is compatible with version OS5 or better.
- You can upgrade to iOS5 by using iTunes and clicking the option to upgrade after you sync to your iPad.
Known issues:
- Possible issues with file uploading.
- iframes stretch content to full width. This can be an issue in the Ramble and File Manager.
We will continue to review this as new iPads and iOS are released. Let us know the details if you are having any other issues when using your iPad for HTO editing.
Android
Android devices should load the TinyMCE editor.
Amazon & Other Devices
Amazon and other devices do not support the text editors, but should default to editable HTML. If you are stuck on a loading icon, please use the contact form to email Support.
Contact Support if you need to:
- Change all ads on your site to rotating ads instead of set ads. This will randomly generate 4 adds from your Rotating Ad pool on every page.
- Set a few specific pages as Rotating Ads
- Hide rotating ads from the top, bottom or completely.
- Specify a specific set of 4 ads on any page or all pages
- Remove the text "Sponsor" from under your ads
- Remove the text "View Site" from your text ads
- Display only the top ads or only the bottom ads on a page
- Modify width or height
- Hide ads from your Printable Pages
- Display the ads larger than the default
- Remove the outline around the banners
- Make them open in new tabs instead of pop-ups
To import a schedule, go up to the Teams & Schedules tab and select Import. Follow the steps to help the system organize and import your data.
If you are trying to import more games or events than the system will allow, contact Support with the details of how many dates you are trying to import.
If you are trying to import dates older than a year old, the date format may be unrecognized. Contact Support wit the details of what data you are trying to import.
To give a player that did not play credit for a game in the stats, you can check the G box to indicate they played, go to the right and choose Bench (BCH) from the Line Up drop Down menu.
Organization Accounts involve multiple sports. They consist of several team and/or league accounts linked together.
- Org Accounts are priced differently, so the team pricing or league pricing pages will not give accurate Org estimates.
Pricing is based on the number of sports and teams, as well as the package each level has: Rookie, Pro-Style, All-Star & Champion.
For example: if you had 5 sports with 5 teams per sport, you may need a set up like this: a Champion Org with 5 All-Star sports and 25 Rookie teams.
When you create a new website, you can choose multi-sport. The Teams & Schedules > Setup Teams Page will show your accurate Org pricing. On this page you can add sports, and you can also log-in to the sport accounts to set up the teams structure in each sport. When you return to the Org Setup Team page, the Org pricing will automatically calculate for you.
You can also contact support with a list of sports, teams, and desired features, and we can help you get started.
It may be possible to connect the Online Registration feature to a payment service other than PayPal. Contact the merchant you wish to use & request code from the merchant that functions similar to PayPal's "pay now" button.
Let the merchant know that the code must:
1. be provided by the merchant & designed for use on 3rd party websites. HTO cannot use a merchant's system to create code.
2. contain your verifiable customer ID. You must be registered with the merchant.
3. have link to a page hosted by the merchant that securely processes credit card transactions.
Once you've received code that meets these requirements copy & paste the code into a Custom Page. Then, let us know so that we can review the security of the merchant service & check to see if their technology is compatible with ours. If they are approved, we will add a button that says "Pay Now with your Credit Card" that will send registrants to the merchant's website for processing.
Available: PayPal, Authorize.net, Stripe
Unavailable: Intuit, Payeezy, Square, Bambora, Sage/Paya
Registration forms are designed to accept one registrant. The default form has one name and one email field for use in the Contact Lists and Email Tool. You can add additional Registrant Fields for other names and email addresses, but these additional fields will not be recorded in the Contact Lists or Roster.
Package Options
The "Require registrant to enter total number of registrants" option only works when 1 package is selected. If more than one package is selected, each package is multiplied by the number, which can cause confusion.
Packages
You can set up your packages like this:
Package 1: $15 - 1 package
Package 2: $30 - 2 packages
Package 3: $45 - 3 packages
- A great benefit to this setup is if the registrant needs 4 packages, they can choose 1 + 3
- You can also apply bulk discounts this way (1 package $15, 2 packages $25, etc.)
Contact Support if you need assistance setting up your form.
To convert your site to another language:
- Click the name of your organization at the top of the page & in the popup, click edit details.
- On the right, click the gear icon & select International. use the drop down to select a language.
These places will change automatically:
-
headers & labels
-
page titles
-
guestbook*
-
registration verbiage**
Nav Links will need to be updated manually. The admin site will remain in English.
*All-Star membership level required
**Champion membership level required
After a registrant fills out a form, they are taken to the Registration Confirmation Page. When they click a payment button, an email is sent to the webmaster email address with the information they entered.
- If the registrant closes the Registration Confirmation Page without properly choosing a payment, no email is sent, though they are still added to the Registrant List since they completed the form.
- You can use the Invoice button on the Registrants Page to send them an email requesting payment.
Contact Support if you would like to change this so that an email ALWAYS sends, whenever a Submit button is clicked to finish a form.
EMAIL TOOL
- The Rosters & Staff > Contact Lists page includes registration email addresses in the Registration category.
- The Community > Email Tool page lets you add email addresses from each registration form when you create or update a mailing list.
To use the registration forms with Authorize.net, contact support with your Authorize.net API Login and Transaction Key.
The registration confirmation page will then have a "Pay Online" button on that will send the price information and your registrant to Authorize.net for payment.
Unfortunately, Authorize.net will not indicate when someone has paid like PayPal. The system will send a notification email to the webmaster when someone clicks the submit button, but you must manually check Authorize.net to match up who has paid.
Contact support with specific details to add links or forms to the Admin Scores Page.
- Make sure to upload any documents using the Layout & Media > File Manager page, and write down the names of the registration forms you want linked.
This feature lets league administrators adjust the admin Scores page so coaches can download and print documents or fill out forms before entering the scores.
You can create rotating ads/images on your site by creating an Animated GIF image. There are free tools online to convert a group of images into an animated gif.
This site works well, as long as you reduce your image file sizes before uploading them into the site.
We recommend having a different web browser as a backup. If something stops working in one browser, it will often work on the backup until the first browser updates itself. You can use the links below to try out different browsers:
Internet Explorer
Firefox:
http://www.mozilla.org/en-US/firefox/new/
Chrome:
Safari:
The seller accepts encrypted website payments only. You cannot pay the seller through un-encrypted buttons. Please contact your seller for more details.
If your customers receive the error message above, you can turn off the PayPal® Encrypted Website Payments feature in your PayPal account.
To turn off the PayPal Encrypted Website Payments Feature:
- Log in to your PayPal account.
- Click Profile.
- From the Selling Preferences column, click Website Payment Preferences.
- In the Encrypted Website Payments section, select Off.
- Click the Save button.
You can also try this alternative method:
- Click Profile
- Click My selling tools on the left
- under Selling online find Website Preferences and click update.
- Scroll down till you see Encrypted Website Payments
- Turn Off, scroll to the bottom and click save at the bottom.
Note that PayPal may change these steps in the future. For further assistance, please contact PayPal Support.
It is not possible to move registrants between forms at this time.
When you add a ROOKIE team to a multi-team HQ it does not automatically create a standalone website for that team. Instead a team database is made for saving the schedule, roster and coaches information. You can then select that team when updating the schedule, roster and staff pages.
This makes it much simpler to manage the schedule organizations with lots of teams.
The Scores and Stats of your site are customized for your current sport and cannot be changed.
The site is meant to be a running archive. The information is saved for the next season. If you have different sports between seasons, we recommend that you create a new website. Contact Support and we can provide a bulk discount for having multiple sites.
In rare cases we can move your upgrade to a new site set in a different sport. Contact Support if you believe that you need this.
 After creating a schedule in the Scheduling Wizard, the last page has a link to save the schedule as an Excel file. You can make further changes in Excel, or import the schedule as is.
To import the schedule:
- save the schedule as an Excel file
- go up to the Teams & Schedules tab and select Import
- you can either copy and paste your data from Excel, or import the actual file
- follow the steps to help the system organize your data
- the system will import the schedule at the end of the process
Contact support if there are any questions.
If you are using photos that were taken with a mobile device, we recommend downloading the photos to a Mac or PC and then using the program of your choice to view the image's meta-data info to assure that they are oriented correctly. After doing any necessary adjusting, use this Mac or PC to upload the images to your HTO File Manager.
More information about photo orientation can be found in this article.
If your site images display upside down on a mobile device (like the iPhone), this is an issue with the image file.
Open the original image in a graphics program (like Photoshop, Illustrator or Fireworks) and export it as a GIF or JPEG. Uploading the new exported image should resolve the issue.
Both teams and leagues will receive prorated pricing for any upgrades during their subscription. This means if an upgrade is normally $100, and you are half way though your subscription, the upgrade for the remaining time will be $50.
Note that prorated pricing will not change the expiration date. The pricing is a discount for the remainder of your current subscription.
If you wish to pay full price to upgrade and renew your site, contact support so we can send you a custom invoice to renew for a full year with the upgrades, taking account what you have already paid.
If you log on to the Main HQ account, you can use the SPORTS HQ bar under the NAV bar at the top of each page to jump to any Team or Team HQ. Use the drop down list to select the team you wish to edit and you will automatically be logged in as the administrator for that site.

Special Cases:
- When you are logged into your team HQ and editing your Schedule & Results, Roster, and Coaches & Staff Pages, you will notice the label before the team drop down says “filtered by:”. This means that you are viewing the team's Roster, Schedule or Staff list, instead of logging into that site.
- Some teams do not have a site, so their information is updated from the main HQ. Those teams are indicated in orange. You can create sites (and separate log-ins) for these teams, but in many cases there is no need for separate team sites and you can manage everything from the HQ site.
Large leagues can create team sites so each team can log in an update their scores and information.
The Scorekeeper App (and support for it) has been discontinued.
HTO does not place ads on your site for any reason. Any ads that do appear may have been added by your team or league administrators. To remove these ads, you can go to the Community tab > Banner Ads or Community tab > Sponsors. Ads entered manually as images in a text area can be removed by editing the text area, clicking on the ad and pressing delete on your keyboard.
Quicklinks and similar ad programs.
If you have an ad program like Quicklinks installed on your computer, it can affect your browser and insert ads or links to ads into your pages. Try uninstalling your ad program to remove the unwanted links on your browser.
An HQ site is your main "HeadQuarters" site. In a multi-team site it is the main login which provides easy access to all the TEAM sites in your account. It can be used to set up a league, a club, or any group of teams playing the same sport.
Log in and you will see the "Sports HQ" and team drop-downs under the top navigation tabs. Select a team to log into any of the team admin sites. The main site wil have a [HQ] after the name to make it easier to go back.
Note that if you logged into a team site instead of the main site, you only have access to that team. You'll see the Sports HQ logo, but no drop-downs are available, since only the main HQ administrator has access to all the teams.
In a MULTI-SPORT site, the main HQ site can contain other HQ sites. For example, a school athletic department (or any large organization) will have their main HQ site and a multi-team HQ for each sport.
NOTE: If you are logged in as a HQ that is part of a larger organziation, you can access the teams within your sport, but you cannot switch to a HQ for another sport.
If a music update does not play in the site preview, even after you uploaded it properly, try refreshing the page.
- when viewing the Preview Site page, press Ctrl + F5 on your keyboard, or hold the Shift key down and press the refresh button
If this doesn't work, this may be due to a caching issue. Use Google to find information on clearing the cache for your favorite browser.
To confirm it is a caching issue, you can also try visiting your site in a different web browser. You'll usually hear the correct song when you switch browsers.
Contact support if the issue persists.
About 45 days before your expiration date the system will post a renewal notice on your admin home page. Contact Support if you want to renew before then, or if you have any questions.
If your site expires, it will downgrade to the Rookie package. Pro-Style, All-Star and Champion features are saved, but turned off until you renew.
You will be automatically redirected to the Upgrades & Renewal page if you have an expired HQ account with over 4 teams.
Important - Domains
The system does not renew domains for expired sites. After expiration any domains we managed for you are released for sale, so you may not be able to get then back. Please contact us prior to expiration to go over domain options if you do not plan to renew by your expiration date for any reason.
We can help you set up your own domain account so that you can manage it. This is only possible if your domain has not yet expired.
If you notice buttons at the bottom of the page to view the next page 1, 2, 3, etc., it means that there are too many items per page to fit in one page. Contact Support to increase the number of items per page. In some cases you may be able to fit all of the items on one page.
Examples:
- Number of players on roster page
- Number of bulletins on the Bboard Page
- Number of Guestbook Posts on the Guestbook Page
- Number of Box Scores on the Scores Page
The Registration feature uses the https protocol. This means that any data being submitted within the registration framework is being transferred securely. If anyone is monitoring your network traffic, they will not be able to see any information being sent.
Keep in mind that payments are not processed by your HTO website. A 3rd party processor, like PayPal, accepts and processes payment info.
Admins can purchase SSL Certificates for your domain. For more details, click the envelope icon at the bottom of the admin pages and contact our Domains department.
To display the lowest score on top, enter Golf Scores with a negative number. This way the smaller number (less negative) will be the winner.
Contact Support to add a setting that will hide the negative signs on your visitor's site.
Alternately, admins can also enter scores that includes decimals.
Hockey accounts support scoring for shootouts. This is an additional overtime, and counts as an overtime win or loss.
To set the Shootout points:
- log into your site
- go up to the Teams & Schedules tab and select Schedule & Results
- click the Options tab on the right
- in the Standings Display section, change the numbers for "SO Win" and "SO Loss" then save
- close the options window and confirm
The system will then use the numbers you entered.
The Site Sharing links at the bottom of all of the visitor's pages allow visitors to quickly share the pages of your website on their individual social media accounts. For example, if someone clicks Facebook, it will post to their Facebook followers with a link to your website.
To deactivate the links:
- Go to Design > Layout & scroll down to open the SEO section.
- Uncheck the box at the bottom & click save.
Contact support to change the number of points a player receives for each goal
- This affects Stats including Stat Leaders.
-Hockey default is 1 point
-Soccer default is 2 points
Contact support with specific details if you wish to change the formula for TSP (Total Stat Points).
If you are not sure of your password, use the "Forgot?" password link on the top right of www.HomeTeamsOnline.com
If you receive a message that your session expired, it may be an issue with your cookies:
Troubleshooting Cookies:
A. Check your Internet Options for cookie settings and security level.
B. Check your Virus Protection and Firewall security.
- Add www.HomeTeamsONLINE.com to your whitelists for both. Add both the http (normal) and https (secure) links to the whitelist.
C. Try a different web browser.
Contact support if the issues persist.
Contact support to promote your Domain name over the default www.HomeTeamsOinline.com/.. URL in the search results.
Contact Support to add ROE to baseball stats.
Sites with Pro-Style packages (or higher) can save a default staff profile portrait by uploading a photo into the File Manager, then going to the options tab on the Rosters & Staff > Coaches & Staff page and entering the photo name into the "Custom default profile image file name" field in the Profile Display section.
Duplicating Portraits
Contact support if a photo is repeating for Players or for Coaches/Staff and you do not have a file uploaded to do so.
Portraits Not Updating (Multi-team sites)
When you have a multi-team site with upgraded teams, teams may upload their own portrait that overrides the league portrait. If this is happening, you will need to log directly into the team site to replace their portraits.
Certain administrator pages (like the registration page) use standard “HTTPS” encrypted connections when transferring data to the server. Your browser will show an encrypted page with a green address bar on top, and a lock icon. Note that not all administrator pages are encrypted using “HTTPS”. Generally pages that have user edited content are not encrypted because images and links posted by the users are usually unencrypted.
Emails are transmitted using a different method. They are not encrypted, so be careful about what information you include when you send emails using the administrator tools. For example, never request or send credit card information using email.
All teams in a league/multi-team account should share the same expiration date. Additional teams are often pro-rated to match the league expiration.
The expiration dates can vary in certain situations, so if you notice teams that have different dates, contact Support with the details so we can look into it.
Editing permissions for Teams that are a part of a multi-team (or league) account can be limited by Role settings made by the league (also called Main HQ).
This means that your league can restrict some of the information your team can enter on your team's website, such as on the Roster, Schedule, and Scores.
If your team wishes to separate from the league, have both the league and team administrators email us agreeing to the disconnection. Once we receive written confirmation from both the team and league administrators, we can separate your team account from the league account.
There are many things that can "break" your Home Page, causing loading issues or preventing some modules from appearing.
Causes: Pasting text
Use the "Paste From Word" button in the toolbar to paste text from ANY source. This includes text copied from other sites, emails or even documents like Word documents. Pasting text using "Paste" or Ctrl+V on your keyboard can paste bad code in the text area. This code can immediately break your Home Page or even linger and case issues later on. When text is pasted from multiple sources, the bad code starts conflicting and causing major issues.
Causes: HTML
Make sure to paste HTML code using the "paste Code (or plain text)" button. Pasting code directly into the text area will not work, and will often break your page.
Solution: The Home Text Debug Page
There is a link to the Debug Page at the bottom of the Edit Home Page, and also in the loading message if you page is not loading. Use the debug page to access the code directly. Most often, this is to find and remove the last ting you pasted that caused the break.
Pts is visible in the Standings for certain sports such as Hockey and Soccer. The point values are customized under Teams & Schedules > Schedule & Results > Options Tab - STANDINGS DISPLAY.
For special situations, you can add additional points in the SPECIAL SETTINGS tab when entering your scores. For example, if you award an extra point for winning or losing under certain conditions, you would add the point here.
- Support can add the Pts column to any sport
- Add negative numbers to remove points
Points Percentage
Contact Support to add this column. This is the % of points based on the maximum total points. (If a win is 3 points and there has been 10 games, the maximum points is 30).
Schedules will count the number of games and events displayed at the bottom left corner. If no events are displayed, it will just say Showing X Games.
- This will not show Remaining if none have occurred yet.
League admins can control what teams are allowed to change on their own roster.
| Where to find the settings |
|
Go to People > Roster, click the gear icon in the upper right, then click the Team Editing tab. |
| What each setting does |
|
These settings apply to every team in the league. Contact support to set different rules for one team.
Because Twitter is 3rd party code, we suggest adding a Script Area (Advanced) module to your X-Grid first.
Begin by logging into Twitter and using their help system to locate the types of embeddable code they offer. Once you've copied the code, return to your HTO admin site and go to Website > Home Page to paste the code into the Script Area module.
Keep in mind that the size & number of tweets that appear in the feed is controlled by the code from Twitter. Use Twitter's help system for details or assistance with their code,
Use Twitter's help system if you need further assistance with creating code.
By default, the Home link is located at the top right of the navigation bar, and will return people to the Home Page.
If you'd like the link to appear on the left:
- Go to Layout & Media > Navigation Links and click on the Home link so that it's activated in the pink Link Properties box.
- Uncheck the Keep Right box and click Save to make your changes live.
Contact Support to:
- remove the Home Link
- add drop-downs to the Home Link (link will no longer keep right)
- make other links keep right like the Home Link
- Change the URL of the Home Link
To customize the margin width and overall form width, enter this code into the intro message of your Registration Form:
<style type="text/css">#registrationSoloPage .regLabels { width:50%; } #registrationSoloPage { width:750px; }</style>
Advanced Settings:
.regLabels { width:50%; }
This will widen the labels, proving more space on the left margin.
width:750px
This is the pixel width of the form. if your form appears cut-off after adding this, you will want to go to Layout & Media > Site Layout and make your site width wider.
An Anchor allows you to create a link that will jump down the page to a specific word you have anchored. In a web page with a lot of text or multiple sections, you can list the titles of each section at the top, then link them so each title "jumps to" the anchor in the section below.
First, you must have your document in the page. If necessary, list the topics/sections/titles at the top which you will use for anchors links.
1. highlight the actual section title within the text. use the Anchor tool in the toolbar to turn it into an anchor, naming the anchor.
2. At the top, highlight the text you wish to link to this anchor.
3. use the Link tool.
4. For Link Type, choose "link to anchor in the text".
5. choose the anchor name.
6. Press OK and save.
7. Repeat for each anchor you wish to create.
Clicking the Invoice button will send the registrant to their form, but PayPal blocks them from paying twice on the same form.
To change this, log into PayPal and follow these steps:
1. Go to My Account—>Profile
2. Click on ‘My Selling Tools’
3. Click ‘Update’ beside ‘Block Payments’
4. In the Block Accidental Payments section, select ‘No, allow multiple
payments per invoice ID’ option
5. Save
Note that the above settings are not available if you have a PayPal Personal account. You must upgrade your PayPal account if you would like to accept credit cards online or change this setting.
For help with this, contact PayPal.
Leagues can limit what team administrators can enter on their team site
Teams & Schedules > Schedule & Results > Options tab > Team Posting Rules
- Setting "Teams can add/update/delete GAME INFO" to NO turns off all game buttons except "Add an Event or Practice"
- Setting "Teams can schedule inter-HQ games" to NO turns off scheduling games against other league teams.
Contact Support to:
Limit which Game Types the teams may enter
You can set a game's status to "In Progress" vai the Scores for a game under the SPECIAL SETTINGS tab.
To access the Special Settings:
- Go to Schedule > Schedules & Results & click Scores to the left of the game in question.
- Below the Scoreboard, click the grey Special Settings button & click the Game in Progress box.
- Click Save to make your changes live.
- Games in progress will say so on the Schedule on the Home Page.
- Games in progress will not update in the Standings.
Assist to turnover ratio (A/T) calculates using zero turnovers if none are entered. Contact support if you wish to hide this column from the stats.
Adding and removing the side areas on the Site Layout page can sometimes deactivate the Navigation Links.
Contact Support to reactivate the Nav Links.
Making your Side-Nav or Side Col too wide may cause it to disappear. You can reduce the width of the side section under 300 pixels to make it visible again.
We plan to have a solution for this issue in the future. If you have any questions, Contact Support.
A Suspended game is a game that was started but had to be stopped. This is unlike a Canceled or Postponed game, which never started.
In a Suspended game, zeros are not added for empty periods/innings.
You can set any game as Suspended by editing the Info for the game and changing the Game Type to "Suspended".
Head to Head is the standard tie breaker for most leagues.
- Edit your Tie Breaker under Teams & Schedules > Schedule & Results > Options > Standings Display
In most cases, the order of tied teams in determined by Head to Head. The secondary tie breaker only comes into effect when teams are perfectly tied, such as they are 1-1 against each other.
By default, the Standings Records only count Regular Season games. Other game types are ignored.
- Regular Season includes the first 5 selections in the Game Type drop-down
3 or more Tied Teams.
If 3 or more teams are tied, the order is usually determined only by Head to Head. All games are factored in. This means the outcome of games that do not include a team will affect the outcome.
example:
Team A wins against B
Team B wins against C
Team C wins against A
The order will be A B C.
The outcome of A vs. B put C in last place.
HTO does not promote popup advertisements or underscored Text Enhance links of any kind.
If your site is suddenly showing popup ads and underscored links to other websites, check the page using a smartphone or tablet. If the ad links only show up on your computer, it's possible that someone recently downloaded or installed something (like a browser plugin) that included this advertising.
We recommend searching the internet for solutions to removing these Text Enhance links (advertisements) from your site.
To add a link that recipients can click on to download a PDF document, go to Community > Email Tool and create a new email or click to edit an existing one. Next:
- Click the Email body and position the cursor where you want the link to appear.
- Click the File Manager button in the text editing toolbar.
- In the File Manager, click the Upload Files icon toward the upper right corner.
- Click Choose Files to select your document, then Upload it.
- When you see the document listed, click it to open the File Details.
- Click Insert into Page and a clickable link to the document will appear in the email.
Contact support to rearrange or limit the way that birthdays are displayed on Player's profiles. Available changes and limitations include:
- Display only birth year
- Change the birth date format to M/D/Y, D/M/Y, DD/MM/YY
Other options may be available if you contact support with the details of your request.
Contact Support to add specific Registration Fields to the PayPal Checkout, and include them with your PayPal information.
When using the CKeditor, you can center an image after clicking to the side of the image. The Center button (found in the toolbar above) should become clickable. Click this button to center your image.
Note that occasionally, other code in the text area can interfere with centering. Contact support for assistance if the steps above do not work.
You can set the number of periods by clicking the name of your organization at the top > edit details. Use the Periods per Game dropdown and click Save.
The length of the game is the period length (minutes) X number of periods.
Contact Support to set a specific game length. (You can still set the # of periods, but the period length will be ignored). This is only available for certain sports.
(For specifics regarding GAA stat, search: the GAA Statistic)
New sites start with a default "under construction" sport image on the home page.
You can remove the image by going to Page Editors > Home Page and clicking that module's Pencil icon. Select the image, delete it and save.
League Accounts
This section appears on new team sites in a league or multi-team site.
To remove this part of the Home Page for your team sites, login to the main site.
Go to Page Editors > Home Page.
Click the Options tab and choose Settings.
For , click HIDE.
To add 3rd party embeddable code:
- Go to Website > Home Page & click the X-Grid tab.
- In the Modules box, click ADD. Scroll down to Text module & click ADD.
- Drag your new module into the Page Layout. Click the wrench icon & paste your 3rd party code. Click save .
Click Here for a list of 3rd Party Plugins that other Webmasters have used & recommend .
Please keep in mind that HTO is not affiliated with these 3rd Party sites & is not responsible for their content, functionality, or reliability. For questions or more details on these plugins, contact the provider directly .
Administrators at any package level can add slideshows to any Text Area using a 3rd Party Plug-in. Copy the HTML/Embed Code for the slideshow you create with the 3rd Party Plug-in, return to your HTO Admin site and:
- Open the Text Area for editing and click the Paste Code (or Plain Text) icon in the Text Editing toolbar.
- In the popup, paste the code and click Insert HTML.
- Click Save for the Text Area to make your changes live.
Pro-Style and higher membership levels can create and add Slideshows using the HTO tools.
Leagues with separate Groups (or dvisions) and sub-Groups (or divisions) can control how the Team Standings display by going to Teams & Schedules > Schedule & Results > Options tab > Standings Display and using the Include these groups in the team display drop down.
The selections include:
- all groups - shows the entire league
- parent's group - shows team's entire division with subdivisions
- team's group - THIS IS THE DEFAULT SETTING - show only the subdivision with that team
- team only - only show the single team
Be sure to refresh your page to make your changes live.
NOTE: If there is only a single level of Groups (or divisions) then the "parent's group" option will be the same as "all groups". If there are no Groups, then all options except "team only" will show the entire League.
If you'd like assistance in creating a Round Robin schedule, use the Scheduling Wizard to quickly do half of the work for you!
Once you've entered the details for your organization, the Scheduling Wizard will create it's best guess of a round-robin Schedule for you. Export this first draft of the Schedule to Excel (or other similar program) and make any changes that are needed. When your Schedule is perfect for your organization, use the Import feature to easily add the Schedule to your HTO site!
(Note that you don't have to use the Scheduling Wizard to create your Schedule - you can import or manually enter existing dates and events.)
To change the default width of your site, go to Layout & Media > Site Layout and scroll to the Custom Site Width Settings section. Select either Stretch or Fixed Frame, enter the width numbers you would like, and click the Save Site Width button.
See the Setting a Custom Template Width help topic for detailed information on using the Stretch or Fixed Frame settings.
Browsers often have an auto-fill setting for usernames and passwords. Sometimes an error can occur where the browser accidentally enters your username and password on a form.
To correct this issue, you can usually clear the browser settings to remove the stored username and password for the domain.
We recommend looking up the "name of your preferred browser + clear auto-fill" in Google to get the most up-to-date information on clearing your browser.
Supported Game Types and Event Types for Schedule Imports
Game Types:
Regular Season
Regular Season (conference)
Regular Season (league)
Regular Season (non-league)
Tournament (Season)
Cancelled
Postponed
Rain Out
Pre Season
Post Season
Playoffs
All Star Game
Tournament (Non-Season)
Scrimmage
Exhibition
Practice
Try-outs
Event
Camps
Fundraising
Fun
Competition
Spirit
Tournament (Event)
Event Types:
Practice
Tryouts
Event
Camps
Clinic
Fundraising
Fun
Competition
Spirit
Birthday
Tournament (Event)
To create business or info cards, go to Community > Info Cards. Be sure to read the details on this page for correct printer settings and other important information.
Note that by default, the Info Cards will print your Organizations logo and URL on one side. Your Schedule and space permitting, your Roster will appear on the other.
Facebook offers many plugins. To obtain the code for plugins, use the following steps:
- Go to Facebook's Developer page and select the type of plugin you'd like to add. Most admins want to add Social Plugins, but this is totally your choice. Use Facebook's help system to determine which plugin best suits your needs and for more info on creating/using their plugins.
- You will need to copy the code provided by Facebook and bring it back to your HTO Network.
- Paste the code into a Script Area (Advanced) module on your Website Home or into any text area using the Paste Code (or Plain Text) button in the text editor toolbar.
Notes:
- Facebook Like buttons will not work with Events on Facebook. Like button code will only work with an actual Facebook page that already has the Link option.
- Keep in mind that this code is 3rd party, meaning that it is not generated by HTO. You may need to use the help system provided by Facebook to troubleshoot any issues you may have with the code.
At this time, TBA is not an available start time for a Game or Event.
For Games, we suggest choosing a generic or unusual time (such as 12 a.m.) and noting the Game Preview that "Game Time is Subject to Change" or "Official Game Time Will Be Announced".
For Events, "Official Event Time TBA" can be noted directly in the Event Name field.
To make an Inactive Player Active again:
- Go to Rosters & Staff > Roster and click the View Past Players link above the upper right hand corner of the Roster table.
- Locate the Player's name and click Info.
- In the Active Toggle section, click the Active radio button.
- Click Save to make your changes live.
All-Star and Champion membership levels qualify for a free domain (or www.NameOfYourTeam.com).
For more information on obtaining a domain, see the DOMAIN FAQ.
For more information on setting up forwarded email addresses, see the EMAIL FAQ.
Go to Account & Upgrades > Domains for details on domain related questions including requesting a domain, owning your own domain, expiration, and transferring your domain.
To change your primary email address:
- Click on My Account in the upper right-hand corner and in the MY EMAILS box on the left, click the orange +add alternate email link.
- In the popup, enter your new email address and click add email to prompt the system to send a confirmation email to this address. Log into this email account and click the link to accept adding the new email address.
- Enter your personal password and click ADD EMAIL.
- Click My Account and in the MY EMAILS box on the left, click the orange set primary email link.
- Use the dropdown to select new email address and click set primary email.
Important! Accounts created prior to 2/18/15 must activate your HTO Network to make changes to your email address.
Admins with access to multiple websites can set a default for when they log in:
- At the top center, click on the name of your organization. Click to open site details.
- To the right of This site is not default, click change.
Important! When using the HTO Scorekeeper app, the Default HQ is the HQ that a user will be able to access from the app. For more info on use the HTO Scorekeeper app, see the HTO Scorekeeper Walkthru.
To display icons rather than tabs on the Menu Bar when on the backend of the website:
- Click the Menu Display icon towards the upper right-hand corner
 .
- At the bottom of the popup, click My Features> and click the stars to select the features you use most often.
- When you're done selecting favorite features, click the Menu Display icon again and in the popup, click Favorites Only.
- Click OK to refresh.
Tip: You can click and drag to rearrange the order of the icons.
To change back to the default tab display:
- Click the Menu Display icon and click All Features (tabs).
- Click OK to refresh
Setting the Time Zone for your organization allows Visitors to subscribe to your schedule. To set the Time Zone:
- Click the name of your organization at the top and click edit details.
- Use the Time Zone dropdown to select your Time Zone. Click save to make your changes live.
To create a spreadsheet of your schedule:
- Go to Teams & Schedules > Schedule & Results and click the purple View button on the far right.
- If needed, use the date drop down towards the top to select All Weeks. On the far right, click the List View link and allow the page to refresh. (Note that your settings may vary. You may be able to skip these steps.)
- Highlight and copy your entire Schedule, including column headings. Paste the Schedule into Excel.
To change the points in the Standings in Hockey:
- Go to Teams & Schedules > Schedules & Results and click the Scores button to the left of the game in question.
- Beneath the SCOREBOARD, click the SPECIAL SETTINGS tab.
- Use the Standings Points - Special Modifiers section with + or - in front of the number of points.
- Click Save to make your changes live.
To change the email address used to login to your HTO Network:
- In the upper right-hand corner, click on your name.
- In the MY EMAILS section, click the orange +add alternate email link and type the new address in the popup. Click add email.
- If the email address you are changing to is already associated with an HTO account, a popup will review more details of merging the accounts. Click send merge request to merge the accounts so that they can both be accessed by the same email address. Login your email to complete the process.
- If the email address you are changing to is not associated with an HTO account, click OK to refresh and login to your email to complete the process.
- Once your email address has been verified, click the orange set primary email link and select the new address from the Primary Email dropdown. Click set primary email to complete the process.
If you'd like to remove the old email address completely, click the grey remove link to the left of the email address.
Our mail server monitors information and will identify bad email addresses, which will be removed. These emails create errors and many servers reject them and require that they be removed.
When email addresses are removed from our system, in many cases the site owner will receive an email with a list of the removed emails so they can obtain correct email addresses. You may receive several notices if recently added emails contain errors.
Texting addresses can also create errors. A common issue occurs when a person changes their mobile provider but keeps their old number, which means the standard provider for their number will no longer match: the provider name needs to be obtained form the person, and you may use the dropdown list of providers to update the texting number.
To add a favicon for your website:
- Use an image editing program to create an .ICO file. This website creates an .ICO file from standard image files: https://realfavicongenerator.net/
- The file should be named: favicon.ico
- Go to Design > My Files and click Upload Files to save.
- Contact Support to set it as your favicon .
After support sets this up, test your site to verify. Note that you can replace your favicon.ico file by first deleting the old one, and then re-uploading the new file.
There are two methods to add a photo to a Players Profile. Both require you first go to Rosters & Staff > Roster:
- Click the Photo button to the left of the Player's name. In the popup, click Choose Photo & navigate to where the image is stored. Follow the prompts to add the image.
- When the image appears, click Close Window or X out of the popup.
or
- Click the Edit button to the left of the Player's name & scroll down to the Photo section. Click Manage Portrait.
- In the popup, click Choose Photo & follow the prompts to add the image.
- When the image appears, click Close Window or X out of the popup. Be sure to click Save to make your changes live.
Tip: Images up to 15 MB are accepted; the uploader auto-resizes them.
As of 8/21/15, Optonline.net/Optimum.net are bouncing emails that HTO customers are sending. Many recipients who have @optonline.net email addresses are not receiving their Team emails regardless of the Admin's email provider.
We have worked with Optonline tirelessly trying to resolve their issue, but have not been successful.
If you or your email recipients are Optonline.net/Optimum customers who are having issues with the HTO Email Tool, we strongly urge you to visit Optimum's Contact Us Customer Service page and submit a ticket with them regarding this issue, and encourage other Optonline.net users to do the same.
To delete images from the Photo Gallery, go to Layout & Media > Photo Gallery and:
- Click the Album where the image is stored & click the image you'd like to delete.
- Click the red Delete button & click OK to confirm.
To delete images from the File Manager, go to Layout & Media > File Manager and:
- Click the image you wish to delete & in the popup, click the red Delete button.
- Click OK to confirm.
To display a feed from social media like Facebook, Twitter, & Instagram, activate a Script Area (Advanced) module:
- Go to Page Editors > Website Home > X-Grid & click the +Add button in the MODULES box
- Scroll down & click +Add for Script Area (Advanced). Click on, drag, & drop the module into the PAGE LAYOUT
- Click Save
Log into your social media platform & search for "widgets" or "plugins". Follow the steps provided by the platform & copy the code created for you. Return to your website & click the wrench icon for the Script Area (Advanced) module. Paste the code into the field & click Save.
Tips: Script Area (Advanced) modules
- "blocking" browser settings can prevent feeds from displaying to visitors
- Always view your Visitor's website after adding code to a Script Area module to be sure that your site loads properly
- If the feed stops working, you may need to delete the module completely & get fresh code from the original source
To access the Options for the Roster, go to Rosters & Staff > Roster > Options tab on the far right. In the popup, click Roster Options
- Default Sort - use the drop down to select how the Roster page sorts for Visitors & Admins
- Reverse Sort - force the Default Sort to display in the reverse order
- Allow Inactive Player in Search Results - select YES or NO
- Show Printable Page Link - set if Visitors can use a link to print the Roster
Contact Support to set required fields when adding Players or to add custom positions.
Important Note: Returning to a single-team setup requires permanently deleting teams from your website, including all information associated with that team (Scores, Stats, Schedule, Results, Roster, etc.). We recommend contacting support for guidance before deleting teams.
To return to a single-team setup:
- Go to Teams & Schedules > Teams & Packages & in the SETUP TEAMS box, click on and delete the teams that are no longer needed.
- When you have only one team you wish to keep in your structure, click the blue Save Setup button on the right.
- Click the Options tab on the far right & in the popup, click the Convert to Single-Team link. Click OK to confirm.
To add your Schedule to a Google calendar, be sure your Time Zone is set for your network by going to Account & Upgrades > HQ Details.
Next, go to your Visitor's site and click to view your Schedule. Copy the URL from the top of the page.
Log in to your Gmail account and use the help system provided by Gmail/Google for current steps to add this "Other calendar" by it's URL.
Contact Gmail/Google directly if you need further assistance working with their program.
To un-archive or reactivate a player:
- Go to Rosters & Staff > Roster & click View Past Players on the far right.
- Locate the Player and click Info to the left of their name. Click to change the Active Toggle to Active.
- Click Save.
Use a Text module to create custom content using the options available in the text editing toolbar.
Insert text, images, files, documents, videos and even music into a Text module by using the icons available in the text editing toolbar. See the CKeditor help topic for a breakdown of the text editing toolbar.
To add a Text module:
- Go to Page Editors > Website Home and click the purple X-Grid tab on the far right.
- In the MODULES box on the right, click the purple +ADD button and select Text Area in the popup. The module will appear in the MODULES box.
- Click on the Text module, drag, and drop it into any available GRID space on your PAGE LAYOUT. Click the green Save bar over the upper right-hand corner.
Activate a compact Schedule module on your Website Home to quickly give Visitors details about your Schedule.
See the X-Grid help tab for information on adding modules to your Home page.
See the Schedule Options help topic for available settings for this module.
Activate a Tournaments* module for a quick link to the Tournaments page that allows Visitors and Players immediate access to the brackets that are active.
See the creating Tournament brackets help topic for information on creating a Tournament.
See the X-Grid help tab for information on adding modules to your Home page.
See the displaying Tournament brackets help topic for details displaying Tournaments.
*Tournaments feature requires the Pro-Style or higher membership level
Some pages can be in combination with a domain to direct visitors to a specific page on your website. Direct Visitors to go to www.YourDomain.com/pagename.
Page Names:
- About
- Awards
- Bulletin Board (as bboard)
- Coaches
- Donate (as fundraiser)
- Guestbook
- Links
- Locations
- News
- Photos
- Records
- Registration
- Roster
- Schedule
- Scores
- Sponsors
- Standings
- Stats
- Store
For more information on obtaining your own domain (www.YourTeam.com), see the Domain help or Domain FAQ.
To add a clickable caption to an image, even images in a Slideshow on the Home Page:
- Go to hamburger icon > Photo Albums and click the album you wish to edit. Click on the first image you wish to add a clickable caption for.
- Paste the following code into the Caption field:
<a href="http://www.WebsiteURL.com">Text You Want To Appear</a>
- Update the red text and click Save.
To color-code your Schedule, click the grey Contact Us button below on the far left. Use the popup to send Tech Support the details of how you'd like your Schedule to be color-coded.
For example:
Please make all Events color number 996600
Please Make all Games color number 0099cc
To view Color numbers, go to Layout & Media > Colors and click any Color link to view the Color Squares popup. Click a color to view it's number in the field in the lower right-hand corner of the popup.
To contact the Domains department, click the grey Contact Us button in the lower left-hand corner of your admin site. In the popup, use the Department drop down to select Domains. Enter the details and click Send.
To start a new site :
- In the upper right-hand corner , click HTO Center & locate the MY SPORTS HQs box
- In the upper right-hand corner of the MY SPORTS HQs box , click Make a New HQ
- Use the fields & dropdowns to make selections for the new site
Tip : new sites start in a free 30 day trial so that admins can decide the membership level will work best
To add new teams to an existing multi-team site :
- Go to Teams & Schedules > Teams & Packages & in the SETUP TEAMS box on the left , click Add Teams
- In the popup , type the team names into the field . Click Add Teams
- Click on a team name to adjust their membership level . If your package credits allow for the new team , click the blue SAVE SETUP button . If your package credits do not allow for the new teams , click the gold BUY NOW button to be brought through to the payment page
Tip : if you are a single team site & need to track info for multiple teams in the same HQ , convert to a Multi-Team site using the li
To control the order in which your Records appear, enter the records with a number. For example:
INDIVIDUAL RECORDS
1. Points
2. Goals
3. Assists
To change the order in which the Records appear, update the numbers.
Tip: Add numbers to pre-existing Records to put them into a specific order.
There is not a way to automatically download or import information from a 3rd party Stat tracking program.
If the program you use offers emendable code, copy the code offered by the 3rd party program and add it to a Script Area module on your Website Home. For more information on using the modules offered on the X-Grid, see the Adding Grid Spaces help.
Click a link below to access the available Football Scoresheets:
- Football Scoresheets (single team)
- Football Scoresheet (both teams)
to access scoresheets for other sports, click here.
To review how much storage space is available on your account:
- Go to Account & Upgrades > HQ Details and take a look at the SITE SUMMARY box on the right-hand side of the page.
- The storage information will reflect your used and available space.
For details on adding more storage space, see the adding storage space to my account help topic.
To activate (or deactivate) the drop down that will allow registrants to select a Team when registering:
- Go to Rosters & Staff > Roster and click the Options tab on the far right.
- In the popup, select User Input Labels and toggle Team Drop Down on All Forms to SHOW and "X" out of the popup.
- Click OK to refresh.
These same steps can be used to deactivate the drop down at any time.
Tips:
- Contact support to request the drop down be active on only specific forms
MOBILE DEVICE TIPS
If your Slideshow module displays blank space around photos when viewed on a mobile device, use the following steps to update the Override Height field:
- Go to Page Editors > Website Home and click the wrench icon for the Slideshow module.
- In the popup, be sure the Override Height field is blank. Click Save Options to make your changes live.
If you'd like to manually add the PayPal Transaction ID for your registrants, contact support and we will be happy to add a special setting.
Once the setting has been applied, the PayPal Transaction ID will be unlocked so an admin can copy and paste the correct code into the field. Once the field has been updated, the PayPal column on the View Registrants will show as Received.
When viewing your website on a mobile device, most phones and tablets will recognize phone numbers and automatically turn the number into a clickable link. These automatic links make contacting your organization directly from your website very easy.
Contact support if you'd like to turn off this auto-linking.
The "AVS Mismatch" message means that the payment request cannot be completed because the billing address that was entered for the transaction does not match the address that was provided to the AVS (address verification system) processing center by your bank or credit card company.
HTO is not allowed to process a transaction that cannot be verified by AVS. We recommend contacting the bank or credit card company to verify the address they have on file.
Canadian Customers: Please note that there have been known issues with the Canadian processing center - you may try waiting several minutes and then resubmit your order. Note that when an AVS error is returned, it can also mean that the data was not available to verify, which can be caused by a communication issue with the data center.
Search for the paying with PayPal help topic for details on paying for your renewal via PayPal.
The orientation of your device will determine the view you see of your website .
On 8" or larger iPads , using the portrait orientation will display the Mobile Tablet version of your website . Turning your iPad on its side so that it's oriented landscape will display the Computer Monitor version of your website .
On iPhones , when in the portrait orientation , the Mobile version will display . Turning your iPhone on it's side so that it's oriented landscape will display the Mobile Tablet version .
To permanently delete an HQ or to remove your email address from an HQ:
- Go to Account & Upgrades > My Account and click Options on the far right.
- In the popup, click Remove Me and select Delete My Account.
- Follow the prompts that are specific to your role and account to complete the process.
If you own the HQ, you will receive a confirmation code in your personal email that will need to be entered to complete the process.
If you have a role in the HQ and wish to remove yourself, you will be able to just remove your email address.
Use the drop-down filters to select the team, current or past players, etc.
Note: The multi-team HQ site can edit each team - there is no need to change your active HQ using the "ACTIVE HQ" navigator at the top
Discounts - At this time, there are not advanced options for discounts. However; you can create a form that incorporates a workaround by creating a different Package for each expected number of Registrants.
For Example:
PACKAGE 1: One Registrant $50.00
PACKAGE 2: Two Registrants $90.00 (gives a $10.00 discount)
PACKAGE 3: Three Registrants $120.00 (gives a $30 .00 discount)
PACKAGE 4: Four Registrants $160.00 (gives a $40.00 discount)
(Use whatever figures and discounts work for your organization)
Keep in mind that the Registration system is designed for one Registrant per form. Only one Registrant Name and Email can be brought over to the Roster as a Player, but you can add Registrant Fields for a second name, second email, etc & then manually add the extra Registrants to the Roster as Players.
To activate Nav Links on the side of your website or inset links at the top:
- Go to Layout & Media > Layout & scroll down to click Nav Layout.
- Click Activate for the type of links you'd like to activate. Add links using the tools in the popup.
To deactivate side or inset links, edit the links and move all links from the green ACTIVE LINKS field to the dark grey PAGES NOT LINKED field. Click Save.
For more help with editing links, see the changing my Nav links help topic.
Confirmation Emails are sent to registrants who have successfully registered. To access & update these settings:
- Go to People > Registration & click the edit icon for the form. In the popup, click edit.
- Scroll down to the Email section and click Confirmation Emails. Update the fields in the popup.
For more detailed information on editing Registration Forms, including the Confirmation Email options, see the Registration: Edit Form help.
By default, the column on the left side of your Home page will appear below the main section of your Home page.
To have the column on the left appear above the main section, use the following steps:
- Go to Page Editors > Website Home and click the Options tab. Under General, use the Common Settings to select ABOVE MAIN.
- Once the green updated message flashes, X out of the popup and click ok to refresh the page.
Click the X-Grid tab and use the tools to arrange modules within the side and main sections to further customize and control how your Home page displays on desktop and mobile.
League websites that are at the Champion membership level can choose to activate the Officials feature. The officials assigned to a game will display on the Game Preview of the visitor's website and on the Game Info page on the admin site.
To activate the feature, go to the People > Officials > gear icon & toggle OFFICIALS FEATURE ACTIVE.
Then, add the info about your official(s). Once the officials have been entered, they can be assigned to a game by using the Officials section that will appear on the Game Info page.
At this time, only League-level admins can assign Officials.
To add social media logo images** to a text module that link to your social media accounts, first locate and save or use your preferred editing program to create the images you wish to link.
Then, use the steps in the adding a link to a website (text or image) help topic to add the images to a text module. Most admins choose to add these clickable images to the Home page, but clickable images can be added to any text module, including player or coach profiles and Custom Pages*.
*Adding images requires the Prostyle membership level.
**Creating Custom Pages requires the All-Star membership level.
All fonts are not supported by all devices, or even browsers. For example, a Microsoft font may look just fine on a Windows computer, but will look different when viewed from an Apple phone.
Right now, there's not a way to "force" a font to look identical across all browsers and devices or to fully control how a font appears to different visitors coming to your site from different computers and devices. We recommend viewing your website from both desktop computers and mobile phones to be sure that any fonts look okay regardless of how visitors are accessing your website.
Contact Support to activate a form that can be used by visitors to your site to reach out to you. A link will be added to a module on your Home Page that when clicked will activate a popup that visitors will complete and submit.
Contact support if you'd like for your team's score to appear first on the Schedule page and in the Last Game module on the Home page.
Text Message Troubleshooting Tips:
- Double check that the provider & phone number are accurate
- Verify Phone Numbers: when a person responds to their invite, they verify that they are receiving texts.
- Sometimes the provider can have testing delays of several minutes up to an hour. If you don't receive your copy of a text alert, this might be the case. Try sending again & if it still doesn't arrive, there's a good chance the issue is with the provider.
In the meantime, the Chat feature can be used to get a message out.
To quickly re-send invitations to your players:
- Go to People > Roster and click the invites button towards the top of the page.
- The popup will display the number of invites that are pending. Click to check the box to confirm that you wish to re-send the invites & click send invites.
When the players accept, they can use the Player Chat and Calendar modules on their Dashboard & manage their own contact info.
To setup G-Suite domain related emails, we need the text verification record which can be generated through your G-Suite account. The record will look similar to this:
Host: @
TXT Value: google-site-verification=3n3bLFZ9u3j72LxvkukF39Y26qLcymnzNYDavLYrPGk
TTL: 1 Hour
After you have that information, please send it to Support.
Contact Support to discuss other options for setting up email accounts for your domain.
| Styles |
| Use the tools in the Styles feature select from over 50 different looks. Fine tune using the locks to build your custom style! |
| Colors |
| Set custom colors choosing from thousands of shades. Select from our library of background images and textures or upload your own. |
| Banner & Logo |
| Welcome visitors and identify your site by creating a custom Banner using our tools. Add animations, select colors, pick fonts - even upload your own background image! |
| Layout |
| You are in control of your website. Change the width, update browser tabs, even set your SEO. |
| Navigation Links |
| Choose what links visitors have access to when. Name and arrange active links and create custom sub-links whenever you need them! |
This Page lists all the help for specific pages, helpful FAQS and the "I need Help With" section which lists specific Help Topics. These help sections are also linked throughout the site.
| Is it just me or does this look really different from last season? |
|
No, it's not just you! The Edit Player page was overhauled in February 2019 to allow admins to invite players to edit their own Contact Info. All you need is the email addresses & they can handle the rest! Click the enter info icon to send an emailed invitation to the player. |
| What happens when they accept? |
|
Once they accept, they'll be able to enter/edit their own Contact Info.
They'll also have access to use:
|
| What if I don't want to send invites? |
|
You can turn this option off by:
|
| Okay, I want to send invites - but I don't want the players to see the Roster yet. |
|
No worries! To hide the Roster from your internal users go to the gear icon on the Roster page &:
|
What Sports Website Will Help Me Manage My Sports Club?
- HomeTeamsONLINE has specially designed multi-team website to show all your teams and divisions in one main site.
- Manage centrally, or assign website administrators for each team.
- Score conflict automatic emails, with tools to help even the largest organization easy to manage.
- Scheduler assistance and schedule import tools make your scheduling easy.
- Schedule Importer will even create team sites on the fly!
- Manage your registration online. Go paperless by managing all your forms and payments using our easy online system.
|
What's the Best Way to Alert My Team or League of Schedule Changes? |
|
|
What's the Best Sports Website Template? |
|
|
Which Sports Website Builders Offer the Best Price? |
|
If you’re looking to create a website for a sports team, a league, or an organization such as a school or college sports program, a website builder that specializes in sports is your best bet. Managing team or league requires sports website tools or apps that will help you with basic requirements for a sport website:
• Create a schedule that tracks scores, stats, and standings, as well as practices, team meetings, and events.
• Registration forms for you players to fill out, to get emergency contact information, collect fees, get signatures for agreements and disclaimers, along with sizes for gear and clothing.
• Post news, updates, scores, standings, player profiles for recruitment.
• Keep coaches, players, parents, schools, and fans informed with text messages and emails.
• Support you sponsors, create booster programs and set up fundraising tools.
• Manage Coaches and Staff, Officials, and of course Web Admins to help you manage your league, sports programs, or any organization.
Running a sports program takes a lot of work, and you will need a website service designed specifically for sports teams, clubs and leagues.

| What is the best looking sports website for my team or league? |
|
There are many websites that let you pick from style templates, upload your logo, post pictures and articles. If you are running a sports organization, a fun logo and background image, and other typical website features are great, but you may soon realize you need webpages designed for sports:
|

| How do I get started making sports website for my team or league? |
|
If you’re looking to create a website for a sports team, a league, or an organization a great way to start is to make checklist of the features you will need. Here is a checklist specific to sports website requirements:
|
| How can I make registration forms? |
You will want a website that lets you create as many forms as you need for your sports program, and lets you set up easy online payment. You want to avoid large transaction fees. You will want to track payments, and you will want to easily import registrants into your player rosters or coaching staff. You will also want the ability to upload documents along with your forms. 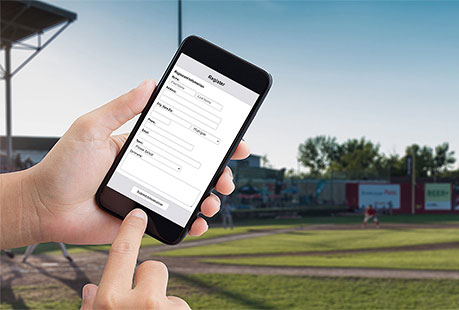 |
| What is the best app for sports leagues and teams to use for texting and sending emails? |
| If you are like most of us, you have to contact different people on different apps. Some people like a text. Some people want an email. Some people like a chat program, or a social media chat. Most communication tools have one thing in common - they expect everyone you communicate with to sign up for their App! If you have ever tried to get a large number of people synced up for an online meeting, etc., you know how frustrating it can be. What you will want is a sports website that is designed to handle the groups common to running a sports program. Players, along with their parents or emergency contacts, Coaches, League Staff, Team Staff, divisions, mailing lists for fans, sponsors, officials. You want to make it easy to send email, text, or chat with various groups on a regular basis. You need communication tools to send quick updates and messages, link to your pages or a video call, or send newsletters, and you want it to be quick and easy. |
| What is a good sports website for recruiting? |
| You will want a site that has a great player profile, with bio, highlights, and awards and honors. A very important feature is maintaining their statistics over several seasons, playoffs, summer leagues, etc. You want a website that can show statistics season by season. |
| How do I choose a good sports website service? |
|
Many sports website builders are available - here are some basic questions to ask to find a good one.
|

Yes. HomeTeamsONLINE is a sports website builder and league management system for teams, leagues, clubs, schools and tournaments. You get a custom website plus the tools that run the season behind it: schedules, scores, standings, rosters, statistics, online registration, photos, news and messaging, all in one place.
We have been doing this since 2000. Over 25 years, tens of thousands of sports organizations across the United States and Canada have run their seasons on HomeTeamsONLINE, supported by a US-based phone support team.
| Is there a free version of HomeTeamsONLINE? |
|
Yes. The Rookie package is free for a full year, and it is a real website, not a trial. You get a fully customizable, mobile-friendly site with schedules, scores, standings, rosters and unlimited members, with no ads. You can stay on Rookie as long as it suits your organization, and upgrade in the middle of a season if you find you need statistics, a custom domain or online registration. |
| How much does a league or team website cost? |
|
There are four packages, priced for the full year: Rookie is free, Pro-Style is $90, All-Star is $180 and Champion is $300. Every paid package starts with a 30-day free trial. Pro-Style adds the Player and Team Stats Manager, custom statistics, and photo albums and slideshows. All-Star adds a free custom domain, unlimited custom pages, game officials tracking and the News and Media Center. Champion adds the complete Online Registration Suite, an online store, and fundraising and sponsor tools. Leagues are priced by the number of teams, and each team can be upgraded on its own. |
| Can I make a webpage designed for sports, with stat leaders, rosters, news, photos and standings? |
|
Yes, and it can look like a professional sports site. HomeTeamsONLINE has powerful website tools for customizing your home page and applying modules: slideshows, stat leaders, schedules, standings, rosters, player profiles, news, photo albums, sponsor banners, social feeds and video. You are building a sports page, not fighting a generic page builder into looking like one. Our websites are remarkably flexible, and with how easy modern AI has made writing and image work, you can create just about anything you can imagine using our website tools. You can also restyle the whole site later without rebuilding it or losing content. |
| Can I create my own custom statistics using HomeTeamsONLINE? |
|
Yes. HomeTeamsONLINE lets you easily create your own custom statistics for any sport, even for a game you invented yourself. You can also build calculated stats by combining your custom stats with each other and with the standard ones. HomeTeamsONLINE has standard statistics built in for the major team sports: baseball, softball, football, hockey, basketball, soccer, lacrosse and volleyball. That covers offensive and defensive stats, pitching stats, goalie stats, kicking stats and more. Enter only the stats you want to track and we calculate and publish the rest. |
| Does HomeTeamsONLINE track hockey assists and other scoring details? |
|
Yes. The major team sports have a scoring play-by-play that lets you record the detail behind each goal or basket: who assisted, whether it was a power play goal, and more. This is available for basketball and the other major sports as well, not just hockey. Everything you enter flows straight through to your public site, so standings, stat leaders and player profiles update themselves as the season runs. |
| What about a sport like golf? |
|
Golf is supported with a nine out, nine in, hole-by-hole scoring system for multiple players and teams. Scorecards, team scores and results publish to your site the same way any other sport does. This is the part most sports platforms skip. Golf is not a wins-and-losses sport, so a system built only around a league table cannot describe it. Ours is built to handle it properly. |
| What about track and field meets, cross country, or swimming? |
|
HomeTeamsONLINE has an extensive track and field meet system for recording times, distances, best of three attempts, relay teams and more. Cross country and swimming run on the same meet-based structure. Most meet software is timing software that stops at the results file. HomeTeamsONLINE is the website your program publishes those results on, alongside the schedule, the roster and the news, so parents and athletes have one place to look. |
| Does HomeTeamsONLINE offer an online registration form system? |
|
Yes, and we do not add any per-transaction fees. With the Champion package you get a complete registration system where you can build as many forms as you need, with your own questions, waivers, package options and file uploads. Your forms are made for sports, so registrants can be imported automatically into teams and leagues. You can track payments and let registrants import to rosters with or without a payment requirement, which gives you a lot of flexibility in how you run your registration. |
| Which payment methods can we accept, and are payments tracked automatically? |
|
You can take payments through PayPal, Venmo, Stripe, Zelle and Authorize.net for credit cards. You keep your own payment relationship and we take nothing per transaction. There is one difference worth knowing before you choose. PayPal and Authorize.net return the transaction result to us, so those payments are tracked and reconciled automatically against the registrant. The others are marked as paid by you, which is simple enough but is a manual step. |
| How do I make a schedule for my league? |
|
Use the free Round-Robin Schedule Wizard. Enter your teams, your fields and the dates you have available, and it builds a balanced season you can review and publish in one step. You can also enter games by hand or import a schedule you already have from a spreadsheet. Published schedules can be viewed by team, division or whole league, and every game carries its location and map, its score and its box score. Past seasons archive rather than disappear. |
| Can we run a tournament with brackets? |
|
Yes. Tournament brackets are built in, and they publish to your public site and update as results come in, so teams and families follow along without you sending anything out. Tournaments can take entries through the same registration forms as a season, so teams sign up, pay and land in the bracket without a second tool bolted on the side. |
| How do standings and tiebreakers work? |
|
Standings update themselves as scores are entered. There is nothing to recalculate and no spreadsheet to keep alongside. Tiebreakers are configurable, so the standings follow your league's own rules rather than a fixed formula somebody else chose. You can publish records, awards and team leaders alongside the table. |
| Can we email and text our players, coaches and families? |
|
Yes. Email or text any group from your dashboard: the whole league, a single team, the coaching staff, or a custom mailing list. Messages go to the addresses and mobile numbers already on file, so there is no second contact list to maintain. Automated schedule alerts and game reminders go out on their own, which is what everyone notices when a field changes an hour before the first pitch. Fans can follow your site with a free account, and a Join Us button lets new players and volunteers sign themselves up. |
| What web address do we get, and can we use our own domain name? |
|
Every site comes with a free web address in the form www.hometeamsonline.com/yourleague, and you can start handing it out the day you sign up. Most organizations later move to their own domain, such as MyLeagueName.com. The All-Star and Champion packages include a free custom domain, registered and configured for you with an SSL certificate. You can also point a domain you already own at your HomeTeamsONLINE site. |
| Can each team in our league have its own website? |
|
Yes. Under a league account every team can run its own site and update its own schedule, scores, roster, coaches and standings, while the league keeps the master view and the consistent look. Team sites are upgraded individually, so a competitive travel team can add statistics or its own registration forms without the whole league changing package. A single team can also start on its own and convert to a league later. |
| Can we run more than one sport in the same organization? |
|
Yes. Multi-sport clubs, parks departments and school programs run every sport under one organization, with one logo, one navigation menu and one set of sponsor banners across all of it. Each sport keeps its own schedules, rosters, standings and statistics, using the stat model that sport actually needs, so your basketball program is not forced into a baseball shape. |
| Can we move our existing website to HomeTeamsONLINE? |
|
Yes, and we have brought a lot of organizations across, including many that came off Eteamz and TeamPages when those services changed. Schedules and rosters import from spreadsheets, so you are rarely retyping anything. You can build the new site alongside the old one and switch your domain over when you are happy with it, so your league is never without a site in the middle of a season. |
| Are the pages mobile friendly, and are there ads on our site? |
|
Every HomeTeamsONLINE page is mobile friendly and works on phones and tablets with no app to install. That is where most of the traffic comes from, since parents check the schedule from the car. There are no ads and no spam on any package, including the free one. Your site is not used to sell advertising to your families, and the only sponsor banners on it are the ones you put there. |
| How long has HomeTeamsONLINE been in business, and how do we get help? |
|
HomeTeamsONLINE has been building sports websites since 2000, over 25 years. Seasons roll over, archives stay intact, and the platform is still here the following spring. Support is a US-based phone team, on every package including the free one. Call (800) 486-0505, weekdays 9:00 AM to 4:00 PM Eastern, excluding federal holidays. You can also reach us by email. |
- Specially designed multi-team league website to show all your teams and divisions in one main site.
- Scheduler assistance and importable schedules make your scheduling easy.
- Manage your registration online. Go paperless by managing all your forms and payment using our easy online system.
| How Can I Track Scores & Standings? |
|
|
| Whats the Best Way to Manage Stats? |
|
You can manage stats from your website. Advanced player stats available for: Baseball, Softball, Football, Basketball, Soccer, Hockey, Lacrosse and Volleyball.
|
| Communication Made Easy |
|
|
| Create a Professional Sports Website with Great Templates Plus Customization |
|
|
- Top-shelf support specialists
- Easy, intuitive sports websites
- No risk, free trials, try before you buy
- Great pricing, flexible options
- Free domain names available
- Advanced features, built to help our customers
Call our friendly support and find out why we are the trusted host for thousands of sports teams, leagues and schools.

- Sign up for a multi-sport website
- Simply list your sports teams, and click...
- Your site will be ready to go! Check out a sample website
|
Manage Your School Athletic Programs Online |
|
| Communication Made Easy |
|
| Customize to Match your School Site |
|
| Flexible Pricing - Try Any Package Free For 30 Days |
|
- Enter and track scores on your HTO account
- Standings are automatically updated
- Score entry management tools and options
- Leagues can set score entry deadlines
- Score conflicts detected & teams auto-emailed for friendly resolution
- Detailed Statistical tracking software for major team sports
- Features based on more than 19 years of experience working
with teams & leagues like yours!
| FREE MOBILE APP: HTOSports SCOREKEEPER |
|
| PRINTABLE SCORESHEETS FOR MAJOR SPORTS |
|
Note: Each PDF file has copies for two teams. The links below are blank copies: when you open these sheets from your HomeTeamsONLINE team site, the roster and team information is auto-filled for the game. |
A statistics program is available for the most popular team sports: Baseball, Basketball, Football, Soccer, Hockey, Softball, Lacrosse and Volleyball.
You can start a free trial with Home Teams Online and start entering your stats right away! First add/import Players into the Roster, then add a game into the schedule and use the STATS button to record your statistical information for your players. You can enter your stats one at a time or switch to bulk edit to enter an entire season stats. (This is also useful if you wish to add a past game and record historical stats).
Once you have entered your stats, they appear on the Stats Page, in the Career Stats section on the Player Profiles, and in the Stat Leaderboard on the Home Page.
Adding stats is easy with a HomeTeamsONLINE website.
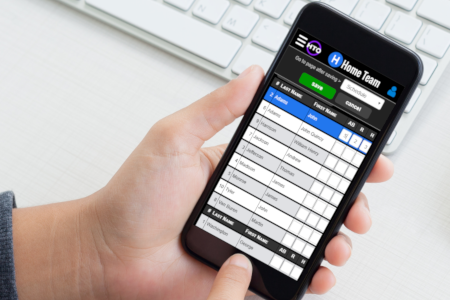
| How can I enter stats for free? |
|
Our Stats feature is an advanced feature available with a PRO-STYLE (or better) account.
|
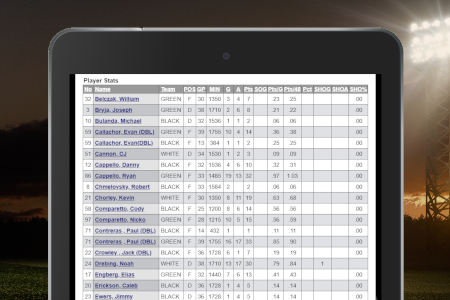
| Is it difficult to enter stats? |
|
Updating your statistics couldn't be easier. Login to your HomeTeamsONLINE site on a computer or mobile device and click the STATS button for the game you wish to enter stats for. |

| Do I have to download anything? |
|
No, you do not need to download or install a program. You can update your stats online anywhere you can access the Internet. |
| How can I view my stats online? |
|
Our dynamic websites automatically display your stats on a sortable Stats Page, Player Profile Career Stats, Game Box Score Pages, and Stat Leaders on the Home Page. Anyone with a link to your site can view all the statistical information (you can also password protect your stats so only those with a password can view them). |
| How can I enter past season stats? |
|
All of your stats are saved in an archive. Your Stats Page will display your current season stats and will have the ability to view all past season stats. The Player Profile Pages will compile Career Stats and show sortable Season Stats.
|

| How do I import stats? |
|
We currently have an import tool for statistics exported from GameChanger for baseball and softball, both the standard (CSV format) and college versions (XML format).
|

| How can I customize my stats? |
|
Every sport comes with the standard stats for that sport, and you can add your own on top of them:
If your sport keeps a number nobody else keeps, you can still track it, post it and rank your players by it. |

| How can I get help with my stats? |
|
We offer full Customer Support for all our users. Email or call us at (800) 486-0505 to speak with a Support Specialist.
|

| Can I get a free trial to enter stats? |
|
We offer a free 30 day trial. Sign up and try it today.
|
- Quick and easy access to multiple teams and age groups on one site
- Import schedules from spreadsheets, emails, or web pages.
- Advanced scheduling tools make your job easier - print calendars, automatically set up recurring events, and even track attendance
- Score entry management tools for automatic updates
- Detailed Statistical tracking software for major team sports
- Password management options
- No ads or spam!
| GET THE MESSAGE OUT: |
|
| FUNDRAISING ONLINE: |
|
| CUSTOMIZE YOUR SITE: |
|
| TRY FREE FOR 30 DAYS! |
|
| WE ALSO OFFER: |
|

| Why Choose HomeTeamsONLINE for My League's Sports Website? |
| HomeTeamsONLINE has been providing sports websites for over 25 years! Our websites are designed specifically for all kinds of sports organizations, and provide the tools you need to manage your sports programs, along with the most advanced website builder for sports available on the Web. Stop playing around, get serious with your game! |
| What Do I Need to Make a Sports Website for My League? |
|
HomeTeamsONLINE gives you all the tools you need to manage and create a website for your team, league, school or any organization! We have listened to our customers for two decades and provided the features they need to manage their leagues. Here are some of the key features needed to manage a sports program: • Multiple online registration forms, with the ability to accept payment from credit cards through PayPal, Stripe or Authorize.Net, plus Venmo, Zelle and mailed-in checks. HomeTeamsONLINE provides this with no extra transaction fees! |
| Can I Make a Website for a School Sports Program? |
| Absolutely. Sign up for a multi-sport account, and simply list the different sports in your program to create a website for each separate team, or even league, in your organization. Each "Sport" site is part of your top level organization, but can be managed centrally or locally. |
| Do I Need to Have a Web Hosting Service? |
| We provide everything you need to get your team, league or organization online in a matter of minutes. There is no software to download, everything is available on the Web. |
| Can I Use My Own Domain Name? |
| Yes! You can use a domain name that you have already purchased, purchase a new one, or get one for free with our ALL-STAR or CHAMPION packages. Our support staff will be happy to help you register your domain name today. |
| Do You Enter My Schedules and Scores For Me? |
| Users enter or import their own schedule and enter scores. HomeTeamsONLINE provides a user friendly template to allow anyone to enter scores and schedule, including import tools and a round robin schedule wizard. We have advanced tools to allow you to assign admins to enter scores, and there is even an automatic score conflict detector that will notify teams of scoring issues. You can also set a deadline for entering scores, along with other features that allow you to manage your game results the way that suits your sports program. |
| Can I Use HOMETEAMSONLINE as a Statistics Program? |
| Absolutely. For the major team sports (baseball, softball, football, basketball, soccer, hockey, lacrosse, and volleyball) we track all the major statistical categories that are kept on professional sports websites. See our Stats FAQ for more info. |
| How Much Does All This Cost? |
| You always have the option to sign up for a FREE ROOKIE team website. You can also get a FREE 30 day trial for a more advanced website package. There is no obligation to buy anything, but you can upgrade your website at any time. Each package offers additional features which you can view on the Features page. You can also visit the Team Website Pricing or League Website Pricing page for more details. |
| Will My Site Have Ads On It? |
| NO, HomeTeamsONLINE prides itself on giving you complete control of your site with absolutely no advertisements displayed on your website (other than YOUR own fundraising banners if you wish to use that feature on a Champion website). Even our FREE ROOKIE sites have no ads. Likewise your email is used only for HomeTeamsONLINE business and never given to third parties. |
| In A Nutshell, What Is HOMETEAMSONLINE? |
| HomeTeamsONLINE is a sports website service founded in 2000 that provides everything you need to set up a website for your sports team, league, or organization so that your players, coaches, fans, family and friends can keep up with all the latest news, schedules, scores, view pictures and video highlights, along with a variety of other great features specifically designed for managers of teams, leagues and organizations. HomeTeamsONLINE gives YOU the power of the Internet to make managing your sports programs as easy as possible! |


| FREE DOMAIN FEATURE |
| To eliminate the confusion of domains, we offer to register and maintain a domain for our ALL-STAR and CHAMPION users. This domain will be registered under OUR NAME, but will forward to your sites Home Page. This means we can directly access your domain to make sure it is working properly and set up additional features. Even though it is under our account, the domain is YOURS. If at anytime in the future you wish to use your domain for other purposes, or you no longer wish to have an ALL-STAR pr CHAMPION site with us, we can transfer the domain to your own account. You will then have to maintain and pay for the domain on your own. |
| I AM AN ALL-STAR/CHAMPION USER. HOW DO I GET MY FREE DOMAIN? |
| If you missed the link to set up a free domain on your confirmation page, just send us a quick email and we can set this up for you. At the bottom of any admin page, click the envelope icon and use the popup to send us your request. Use the Department drop down to select Domains and include the name of the domain that you'd like for us to look into for you. Feel free to visit UseYourOwnTeamName.com to check the availability of your domain name, but DO NOT PURCHASE THE DOMAIN. Once you have found an available domain name, let us know via the envelope icon and we'll register it for you. |
| FREE DOMAIN POLICY |
| Since we are working with and paying another company to manage domains, we have a strict policy on what we can do as part of the Free Domain Feature. - We can register one available domain for your site per ALL-STAR or CHAMPION account. - If you already have a domain, through another registrar, we can transfer this domain to our ownership to manage and for future renewals, provided the domain is available for transfer. We will purchase the transfer, but we'll need to work together to complete the process. - We cannot refund a domain purchase. If you purchased a domain before upgrading or before you were aware of the free domain feature, you'll have to manage this domain on your own. Just set up the forwarding to get your domain working. If you renew next year, we can transfer this domain to renew it. We can register a different domain for you if you wish to take advantage of the free domain feature. - We cannot change your domain name once it has been registered. If there was a spelling error or issue with the domain that you requested, you only option is to register a new domain. Since we have already purchased the domain, you will have to register a new domain on your own account. When submitting your domain request, take care that you have requested the exact domain that you want, and there are not any similar domains directing to other sites that may confuse your viewers. - Keep in mind that the domain feature is one of may features available to our ALL-STAR and CHAMPION users. The subscription fee for your site is not affected by the domain feature. Like any other feature available, you can choose to take advantage of the feature or not. Many of our ALL-STAR and CHAMPION users choose to manage their own domains. - Keep these limitations in mind when requesting a domain. We at HomeTeamsONLINE want you to get the best experience possible in managing your own website, which is why we have extended this feature to both our CHAMPION and ALL-STAR users. We will do what we can to get your domain up and running and ensure that it is working for as long as you have a site with us. Since we are not actually a domain registrar we are limited in what we are able to do for your domain, and we appreciate your understanding with all domain related issues. |
| EXTENSIONS (.com.net.org) |
|
We can register or transfer the following extensions on your behalf: .info .net .org .biz .us |
| DOMAIN TRANSFERS |
Transferring a domain is a simple process, provided that we work together to share the necessary information. There is typically a 10 day limit on a transfer, so we'll need to make sure we do everything needed to complete the transfer within the allotted time. This process should go pretty smoothly provided we take all the necessary steps. We typically review all emails within 24 hours of receiving them, and place transfer related emails on high priority. Provided you follow the information provided, we should be able to quickly and easily transfer this domain and ensure that it is working for you. Important: - You do not need to transfer a domain to get it working for you. You can link the domain to your Home Page from within its current domain account. The benefit of a transfer is that we can manage it as part of your site and make sure it is always working, including handling all future domain renewals. - External features like POP-3 email accounts will be lost in a transfer (any email you ave @yourdomain.com will be lost in the transfer). You may not want to transfer if you have email accounts. Step One - Verify the Domain Owner Only the person whose email is listed as the Registrant of the domain, and who receives all emails regarding this domain is able to complete a transfer. If you are not the Registrant, you will need to have the current Registrant of the domain contact us so we can work with them, or have the current Registrant contact the domain company to change the email on the domain account to your email address. Step Two - Confirm the domain is not locked New domains that have recently been registered are locked for about 3 months. If you have recently registered this domain, we'll have to wait to transfer the domain. Newly registered domains are locked for 60 days. We recommend you contact us about a month before the domain expires. If you are still an ALL-STAR or CHAMPION user, or planning on renewing at that level, we'll work together to transfer this domain so we can handle the domain renewal for you. Only ACTIVE domains can be transferred. If your domain has expired, it is in a "grace period" for about two months and cannot be transferred. The only thing you can do to activate this domain is re-register it again under your own account, or request that we register this domain for you after the grace period. Domains with extra security and privacy settings can not be transferred. If your email address is not visible by doing a standard WHOIS lookup for your domain, the transfer will not be possible until the privacy settings are removed. Step Three - Determine your current domain Registrar If your domain has been registered under Useyourownteamname.com, we can actually do what is called an ACCOUNT CHANGE. This is the easiest way to transfer the domain. You'll just need to login to your domain account, press the account change button and replace the contact info with our own info. Contact us if this is the case, and we'll provide you with the necessary steps and contact info. If you have registered your domain with a different Registrar, such as Yahoo.com or GoDaddy.com, we will have to work together to complete a standard transfer. Contact us with your domain name and we'll purchase and initiate the transfer. CONTACT US with your HTO USERNAME, the DOMAIN NAME, and let us know whether your domain is set up through UseYourOwnTeamName.com or another Registrar. Also verify that your email address is listed for the domain Registrant, otherwise, we'll have to confirm this before we take the next step. Step Four - Receive and send us the Authorization Codes If your domain is not registered through UseYourOwnTeamName.com, we'll have to purchase and send the domain transfer request to your current Registrar. You will then be sent an email from UseYourOwnTeamName.com with Transaction ID and Security Code. Ignore the content of this email; it provides the directions for us. Just forward the email, or email us with these codes, and we can process the transfer. An Authorization Code or EPP key is also required. You can either request an email for this in your domain account, or contact the support of your domain company to ask for this. This code is required to complete the transfer, but we won't need it to start the transfer. Step Five - Finalize the transfer The fifth step varies with each company. Some companies require you to login to your domain account to accept the transfer. Other companies simply wait a certain number of days, typically about 5 days, and then release the domain at that time. The best thing to do is contact the domain company. Find out what needs to be done to release the domain, if the domain will be released on its own after a certain time or if the domain has been released. Once this is completed we can set up the DNS for your domain and manage it for as long as you have a site with us at the All-Star or Champion membership level. |
| What is a domain? |
|
By setting up a domain, you can change how people access your site. For instance, if your team name was "Green Way Baseball", you can register the domain www.GreenWayBaseball.com so that people can reach your page by typing that into their browser address bar, rather than searching for your team on the HomeTeamsONLINE site. Creating a domain is an easy way to make your site more personal and easy to access. |
| Auto-renew and choosing your name |
|
IMPORTANT: When you register a domain, selecting the auto-renew option authorizes the domain company to charge you for renewals. Do not turn on auto-renew if you do not want this. Without auto-renew, you must submit the renewal yourself or the domain will expire (and can be taken by someone else). Renewal notices are sent to the email you used on the domain registration, so be sure to use a permanent email. Also, take extra care when choosing your domain name. Make sure you spell it correctly and avoid names similar to existing domains that your viewers could easily misspell and be taken to the wrong site. Once a domain is registered, it cannot be changed or deleted. If you have any issues or emergencies regarding a domain registered through us, contact domain support @ 480-624-2500, and have your credit card handy to confirm your identity. |
| Set up a domain you already own |
|
You can keep your domain at your current domain company and point it to your HomeTeamsONLINE site. First, contact us to add your domain to your account. Send Support the domain name you want to use, and we'll add it to your account and get it ready. All-Star and Champion users: we can manage the domain for you and take care of the rest. Then point your domain to your site. The easiest way is your Domain Setup page, which shows the exact records with copy buttons and tracks your progress. Or set these two records in your domain company's DNS settings:
Leave everything else as it is, especially your email (MX) records. Once saved, your secure padlock (HTTPS) turns on automatically. If your domain company's DNS screens look different, contact them and they can help you add these two records. |
| Using domain forwarding |
|
Domain forwarding is only an option if you own the domain in your own domain account. It is usually available for a small annual fee, however many domain registrars provide it at no extra cost. For domain forwarding to work, the name servers sometimes have to be assigned to the registrar's default servers. This may be an issue if you used your domain name for a custom website in the past. In that case, ask your registrar how to reset the domain to their default servers. You do not need any DNS or name server information for forwarding. Keep the domain on your registrar's servers and just forward it to your HTO home page. If you follow the steps to set up domain forwarding on your registrar's account, it should be fairly straightforward. Your HomeTeamsONLINE website address is always in this format: http://HTOsports.com/your_username_here Replace your_username_here with the username for your account. Another method is to go to the page you want to link to (usually the team or league home page), copy the URL from the address bar in your browser, and paste it into the address requested when setting up the forwarding. Each registrar has its own method, so ask your registrar for their specific steps. Will my domain name appear at the top of my site in the URL? With DNS (the two records above), it shows up on every page. If you use domain forwarding instead, you'll want to set up domain masking as well to hide the default URL. Contact your domain company for details; there is usually an extra fee for masking. |
| How domains work (and troubleshooting) |
|
If you're confused trying to understand how to set up a domain name on HomeTeamsONLINE, don't feel bad, it is genuinely confusing. Here are a few things that should help clear it up: 1) Your website is NOT the same as your domain. It is common to refer to a website as a domain, but they are two different things. A simple example is your name: if your name is "Bill" you could change it to "John" but you are still the same person, and just because someone shares your name doesn't mean they ARE you. Names are just an easy way to identify people. It's the same with websites: domain names are just a way of identifying a website. If your domain is not working, that doesn't mean your website is not working. You can go to our homepage and use the search box at the top to find your team website even if the domain name does not seem to be working. (This will not work if you have set your website as NOT SEARCHABLE under User Info & Upgrades > Team/League Info.) 2) Domain registration is only done by official organizations. We cannot actually register domains, we just help you do it. When a baby is born, the hospital records the name and information, but the registrar of births, not the hospital, issues the birth certificate. It's the same way with domains: you will contact your domain registrar for help and information about your domain. HomeTeamsONLINE staff cannot directly access your domain account. 3) Changes to your domain can only be made with YOUR permission. We will do everything we can to help you set up your domain, but we do not have control over your domain account. If you provide us the customer number and password for your domain account, we will gladly make changes on your behalf. For your security we are not allowed to know your domain password; the domain is something you own. You keep your domain name for your own use even if you no longer use our sports websites. 4) My domain isn't working, now what? When you contact us about a domain issue, it is best to have the customer number and password for your DOMAIN account (not your sports website). We can usually find your customer number, but you may need to reset the password through the email you used when you got the domain, or by calling your registrar's support line to verify your identity. This separation between the registrar and HomeTeamsONLINE is intentional, to protect your rights to your domain. If your domain was set up through another registrar such as GoDaddy, that registrar will be your best resource. 5) Isn't there an easier way? Yes. If you have a CHAMPION or ALL-STAR site, we can register and manage a domain for you at no extra cost. Just contact us and we'll take care of it. (Because the domain is under our account, you won't access the domain settings directly, but it can be transferred to your own private account later if you request it.) |
| What is the best website for sports? |
|
If you’re looking to create a website for a sports team, a league or an organization, a website builder that specializes in sports is your best bet. That way, you can select your website colors, choose a style, and upload your logo, as well as: |
| What is a Sport website? |
|
A sport website is an online source of information for Players, Coaches, and Fans. Website administrators enter details such as Schedules, Scores, Stats, and Standings, along with information on fundraisers, meeting notes, sponsorship opportunities, registration and more. The information is published to keep the people connected to the sport informed. |
| How can I create my own sports website? |
|
If you want to find other athletes or hobbyists in your area who want to play the same sport as you, creating a website about the sport is good first step. |
| How can I improve my sports website? |
|
First, find a website builder that specializes in sports. Next, decide what you want to improve: |
| Can I create a website for free? |
|
Yes, a free website is possible! Some website hosting companies will give you a website for free, then offer access to special features for a fee. These fees often come in the form of monthly or yearly subscriptions. |
| How do I create a sports website for a league? |
|
Leagues need tools to easily publish Schedules, Scores, Statistics, and Rosters for multiple teams – a difficult thing to do manually. Your best bet is to find a sports website builder that gives you the tools to manage lots of data for multiple teams.
|
| How do I create a football club website? |
|
Football clubs can be challenging. A website builder that lets you choose from different templates will help you quickly create a site that looks great.
Managing the people in a Football club gets intense fast. With 15 active players on a roster and 5 teams in the club, you’re looking at 75 players on the club Rosters.
If your club is youth, you’re likely looking at keeping up with two emergency contacts per player for 150 entries. Add them to the players and you’re looking at around 225 entries.
That’s a lot of important data and information to enter, manage, and update for a full season.
Finding a website builder that understands these complexities and has experience with Football is a must. |
If you have a single Team site, and would like to display information on more than one Team, you can convert your site to a League site.
There is a link on the Administrator Home Page to convert your site to a multi-team account by clicking the do you need to "add more teams" link.
What will happen when I convert my site?
When you convert your site, all of your information will be saved as the first Team in your League, and you can then add new Teams by going to Teams & Schedules > Setup Teams.
What is the price to convert?
Converting is a free service. However, your subscription will change based on the number of teams and the package you are using. The price of your renewal will reflect these changes. For information on League pricing, check out our League Pricing link at the top of our Home Page.
Now that I have multiple teams, what will change?
Using a multi-team site is very similar to using a single team site, except there will be a few minor differences. When adding players, you'll now pick a team first. When adding new games, you can now pick which team the game is for, and type the name of the opponent in the "OR:" box.
The biggest difference is that there are now two kinds of events – "league" and "team". If you assign an event to "All (League Name)", these events will show in the default schedule view, which includes all games for both teams. If you assign an event to one team, you will only see that event when you pick that team to view only that team's schedule. Team schedules do not include the "league" events. There are options in the Advanced Settings to make "team" events show in full view or "league" events in the team view. If you edit the Mini-Schedule on the Home Page, there is a check box whether or not to show team events.
The information is separated by page. This means that the site will still look the same with the Schedule, Scores, Stats and Roster Pages, but there will now be a "Select Team" option to pick which team you wish to view.
What if I have a League or Multi-Team site and I only need 1 team? Can I convert to Single-Team?
To change your account from a League to Team, you must first remove all but one Team from your League Structure (Sports HQ page). When you have just one active Team remaining a button will appear in the Account Summary on the Admin Home Page that you can click to convert to a Single Team site.
If you have any questions, Contact Support with the details.
LEAGUE PRICING is used anytime you create a site with more than one team (multi-team). LEAGUE PRICING is designed so that the more teams you add, the lower the cost per team.
TEAM PRICING is always used for a single, standalone team site. TEAM PRICING also applies if a team within a league (any multi-team account) wishes to upgrade under a different account. This provides organizations and teams the flexibility to purchase site upgrades for the entire group, or to let teams decide and pay on their own.
Team pricing is set on our Home Page:
Rookie: FREE
Pro-Style: $90/year
All-Star: $180/year
Champion: $300/year
Do I need League Pricing?
League Pricing is for any situation where there are multiple teams:
- Leagues
- Clubs
- Programs with different age levels
- High School sports with Varsity, JV and Freshmen teams
League pricing is based on the number of teams and the features you need:
http://www.hometeamsonline.com/sportswebsites/?leaguepricing
About Per Team Pricing
The published price is the only price we offer, and it already has a built in discount. We do not support changing the pricing for individual users, as the pricing ties into the setup and renewal infrastructure.
The pricing formula is designed to round in the customer's favor. The pricing does not increment evenly, so there will be "sweet spots" that provide a better "per team" cost. When you find a "sweet spot" for example, one more team may kick you out of that "sweet spot" and back on the normal price curve. The per team price is only meant as a guideline to help you make your decision.
How do I Know What Features I Will Need?
Check out the features page: http://www.hometeamsonline.com/sportswebsites/?features
You can also utilize the free trial to test out the features, or contact Support with any questions.
If I get a Pro-Style League website, do all the Teams need to be Pro-Style too?
You can combine any level League and Team websites. If you don’t see a set up you need, such as All-Star with Pro-Style teams, just contact support. You can also set up different packages for each team, like some Rookie and others Pro-Style. Just contact Support and we'll send you an invoice.
- Teams can also upgrade on their own. If you provide a site for the teams they can choose to upgrade it to highlight their team with an upgraded website.
Hall of Fame Setup and Design Service
You may choose to get the Hall of Fame setup and design service for your site. In addition to our usual support, we will assign our specialists to actually do the work for certain setup and design items. See the Hall of Fame FAQ for details.
Will there be any additional pricing involved?
There are no additional fees involved for the hosting service. The cost of your subscription includes everything you need to get online. There are some additional fees involved for certain features, or if you get the Hall of Fame service.
A. All-Star and Champion get a free domain, but Rookie and Pro-Style users will not receive a domain credit. They may choose to purchase a domain name on their own though a domain company. This is typically about $10-$15 a year.
B. We do not charge transaction fees, but if you use PayPal or another online processing service, they normally charges about 4% to handle transactions online. Champion users should keep this in mind when utilizing the Registration, Online Store and Donation Pages. (Contact PayPal support for details on their options and fees.)
Are there other options for payment?
We currently only accept one year subscription payments. You will receive notification about a month before your expiration to let you know you can renew your site.
We do not accept month to month payment. The pricing is actually based on a typical sports season of a few months, with your free trial providing a whole extra month at no cost. We keep sites active for the whole year, so that players and fans can continue to look back on the season, and prepare for the upcoming season.
If you have a large multi-team package, contact support for options on quarterly payments.
Features are part of a package. We do not offer prices for a single feature. To access a feature you must upgrade to the package with that feature. For example, if you only need registration, you can purchase a single team Champion site, which is $300/year.
How can I Make a Payment?
First, you'll need to create a site by following the Sign-up link on our Home Page. There will be a link at the top to review your pricing and make a payment. You can make a credit card purchase online. We also accept checks and PayPal payments.
the intellectual property of others.
Home Teams Online has no responsibility for content on other websites that you may find or access when using Home Teams Online’s products or services. Material available on or through other websites may be protected by copyright and the intellectual property laws of the United States or other countries or both. The terms of use of those websites, and not the Home Teams Online Terms of Service, govern your use of that material.
It is Home Teams Online’s policy, in appropriate circumstances and at its discretion, to disable or terminate accounts of users who may infringe or repeatedly infringe the copyrights or other intellectual property rights of Home Teams Online or others.
Notice for Claims of Intellectual Property Violations, and Agent for Notice
THIS PROCESS IS FOR COPYRIGHT AND OTHER INTELLECTUAL PROPERTY MATTERS ONLY.
Correspondence regarding other matters will not be answered.
If you believe that your work has been copied in a way that constitutes copyright infringement, or that your
intellectual property rights have been otherwise violated, please provide Home Teams Online's Agent for
Notice with the following information in English (your "Notice"):
a. an electronic or physical signature of the person authorized to act on behalf of the owner of the
copyright or other intellectual property interest;
b. a description of the copyrighted work or other intellectual property that you claim has been infringed;
c. a description of where the material that you claim is infringing is located on the Home Teams Online
site, with enough detail that we may find it on the website (in most circumstances, we will need a URL);
d. your address, telephone number, and email address;
e. a statement by you that you have a good faith belief that the disputed use is not authorized by the
copyright or intellectual property owner, its agent, or the law;
f. a statement by you, made under penalty of perjury, that the above information in your Notice is accurate
and that you are the copyright or intellectual property owner or authorized to act on the copyright or
intellectual property owner's behalf.
Note: If your Notice is not in regards to a copyright issue, please specify the intellectual property right
at issue (for example, ‘trademark’).
In some circumstances, in order to notify the subscriber, account holder or host who provided the allegedly
infringing content to which Home Teams Online has disabled access, Home Teams Online may forward a copy of a
valid Notice including name and email address to the subscriber or account holder.
In some circumstances, Home Teams Online may forward a copy of a valid Notice (with personally identifiable
information removed) to Chilling Effects (http://www.chillingeffects.org) for publication.
Home Teams Online's Agent for Notice of claims of copyright or other intellectual property infringement can
be reached as follows:
By mail:
Copyright Agent
c/o Home Teams Online
21 Stuyvesant Oval, Suite 9B
New York, NY 10009
By email (must have electronic signature):
[email protected]
A "cannot connect to server" error message can be caused by a wide variety of issues. Problems can occur anywhere along the communication path; the home computer, router, cable modem, ISP service, telecommunication networks, the datacenter network, network hardware, or firewalls, as well as the website servers.
The most common outages are related to your network. Extended HomeTeamsONLINE server outages are rare, most outages are caused by network issues. We have several redundant failovers which allow us to keep the website up, as well as post notifications regarding the status of the outage. (Check for alerts on the top of the Admin Home page).
How do I identify What is Causing the Connection Error?
Since most outages are due to a local issue along the communication path, you can follow these steps to identify the point of failure:
1. First try reloading the page, or restarting you browser (to avoid "cached" pages). Many outages are very brief and my only last several seconds. Try visiting a common website like "google.com" to see if the outage is happening for any connection to the Internet, in which case you should contact you Internet Service Provider (ISP).
Additional checks:
Try other browsers, like Firefox, Safari, Chrome or Internet Explorer. Test on as many as possible.
Power Cycle (Unplug/re-plug or turn off/on all devices in order)
Reboot your computer
2. If you still cannot connect, a good idea is to run the trace route utility (in Windows) by first opening a console by clicking:
start > run > then type: cmd
Alternate method:
start > All Programs > Accessories > Command Prompt
Next:
Type: tracert hometeamsonline.com
Then, press Enter.
When you start seeing stars, press Ctrl+C
Tracert will display the milliseconds used for each "hop" along the network path (and it shows a * symbol if it times out).
You can click the icon at the upper left of the command window to select, copy and paste this information to send it in an email. ([email protected])
It is helpful to have this information to see at what point along the path the issue occurs. However, if you see the timeout happening right away, it is likely an issue with your ISP or your local setup, and you should call your ISP.
Please contact support or call toll free if you have any questions:
800-486-0505 (Weekdays 10 AM - 4 PM EST)
Keep in mind that once an account is deleted it cannot be recovered. Feel free to renew your site at the ROOKIE level at no cost if you would like to preserve the information and content.
| Why do I need cookies? |
| You need a password to log in. Without cookies, your browser will forget that you entered the password as soon as you enter it, and you will get logged out for security. Check your computer’s security software (firewall, virus protection, etc.) to see if it is blocking cookies. |
| How to enable cookies in your browser |
| #showhelp-662# |
| What if this doesn't work? |
| Cookies can also be blocked from other sources. Your Internet Security (like firewalls, virus protection or any special security) can be blocking cookies. You'll need to troubleshoot this by reviewing the help within the security program you are using. Public access computers (like school, work, & library computers) often have special security installed which may block cookies. You'll have to disable this security if you wish to use this computer to edit your site. In some cases, it may be best to wait until you can access your own personal computer to edit your site. |
| Q: My Eteamz site is getting replaced by Teampages. Is HTO an alternative to Eteamz? Can I transfer my Eteamz site over to HomeTeamsOnline? |
| A: Yes, you can copy information like schedules and rosters into our easy import tools. Page content can be copied and pasted into text areas to re-create the site. Contact Support and we can help you set up a free site and transfer over your information, or you can jump in and get started on your own. |
| Q: Is it expensive to set up a site with HTO? |
| A: Creating a HTO Sports Website is free for teams that want to manage their Schedule, Scores, Roster, Coaches and Standings. If you want to track more advanced information like Statistics, HTO is one of the least expensive programs - check out our Team Pricing and League Pricing Pages for more info. |
| Q: Can I manage Registration with HTO? |
|
A: Yes! Our registration feature lets you create custom forms to gather the info you need from any computer or mobile device. Payments can be submitted online and HTO does not charge any extra fees.
|
| Q: Do I need to know coding like HTML or CSS? |
| A: Not at all! HTO's template driven design gives anyone the tools to create a fantastic looking website for their team, league, school, club, or organization. (But, if you know and love HTML & CSS, we've got ya covered there too!) |
| Q: Will my website work on cell phones? What about other mobile devices, like tablets? |
| A: Your HTO website will automatically be fully optimized, look great, & be easy to use on any device, from desktop computers, to tablets, to mobile phones. |
| Q: What do I get with a HomeTeamsOnline account? |
| A: HTO provides sports website templates to post your sport information live on the web and tools to make sports management easy. Check out our full FAQ for more info. |
| Q: Does it take a long time to set up a HomeTeamsONLINE website? |
| A: Using the easy import tools for Schedule and Players, a new HTO site can be live within minutes of startup. Players can begin updating their contact info saving even more time! |
| Q: What are the benefits of using HomeTeamsONLINE to host my website? |
|
A: HTO has been hosting sports websites and providing management tools for over 25 years. With an emphasis on top notch customer support, we've been listening to coaches, managers, and owners for a long time. Through this combined feedback, we're created the tools you need to make sports management easy & get you back out onto the field. Start your free 30 day trial today & check out features such as instant Schedule update texts, Email communication, Online Registration, and much more!
|
To permanently delete your site:
- Click the name of your organization at the top & select edit details. In the Site Summary box, click the red delete sports hq> link.
- The system will email a confirmation number. Put this number into the Confirmation Number field and click Delete Account.
To permanently delete a TEAM:
- Click the name of your organization at the top & use the -teams- drop down to assure you're on the correct team's site.
- Use the steps above to permanently delete the Team's site & all data attached to this team..
IMPORTANT: deleting your website is irreversible
| ADD A CUSTOM ROLE |
|
To add a new access role, make sure you are on the ADD A CUSTOM ROLE tab.
1) Enter a Role Name that will be easy for to remember. To avoid long text wrapping, keep the name short. 2) Check the boxes of the features you want admins in this role to be able to edit.3) Click the category titles to select or deselect everything within it. 4) The save button will turn blue once you add a name and select at least one feature. Click save and the role will appear in the dropdown when assigning roles to admins.
Tip: in multi-team sites, League-level Administrators have access to those features for every team in the organization. Team-level Admins only have access to their own team's info.) |
| VIEW / EDIT ROLES |
|
Use the View/Edit Roles tab to review the Existing Roles in your organization.
Check/uncheck boxes to quickly change the access for every admin who has been assigned to this Role, |
| DELETE ROLES |
|
When viewing any custom role, there will be a delete role link on the bottom left to permanently delete that role. (Standard roles like Webmaster cannot be deleted). |
IMPORTANT: The Webmaster role always has full access, including inviting other admins to be Webmasters.
| I Forgot My Password |
|
Go to the RESET YOUR PASSWORD page and enter your email address in the field. Click submit request and follow the prompts. |
To create the quick URL, add the page title after the URL.
For example, the admin of the Bedrock Tigers manages their own domain & wants to create a quick URL to their Schedule page. Their quick URL would look like this:
www.bedrocktigers.com/schedule
Quick URLs can be created for these pages:
Specific News Articles
Specific Photos or Categories
| Sending Referrals |
|
Complete the fields & click the Submit button. HTO will reach out to your referral & send them a special link to use. When they purchase their membership, your account will automatically receive a credit for 10% of their purchase price! |
| Share Even More Love! |
|
Use the fields to send the same message to up to 4 friends at a time. Send as many referrals as you want - with enough referrals purchasing memberships, your next renewal or upgrade could be free! |
| HQ |
| Lists the Site ID of the account you are submitting payment for. |
| package |
| Lists the details about what you're purchasing including membership levels. Multi-team sites will list the number of teams & membership level(s) of the teams. |
| upgrade cost |
|
The amount being charged for this transaction. |
| expires on & annual price |
|
Lists the next expiration date for this account. Lists the total cost that will be due at the next renewal date to maintain the current membership level(s). |
| Payments made on this account are made on behalf of the owner. |
| If you are not the Owner of this account, (for example, you are the primary contact for a team within a league), the payment you are submitting is on behalf of the site Owner. The Owner retains control of the account & all of the accounts (also called "HQs" & "sites") contained within. Contact the Owner of the league or organization if you have questions about purchasing upgrades or additions to this account. |
BILLING INFO
| What should be entered? |
|
The billing info that is entered should be the billing address & details that are for the card being used. Typically, this will be the address that the card issuing company sends the bill to. An AVS Mismatch may occur if the incorrect billing address is entered. |
| Receipts |
|
Receipt for this payment will be emailed to the Owner's address. If your email address is different, contact the Owner of the website & request that they forward the receipt to you. |
PAYMENT DETAILS
| Please Note |
|
If your credit card company declines to release funds for this transaction for any reason - including an AVS mismatch - HTO does not have the ability or authority to "force" the charges through. Please contact the credit card issuer for info as to why they declined to release the funds. |
To set your Time Zone:
- Go to Design > Site Details & click the pencil icon to open the Location module.
- Use the Time Zone dropdown to select. Click save to make your changes live.
Note: your Time Zone is also used for recording times on the Guestbook and the Registration features.
Team pricing is based on the package and features:
Rookie: FREE
Pro-Style: starting at $90/year for a single team
All-Star: starting at $180/year for a single team
Champion: starting at $300/year for a single team
Prices scale with the number of teams. Our pricing is among the most competitive in sports website hosting. See team pricing or league pricing. Leagues start at 4 teams.
LEAGUES/ MULTI-TEAM PRICING
Leagues are priced based on the level of package you wish to have, the package level of the Teams in your League, as well as the number of Teams.
League sites come standard with 4 Team Credits. Additional Team Credits may be purchased for a cost depending on the package level of the Team.
There are many factors when calculating the price of your League. You may be entitled to special pricing, depending on the level of site you purchase and the number of Teams in the League. For example you may be surprised to find that making your team sites PRO-STYLE instead of ROOKIE is more affordable than you figured. Play around with this feature to see how you can get the most out of our site at the most convenient price.
Using the League Pricing Tool:
Using the League Pricing Tool, you can quickly and accurately get a quote on any League package you may be interested in!
To use the tool, simply follow the listed steps:
(1) Enter the amount of Teams you wish to have, either manually, or use the + and - buttons.
(2) Choose the package of your League site. Chose a package depending on what you would like to get out of the site and which features you are interested in.
(3) Pick which package you want for your individual team sites. The information on your team sites will carry over to your League, and vice-versa. It is important to note that ROOKIE sites do not have Pictures or Statistics. If you would like your team sites to be able to fully create and modify the Schedule, Roster, or Statistics, your team sites have to be PRO-STYLE or better.
The price of the package you have selected will now display in the Price Box. Press the link to get your League started today.
ANY QUESTIONS? The convenient Selected Package Description box will explain all you need to know about the packages you are choosing as you set up and determine your league structure.
ORG/ MULTI-SPORT PRICING
Contact Support if you are interested in creating a multi-sport website
These cards provide information on how to use your HomeTeamsONLINE sports management site.
| Tabs for GET STARTED CARDS |
|
These cards are arranged by topic (example: Schedule, Website). Only topics related to the type of site you have, such as TEAM, MULTI-TEAM, SPORT, or ORG, are shown. |
| Features Requiring Upgrade |
|
Some GET STARTED cards refer to features requiring an upgrade to a higher package level (ROOKIE, PROSTYLE, ALL-STAR, and CHAMPION) Those cards will indicate an upgrade is required, and either auto-upgrade during the 30 DAY FREE-TRIAL period, or take you to the UPGRADE page after that. We wanted you to be aware of the great features available for the topic you are setting up. There is no obligation to upgrade unless you want. If you upgrade during the 30 DAY FREE-TRIAL and decide you don't really want an advanced feature, you can easily change the package level before you decide to subscribe. |
| Deactivating or Activating the GET STARTED menu |
|
At the bottom of the main menu > Get Started links, you can click to remove the Get Started section and go directly to your features on the standard menu. You can also turn this menu off or on by clicking the Options gear for the Get Started Index, and toggling the menu to hide or show. GET STARTED cards cannot be dismissed individually: You can instead toggle the entire menu to hide it. You can always see the cards by clicking the My Account person icon (top right of every page) and clicking Get Started. |
Setting Up Your Personal Email Login
Click the appropriate link to get started - either 1. if you see your email, or 2. if it is not listed:
This will take you a sign up process to create a new email-based login:
- If your email was not listed, first enter the email address you want to use for your account.
- Enter your name, and make a new password.
- An email will be sent to verify it is your address.
- Click the link in the email, and re-enter you password for security
You will now be logged into your account, with the new features activated!
You will be linked in the role of Webmaster, which provides access to all the same features you were using before. If your email was listed, your role will also include a "key" for owner, billing contact, and/or primary contact. (Go to the People & Roles feature for details about "key" roles)
NOTE: If you use the second choice (email not listed) you can enter an email that you already used for a different sports HQ. Your email login will be detected and your account will also be linked to the sports HQ you are currently logged into.
Frequently Asked Questions
Q. Why do I have to change my login information?
A. In order to allow users to setup a personal network, each user must have their own login ID. Users will now log into HomeTeamsONLINE as an individual person. Sites will no longer have a login ID, instead people will login as themselves, and then they will be given access to a site.
Q. Should I create a separate email login for each sports HQ.
A. No! You can (and should) manage all your sports HQ from one personal email based account! Your personal account is not shared, and your information is not given to the users of different sports HQs. For example, if you want to create a new HQ to use for your business, this is NOT shown to the people using your team site. There is no reason to share your email login with anybody.
Q. There are several links: which link do I use to set up my personal login?
A. If you see an email listed that you are actively using, you should click it. As long as your have access to the email this is the best option, even if you wish to change to a new one later. This way you will be identified as a "key" person (the owner, billing, and/or primary contact.) Otherwise, use the second choice and enter a new email.
Q. What does "email based" mean?
A. Very simply, your personal ID will be your email address. There is no need to create a special login ID that you need to remember. This also allows the use of your email for security purposes: changes to your account will be verified by sending you an email. Many sites use this type of verification - it is a simple yet effective method for keeping your account secure.
Q. What is the "legacy" login system?
A. This is the system where each "site" has a login, instead of each person. We wanted to be sure our current users could continue without having to worry about their account. We know our users are busy with upcoming games and events! So we provided a grace period to allow our customers to upgrade at a convenient time.
Q. How long will you maintain the "legacy" system?
A. The specific date when we will discontinue it will be announced, but it has not been determined yet. We recommend you upgrade your account as soon as you can, so you can enjoy the new features!
Q. I have many people using my site, and they login with the "legacy" username and password. What do I do?
A. Once you establish your personal email login, you will have access to the HTO Network features if you were the webmaster or billing contact listed previously. You can invite the people who use your network by going to HTO Network and adding them - really all you need is their email, and you can send an invite. If they respond to the invitation email, they can create their personal account in seconds, and they will automatically be added to your network!
Q. Should I delete the "legacy" login?
A. Yes! Once you create your personal login, and once any people that work on your site accept the invites you send to their email address, you will want to click the message and remove the "legacy" login. We will keep a prompt on your HQ whenever you login in to remind you! Simply click the prompt and click to remove it, it only takes a second.
This Page lists all the help for specific pages, helpful FAQS and the "I need Help With" section which lists specific Help Topics. These help sections are also linked throughout the site.
| Role |
| The Role section displays the name of the Role you have accepted. |
| Feature Access |
|
The features you have access to are listed and linked in blue.
Grey indicates features that your organization's membership level does not have access to. Go to Schedule > Teams & Packages or contact your website admin to upgrade the membership. |
Key Phrase
First determine the key phrase you want your site to appear for when typed in a search. Remember to choose a good key phrase for your Home Page, rather than a generic phrase that many better optimized sites are already using.
TAGS
You can see the tag section at the bottom of your Edit Home Page in the Meta information. Here are some tips for your tags.
Title Tag
The title tag is very important, and is almost always the heading the search engine chooses for each of its listings. This is where you should place your key phrase. Try to make this phrase unique and specific to your site.
If you have a large title tag, keep your key phrase close to the beginning and you can also place it somewhere in the middle.
Meta Description Tag
The Meta Description tag is often used as the description of your site. Entering a description may help your SEO.
The best way to optimize this is to keep it short and include the key phrase right in the beginning of the tag.
Meta Keyword Tag
This often does not affect your rankings much. Some search engines still use it and it may be worth putting some key words in here.
URL
This is the web address for your site, or any specific page you want to index. It is found in your address bar.
URL Structure
Long URLs are harder to index, so you may want to register a domain name and mask the URL.
LINKS
Linking to quality sites can help your SEO
The most important thing with links is to keep them relevant. For instance, if you have a baseball site, links to baseball related sites will most affect your rankings. If many baseball related sites are linking to your site, your SEO will be greatly improved.
Site Age
The age of your site affects your rankings. The longer your site is online, the better your SEO. It is best to pick a good domain right form the start and keep that domain.
Load Time
It is best to keep you load time quick. If you have several large images or videos or too much content on your Home Page it can affect your load time.
DON'TS - RANKING MISTAKES
Hidden Text
Make sure that all of your text is visible. Make sure that the text is visible against the background (Layout & Media > Colors)
Too Many Keywords
Do not excessively list the keywords and phrases you want your site to come up for on your Home Page.
Duplicated Pages
Do not repeat the same data over and over, or create multiple pages with the same content. Taking pages from other sites can have the same effect.
Cloaking
Cloaking is when you display different information to the search engines than the actual content of your pages. This can get you in trouble with the search engines.
Frames (including iFrames)
Frames may significantly reduce your chances of rankings. It is better to copy and paste the content into your pages. When using Internet Explorer on a PC, you can press the "Clean HTML" button in the text options to strip access formatting when pasting into your pages.
Forwarded Email Addresses
HTO can not provide email services such as Email Forwarding at this time.
Other Email Options
If you'd like to manage your domain, the domain company you choose may offer other features and options for email addresses. Contact different domain providers for details on available features and options.
Keep in mind that if you choose to manage your own domain, you will need to purchase your domain separately from your HomeTeamsONLINE membership. You will also need to keep up with the renewal of your domain and manage the settings so that they point to your HTO website.
No. Your email is kept confidential. You will only receive emails from HomeTeamsONLINE related to your website.
It is important to provide a valid email address so you can receive important website information.
If we are unable to contact you, you may get a message when you log into your site notifying you. If we are unable to contact you, you will not receive any HTO updates or cancel notifications. If you do not have a correct email address entered you will not be able to recover your account information if you lose it.
If you receive this error message that we are unable to contact you, we recommend that you enter [email protected] on your "whitelist", or list of accepted email addresses. Your email program may block the automatic notification emails sent through our email account.
Emails entered on the Coach and Player profiles will display on the visitor site. Contact Support and we can hide these if necessary. These emails will also update your Contact Lists (Rosters & Staff > Contact Lists)
If you have visitor password protection, there will be a link on the login page to contact you. This email is sent through the Contact Form, so your email is kept secure. Visitors may attempt to contact you if they need to request the password.
You may want to add some contact information to the site in case visitors need to contact someone in the League. ALL-STAR or better users can create a custom "Contact Us" page under Layout & Media > Navigation Links.
IMPORTANT: Orders are not tracked on the HomeTeamsONLINE website, they are managed through your payment processing service. (Payment information from PayPal and Stripe is NOT sent back to this website for tracking purposes, unlike the registration feature.) You must log into your payment account to see the product that was ordered along with the payment receipt. Payment notifications are sent directly from the payment processor.
| Setting Up Products to Sell Online |
|
The Store feature allows you to post information about your merchandise with options associated with the products. You can provide instructions for requesting size, color, etc. Be sure to offer clear instructions, with a list of the options that are available.
IMPORTANT: The online store is very basic, its intended to allow an easy way to put in orders for uniforms and other team gear, without needing to set up a third party store solution. Delivery information would have to be explained in the intro message. Normally it should be used for items that you would "pick-up at practice", etc. Some people use the registration package feature instead of the store, which keeps a copy of the form with the additional information you would want for shipping, etc.
|
| Adding a New Item |
|
Click Add A New Product & complete the Product Name, Price, and Description fields. If necessary, use the Production Options field to enter further instructions &/or advanced options for drop-downs for size, colors, pricing, etc. |
| Payment Processing |
|
Enter the required information for the payment method you wish to use. PayPal requires your account email, while Venmo requires your Venmo ID and Stripe is a bit more complicated, so you will want to contact support so we can add the required Stripe codes. You will need to log into your payment processing service to view sales. The Payment processors do not send information back to our website. |
ADVANCED OPTIONS
| Make an Item Required |
|
To make an option required, put an asterisk * in front of the label: * Size * Color |
| Create a Multiple Choice List |
|
To create multiple choice list, use two forward slashes //: |
|
Creating Multiple Options for an Item |
|
To make several dropdown lists place && between options: Label1 // Choice1, Choice2, Choice3 && Label2 // Choice1, Choice 2 Size // S,M,L,XL,XXL && Color // Black, White |
| Options with Special Price |
|
To specify a unique price for a selected option, add the price at the end in square brackets [ ]:
|
| Options with Modifier |
|
To modify the price for a selected option, add the price in square brackets with a plus or minus [-$0] [+$0]:
If you would like to charge per letter, add the modifier like this: Name [+$1/letter] |
| Example with Everything |
|
*Size // S[$20],M,L,XL,XXL[$35] && *Color // Black, White, Red && Name for Embroidery [+$25] OR Name [+$1/letter]
|
| Tips |
|
| Before You Begin |
|
To make things easier, request that your Sponsors provide you with the following:
|
| Posting a Banner Ad |
|
Four Banner Ads can be displayed on your website - two at the top and two at the bottom.
To designate an ad to appear in a specific location on a specific page:
*be sure the Link URL field includes http:// at the beginning of the URL
|
| Tips on using the Banner Ads Page |
|
Use the dropdown to choose Players or Site Admins before posting your message.
| Players |
|
Before you can post messages to your Players, they have to be added to the Roster and invited to edit their own contact info.
Go to People > Roster to add Players. Then, choose edit player to add their address & use the send invite button to invite. |
| Site Admins |
|
Site admins are the people you've invited to help maintain your website. Before you can post a message to the site admins, they have to be invited.
Go to People > Coaches/Staff/Admins & click League Admins**, Team Webmasters**, or Team Admins* to invite people. |
| What about Coaches? |
|
Coaches who have been invited to edit their own contact info can see and respond to messages in the Players Group Chat.
Keep in mind that Coaches and Site Admins are different. If you want your Coach to have administrator access to your website so that they can make edits, invite them as a Site Admin by going to People > Coaches/Staff/Admins > League Admins**, Team Webmasters**, or Team Admins*. |
| League Admins** |
|
Go to the League Admins page if you want to invite people to have access to edit league-level features for every team in your organization. |
| Team Webmasters** |
| Go to the Team Webmasters page if you want to invite someone to be the webmaster for one specific team. They will have access to edit features for only the team you invite them to. |
*Single-Team Structures
**Multi-Team Structures
- Add
Drag new modules and rows onto your page using the blue Add Module and Add Row buttons, then choose what you want to add.
- Move
Click and hold a module or row, then drag it to a new location. You can move multiple items at once within your active layout.
- Archive / Delete
Click a module or row to select it. A red outline will appear and the red action button will become active.-
Rows can only be deleted.
-
Modules can be archived for later use. To permanently delete a module, first archive it.
Then select the archived module from the Archived Modules section and click the red Delete button.
-
ACCEPTED FORMATS
Only.MP3 audio files will work within our text areas and the Music Player.
We recommend that you download the latest ITunes music player, as this is a great free tool for managing and converting your music, and also a place where you can purchase music files. HomeTeamsONLINE is not affiliated with Apple or ITunes. We recommend this tool because it is popular and free.
Here is a link to the APPLE site for downloading ITunes:
http://www.apple.com/iTunes/
CONVERTING AN AUDIO FILE TO.MP3 FORMAT
Open iTunes
Go to Edit > Preferences in the menu bar
Under the General tab, click the Import Settings button
“Import Using:” should be set to MP3 Encoder
Choose Custom for the “Setting:”
Change the Stereo Bit Rate to 80 kbps or less.
There are other options here. We recommend leaving the default.
Choose OK, OK, OK to close the windows.
Now, just right click any song and choose “Create MP3 Version”.
You can also go to Advanced > Create MP3 Version
The new song will appear right next to the original in your “Music” library, or in the Recently Added section.
MULTIPLE SONG PLAYERS
The default player only plays one file, but to add a set of mp3's you can go to websites like www.MixPod.com, build your playlist, then follow the directions for sharing it to get the HTML EMBED code for your website.
Once you have copied the code, log into your administrator page, go up to the Page Editors > Home Page. After the page loads go a Text area and click the 'edit' link to open the Edit Text window. Press the Paste Code (or plain text) button in the toolbar for a pop-up where you can paste your code, insert and Save.
Don't forget to remove the old music player by going up and un-checking the Music Player module, then clicking the Update Module Selections button to confirm. You can clear up some space by going to Layout & Media > File Manager to delete the homeMusic.mp3 file.
Now you should have only your new playlist player on your website.
Making my Music Play on Every Page
You can do this if you are an All-Star or Champion user with a domain name.
Home Page music: First upload your MP3 in the Home Page Music Player module. Then press HIDE to hide it. Contact Support to create a frame so the song will play on every page.
Embedded Music Player: Embed your player in a new Custom Page called "Music". Then contact Support to have this music play on every page. Note hat visitor will not see the music to pause or stop it.
Note that either option only works when using the domain to access your Home Page.
| Tips on Images |
|
| Can I upload videos? |
|
Yes, but uploaded videos must be under 15 MB, and most videos are larger than that.
We recommend creating a YouTube channel for your organization and uploading videos there. YouTube automatically creates embeddable links to your videos that can be added to any text area or module. Once added, the embeded code displays the actual video. |
your website. (Areas marked
 are currently active.)

Only active areas will be shown on your website.
Click  Activate if you want to use an area
(Layout & Media > Navigation Links)
The left side lists the links in your navigation bar, and the right side lists available (unused) links. You can click a link on the right and press one of the green "Add to..." buttons to add this link to either the top or bottom row of your navigation bar. You can also click a link on the left and press a red "Remove" button to remove it from the navigation bar.
You can rename a link by selecting it, going down to the Edit Selected Link section and changing the name in the "Label (Name of Link)" field.
Adding a Custom Page
Adding the Custom link adds a "New Page" to the left side, which you can then rename using the "Label (Name of Link)" field below. This creates a Custom Page that can be used to display any information you like. Custom Pages are a blank text area, and you can edit these pages under Page Editors > Custom Pages.
More help for Custom Pages can be found in our Custom Pages FAQ.
Links to other Websites
You can make any link go to another site like Google.com by selecting it on the left, going down to the Edit Selected Link section and entering the web address (http://www.google.com) into the the "Link (Go to this page):" field. Click the Save Changes button, then go up and click the green Preview Your Site link to see the results. The link you changed should now go Google.com's website. To change it back, switch back to the Navigation Links page, select the same link and empty out the "Link (Go to this page):" field. Click the Save Changes button, then go up and click the green Preview Your Site link to check.
TIPS
- You can remove a page while you are still working on it, and then add it back when the page is finished. This works for both standard pages and custom pages.
- If you create a custom page, but do not see it in your list of custom pages, remove the link from your navigation bar, then save. Next, re-create the custom link.
- Drop-down navigation bars are created through custom HTML files. If you create your own custom HTML navigation bar, upload it to your FIle Manager and contact support, and we can replace the standard nav bar with your custom file.
- You can contact support to change the color, font or size of your navigaiton links.
- You can contact support to change the label or link in your "Home" or "League" navigation links.
| Adding Officials |
|
Click add official to begin.
Entering Email and Mobile Number for an official will allow the official to receive updates if the game they're assigned to is changed. It also allows admins to text the officials by going to People > Message Center. |
| The Officials Feature |
|
Once Officials are added to your website they can be applied to a game. This can be done on the Schedule & Results page for a game by clicking the Officials button:
Once the Officials button is clicked, assign them by clicking the pencil in the Officials section of the game edit:
Next, select the Officials from the drop-down menu and click Save:
Now that Officials have been assigned to a game and the game has been played, it’s time to rate them. This can be done on the Scores edit page by clicking the Rate Officials tab:
Rating them is pretty straight forward. Give them stars, add a comment if wanted, then click the Submit Ratings button to save them. But, that’s not the end of the story. You can now go back to People > Officials and see their overall average. However, they do not display on the Officials page at this time. They only display when you click on an Official for edit:
This view shows the overall average stars the Official has received, but it also allows you to click the link to the right of the average to view individual game ratings and within that there are links that display every individual rating, who made the rating, and any comment they may have left with the rating. |

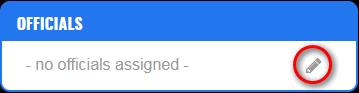
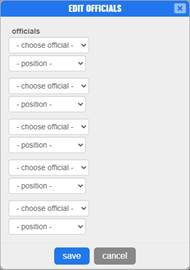
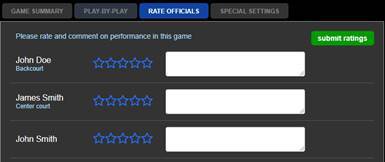
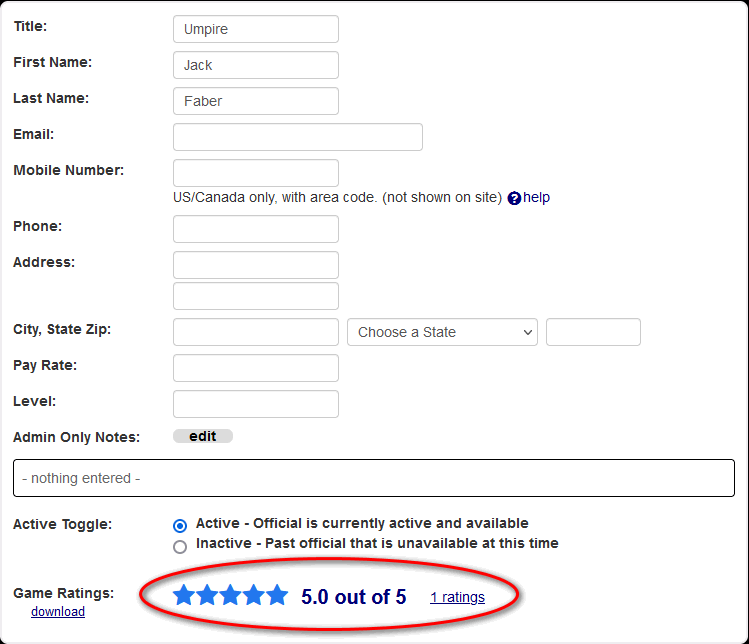
| Archived Game Data |
|
Ratings for officials are stored for past seasons - however archived game details are no longer linked to each official. |
| OVERVIEW - DYNAMIC GROUP MESSAGING! |
|
The Message Center lets you send quick updates to people in your organization. It is designed to meet the needs of sports organizations. • Select groups like players, coaches, web admins. • The unique features allow you to send to groups without revealing members' personal data. • You can also attach a link to your website, such as a scheduled event, new article, etc.
The message center is for broadcasting messages to groups of people. Replies will be sent to the site's Primary Contact email address. (See the Coaches & Staff feature for more about assigning Primary Contact)
You can also switch to "email" mode, allowing you to compose a full email using simple tools. The selection of groups and recipients uses the same dynamic features, however it will send only to email addresses.
|
| HOW TO SEND A MESSAGE |
|
Type a short message and click send!
|
| WHO CAN SEND A MESSAGE? |
|
This feature is available to Webmasters and Team Admins who have access to the Message Center.
|
| WHO CAN RECEIVE A MESSAGE? |
|
A valid email or mobile text number must be provided. For mobile text numbers, we subscribe to a provider lookup service to get the most recent provider data. If there is an issue attempting to send a text, we will attempt to reset the provider for you. In rare cases where the provider cannot be determined, the provider can be manually entered into the person's contact information to ensure they can receive the message.
|
| WHAT IS THE MESSAGE FORMAT? |
|
Use the buttons at the top of the page to let the tool know if you'd like to send a text or an email.
Messages are sent to people with a valid text or email entered on your site. In text mode, the email is used as a backup if a mobile text number is not available. (click the Options tab if you don't want to use email backup) In email mode, the email format is only sent to the recipients email.
Reminder: Texts have no subject line, so for the backup email a basic subject line is added as follows: "Message from <Admin Sending>(<Team>):".
|
|
THE LINK BUTTON |
|
Use the link button to place a link to any page on your site. This is a convenient way to link anywhere on your site, but you can also paste a URL directly into the message. Any properly formatted URL should be a clickable link in any email or text received.
|
| SOME RECIPIENTS SAID THEY DID NOT RECEIVE MY MESSAGE |
|
Sending a message involves several steps. Messages are sent from our OUTGOING mail server. (Note if you send too many recipients it is placed in a queue and it may take several minutes to send them all). However, the message must next go through the recipients INCOMING mail server, based on the provider they use. Finally it is delivered to the recipient. However, it must pass through any spam filters before it reaches their inbox.
|
| MESSAGE LIMITS |
|
You may be alerted if you are sending more than the maximum amount of messages.
|
| RECIPIENT OPT OUT |
|
Recipients can opt out of receiving your messages.
If a recipient notifies your organization of their wish to opt out, be sure to remove their phone number/email address from your lists.
Some organizations choose to include communication notification info in their bylaws since signing up to play a sport will require the organization communicating with Players.
Be sure your use of the Text feature complies with Federal, State, Regional and Local laws.
|
| Recent Messages Button |
|
View all the messages you have recently sent. - Click Message History to view a more detailed list of all sent messages.
|
| Save your List |
|
Save Current List Button
After sending your message to a list, the system will prompt you to save your list.
|
Welcome to HomeTeamsONLINE. This guide walks you through everything you need to bring your league over from LeagueLineup. We have tools to help you import your data and features that go well beyond what you had before.
| Getting Started: Setting Up Your League |
|
Start by creating your free trial account at Sign Up. Pick your sport and name your league. If you run a multi-team league, choose the League option during signup. This gives you a central dashboard to manage all your teams, divisions, and schedules from one place. Key setup steps:
|
| Importing Your Roster |
|
You can import your player roster from a spreadsheet or CSV file. No need to re-enter everyone manually. How to import:
The import wizard supports up to 250 rows at a time and handles players, coaches/staff, and mailing list contacts. |
| Importing Your Schedule |
|
Bring your game schedule over from a spreadsheet. How to import:
You can also use the Schedule Wizard to auto-generate a round-robin or tournament bracket schedule for your league. |
| Bringing Over Past Season Stats |
|
HomeTeamsONLINE supports full box score stats for every sport. For historical data from LeagueLineup, you have a few options: Season Totals (quickest for past seasons):
GameChanger Import:
Game-by-Game Entry:
|
| Setting Up Online Registration |
|
HomeTeamsONLINE includes online registration with integrated payments, no additional fees. How to set up:
Registrants can pay online and their information flows directly into your roster. No separate payment service needed. |
| Permissions and Admin Roles |
|
One of the most requested features from LeagueLineup users. HomeTeamsONLINE lets you define exactly who can do what. How permissions work:
|
| Custom Domain Setup |
|
If you already have a custom domain (like www.yourleague.com) pointing to LeagueLineup, you can point it to HomeTeamsONLINE instead. First, contact us to add your domain to your account so we can get it ready. All-Star and Champion users: we can manage the domain for you. Then update two DNS records at your domain registrar (GoDaddy, Namecheap, etc.). The easiest way is your Domain Setup page, which shows the exact records with copy buttons and tracks your progress. Or set them yourself:
Leave everything else as it is, especially your email (MX) records. Once saved, your secure padlock (HTTPS) turns on automatically, with nothing for you to manage. Your fans will see the same URL they always have, now powered by HomeTeamsONLINE. |
| Communication Tools |
|
Keep your league connected with built-in communication tools:
No third-party email service needed. Everything is built in. |
| Website Customization |
|
HomeTeamsONLINE offers over 1,200 professional website templates. You can customize:
Go to Website > Colors & Style to get started with customization. |
| Need Help? |
|
Our support team is available weekdays 9:00 AM - 4:00 PM Eastern.
We're happy to walk you through any part of the setup process. Many leagues are up and running within a day. Visit our LeagueLineup migration page for more information. |
CURRENT VERSIONS
iPhone / iPad 1.11.4 10/28/2013
Online Connectivity
An issue was fixed where the app would stay offline.
1.11.3 (10/8/2013)
iOS7 Compatibility
The app is compatible with Apple iOS 7.
Data Synchronization
Online data syncs as a background process.
1.11.1 (4/24/2013)
Device Compatibility
Compatibility with iPhone 5 devices has been improved.
Score Edit
Scores can be edited directly from the "Scoreview" scoreboard page.
Android & Amazon 1.11.4 (10/12/2013)
Team Synchronization
Resolved syncing problem with teams removed from the website setup.
1.11.3 (9/12/2013)
Improved Synchronization
The program now syncs to online data as a background process. This fixes situations where a slow connection ties up your device. You can continue inputting data while the sync process is running.
1.11.2 (5/15/2013)
Bug Fix
Fixed issue with Locations not loading.
1.11.1 (4/17/2013)
Device Compatibility
Compatible with Kindle Fire tablets.
1.11 (2/20/13)
Device Compatibility
Screen stretching has been improved for different sized devices.
Not supported:
Blackberry, Windows Mobile
When you have a league with multiple admins updating scores at the same time, there will be no functionality issues. You can set it so that one or both teams can update their scores at the same time, live or after the game, from a mobile device or their computers.
Synch Up!
The apps will auto sync every 5 minutes by default with the web and also do a check any time data is submitted.
Averting Conflicts
Conflicts are ignored while a game is In Progress (games are set In Progress by default in the App). When both teams post, they will automatically overwrite the values of the other team.
After either team marks the game as final, the app will confirm if any changes have been made, and if so will notify the app user there is a conflict and give them the option to sync (to what the other team posted), or overwrite them with their own scores (which will case a conflict for league review).
Team Posting Rules
This functionality can be modified under Schedule > Options: Team Posting Rules.
* Auto-Update Opponents Score
Auto update is the default. As noted, if one team finalizes and the other team tries making changes, a conflict notice will be sent. This is the easiest way to manage, and only in exceptions should have to be involved and review.
* Each team enters own score
The alternative is he change to each team enters own score. This will cause the team to post the results only to their own account. The league website will default to the Home Team values in case of a conflict.
Conflict Resolution
The League Admin Schedule will color code the scores buttons and notify of any conflicts (bright red). It will also notify if only one of the teams have entered scores. The league admin can go into the scores and save to push the values down to both teams and settle any conflicts. This requires more work on the league admin, but prevents teams from auto posting their results to the opposing teams website.
| Division* |
|
Use the Division dropdown to display the pitch count for a specific division in your organization.
If you want to display each division in it's own module, activate as many Pitch Tracker modules as you need & use this dropdown to set one division per module.
Keep in mind that if All Teams is selected for the Division*, all of the teams in your organization will be subjected to the eligibility settings for the Age Group that is selected. |
| Age Group |
|
Select the Age Group for the division. If you have a single-team website, select the age group for your team.
By default, HTO Pitch Tracker uses MLB's guidelines. Be sure your organization is following your local guidelines. |
*Multi-Team websites only
Use the question field to enter the topic you'd like feedback about.
Use the Choice fields to list up to six options for Visitors to vote on. Note that you do not have to use all six fields.
If you do not want the voting results to be displayed on your website, check the do not show results on site.
Click the Advanced tab to:
- Unblock: allow visitors to vote multiple times.
- Reset: clear the results of the poll and keep the current questions and answers allowing visitors to vote again.
- Clear: clear the questions, answers, and results to begin a brand new poll.
- Archive: copy the results to a News article and clear the current poll completely.
#showhelp-630#
| Schedule Module Options | |
|
• use: controls if the schedule is displayed by the game or by the day. • show next: controls how many future games will be displayed. • show last: controls how many past games will be displayed. • dropdown: lets you choose to show either newest or oldest games first. • divide by: allows leagues to decide whether or not to show Divisions. • Sport/Division: select which sports, divisions/teams displays • game types: controls which types of games are displayed.
Use the check boxes to control what details are displayed for each game/event.
Note that more than one Schedule Module can be activated on your Home Page. These Schedule Modules can be set to display different Game Types. |
| Standard Module Options |
|
#showhelp-630#
|
| Slideshow Module Options | |
Slide Show Dimensions
Transition: control how many seconds images display. Display Options: disable controls from visitors. |
| Captions | |
|
Hide Captions: Note that if you have not entered a caption, the caption area will auto-hide. You can also hide ALL captions with this setting if you prefer to show only the image.
<a href="http://www.WebsiteURL.com">Text You Want To Appear</a> |
| Standard Module Options |
|
#showhelp-630# |
You will need to find the correct URL for your various accounts. See the sections below for finding the URL for different platforms.
1. Click on the Add Module symbol on the home page edit feature, and select the module you want to use.
2. Select other options, such as the title, and whether you want to display the title. (See below for other module settings).
3. Paste the URL from your social media account into the URL field for the module and you should see the results!
| Q: How Do I Embed a YouTube Video on my Home Page? |
| For Youtube it is fairly easy, just click to get the share link, or copy the link from your address bar. Paste the link into the YouTube Video URL field and save. |
| Q: How Do I Add an X (Twitter) Module to My Home Page? |
|
Go to your X (Twitter) account and copy the URL by selecting share and copying the link. |
| Q: How Do I Add a Facebook Module to My Home Page? |
|
If you go to your Facebook page, you can click the web address and select share, and select copy. Paste this URL into the module options and save. You should see your Facebook feed on your homepage.
Here is a copy of the Facebook Help Page: Anyone with a Facebook account can create a Page or help manage one, as long as they have access to the Page. When someone likes or follows a Page on Facebook, they can start seeing updates from that Page in their Feed. Note: Pages are different from Groups. Create a Page
|
Note: This module does not show banners, it is simply a standard link to your Sponsors page.
#showhelp-630#
Roster Module Filters.
You can insert more than one Roster Module on your home page, so you can filter modules for different positions or teams.
- Team: Filter by Team, or show all Teams
- Position: Show all positions, or filter by a position
Roster Module Display Options
- Scroll Options: Auto-scroll, or manual scrolling
- Hide Player Number: On by default, click to hide
- Hide Player Position: On by default, click to hide
- Show Player Year: Off by default, click to show
- Show Player Age: Off by default, click to show
- Disable Link to Player Profile: Links to player profile. click to disable.
#showhelp-630#
If you forgot your password, or are looking for your account information, you can paste the email address of the account in the "Forgot?" password link in the login section on our Home Page. (www.HomeTeamsONLINE.com)
If you are unable to access the email account associated with your account, contact Support and we will look into it for you. However, keep in mind that HTO does not give out any password or account information for security.
USING, EXITING, & RETURNING THE GET STARTED CHECKLIST
The setup checklist will help you quickly enter the most important information you need to get started. The navigation lists the main features, and once you add an item it will add a green checkmark.
Follow the steps in order using the help cards for a smooth walkthrough - but feel free to click a link on the menu if you want to return to something or jump ahead. The only rule is -- there are no rules!
- LEAVING THE CHECKLIST NAV: Click the Exist Setup link to go to the standard navigation and dashboard.
- RETURNING: click the Get Started link on the standard navigation, and click the Get Started button at the top right to return
|
VIEW YOUR ACCOUNT INFORMATION |
|
Tap the blue "person" icon on the top right corner to view your personal account information. |
|
HOW TO ADD TEAMS |
|
Use the TEAMS feature to add and edit teams |
|
PRICING |
|
Click here to see the latest pricing, packages and features: |
|
SETTING UP SCHEDULES |
|
Use the SCHEDULE & RESULTS feature to add and edit games and events to your schedule one at a time. However, the IMPORT and SCHEDULE WIZARD feature can be used to automate the scheduling process, so see the sections below on using those options.
If you already have a spreadsheet or email with your schedule listed, you can use the SCHEDULE IMPORT feature. You can paste your list of games into the SCHEDULE IMPORT and follow the steps to match your columns up so it knows how you listed your teams, locations, dates, etc. You can even import additional games, and it will help you match up your new list to your existing teams. On top of that, it will even create new teams for you if you need to add them when you import! |
|
ADDING PLAYERS TO YOUR TEAMS |
|
Use the ROSTER feature to add and edit players one at a time, however there is an IMPORT PEOPLE feature to automatically do this. See below for using this feature.
|
|
SETTING UP YOUR PUBLIC WEBSITE |
|
HomeTeamsONLINE has amazing tools to set up and customize your sports program's website. You can click the purple "ACTIVATE" button on the right (under the blue icon) to quickly make your website live. Your schedule, scores, rosters, etc., will be posted automatically. You can then use many advanced customization features to do just about anything you want!
|
|
ADDING REGISTRATION FORMS |
|
For CHAMPION packages, you can create as many online registration forms as you need for your organization. You can link to most of the popular payment options. We do not add on extra fees per transaction!
The latest payment options are shown when you click "Payment Options" when editing a form
|
|
ADDING COACHES & STAFF TO YOUR TEAMS |
|
Use the COACHES & STAFF feature to add coaches, staff, and even officials to your teams and leagues. To automate this process, there is also an IMPORT PEOPLE feature. See below for using this feature.
|
|
COMMUNICATION TOOLS |
|
As you add players, coaches, staff and fans you automatically have them available for emails and texting.
|
|
SETTING UP COACHES & STAFF USING THE PEOPLE IMPORT |
|
If you already have a spreadsheet or email with your various players, coaches, etc, listed, you can use the PEOPLE IMPORT feature. You can paste your list of people into the PEOPLE IMPORT and follow the steps to decide what type of people (coaches, players) and match your columns up so it knows how you listed names, titles, contact info, etc.
|
|
POSTING PAGES |
|
HomeTeamsONLINE has many standard pages that you can use for your webpages, and you can also create CUSTOM PAGES as well. All your games and events will have their own page, along with player profiles, coaches, and much, much more. Everything designed to work on all different devices automatically, from older phones to big screen computers!
|
|
DESIGNING YOUR SITE |
|
HomeTeamsONLINE has amazing tools to design the look of your website. We provide many levels of customization (power users love us!). Keep it simple or get into advanced customization, its up to you!
|
| Sport-Activity |
| What is your sport or activity? (Many team sports have the advanced stats feature, which will be activated when you select them.) |
| One Team or Multi-Team? |
| Are you managing just one team, or will this be several teams, like a league or school. (Note that you can change from one team to a multi-team later.) |
| Organization Name |
| Type the name of your organization (team, league, school, association, etc.). This is the name of your website. (You can change this later.) |
| Season |
| This allows you to track scores and stats over many seasons, depending on your organization. You may have only one per year, or perhaps you have spring/summer/fall/winter leagues, or by semester. |
| Periods/Innings per Game |
| This will set the default in your game results, but you can change this later. |
http://hometeamsonline.com/neworleansjazz/
OR
hometeamsonline.com/neworleansjazz
The Username is NOT case sensitive, so use lower case and capitals as you like, and either will work when someone is locating your team's website in the future.
You cannot use SPECIAL CHARACTERS (@, #, &, ",...etc) or SPACES, but you may use a hyphen or underscore (- or _) if you need to.
Using websites and email is always increasing in popularity, and so are the number of attempts at hacking into networks with attempts to steal data or disrupt business. Here are some reminders to help keep your computer and website secure:
1) HomeTeamsONLINE will NEVER ask you to give your password or other private information in an email. Don't respond to email requests for personal information - even if it looks like it is from an organization or even a friends email. Alway check links to websites very carefully.
2) Note that payments on our site are only done through the secure checkout after you log in, and be aware that HomeTeamsONLINE immediately deletes all but the first and last four numbers of the credit card as soon as it is submitted for authorization. We do not store full credit card numbers anywhere.
3) Be very careful of giving out your site password to anyone, and if you use a public computer, do not save the password in the browser. It is good practice to change your password often, especially if you suspect it could have been told to other people you can't count on.
4) Here's some other general tips:
- Keep your virus protection software up to date.
- Don't open emails from unknown sources, and be careful even if you think it is from a known source. We generally recommend you delete ANY email with an attached file of any sort unless you specifically made arrangements for someone to send you something. Email names can easily be "spoofed" and sometimes your friends may have infected computers that are being used to send malicious spam.
- Make sure you use a good password for your router and especially your wireless networks.
- Be very careful of the sites you browse, and if you get one that opens endless pop-ups with blinking text and load bars with warnings, etc., DO NOT start clicking anything: slow down, take a deep breath, and carefully shut down your browser application. If your confused, you might want to shut down the system directly. A lot of malicious programs "disguise" themselves as a legitimate virus scan or operating system pop-up window (even if you have a pop-up blocker) and try to get you to panic and click the wrong thing.
- When in doubt, delete it, turn it off, shut it down. Users should all be aware that many emails they send might get treated as spam and never opened - be understanding about the need to err on the side of caution. If you do send something important you'll want to follow up and verify the information was received.
By being aware of the ways computers and networks are attacked, and taking precautions, we can hopefully put malicious hackers out of business!
#showhelp-1016#
| The Main Menu & Getting Started |
|
Use the Navigation Menu on the left side to Navigate your site #showhelp-1017# Set up quickly using the Get Started menus. |
| My Account & Important Links |
|
Click the icon to review your account. Click your Team Name to view site details, or navigate multi-team sites. |
| Page Header Links |
|
Click the links at the top of the page to view alerts, options and help:
Bell - (dashboard only) shows alerts about your account. A red number indicates the number of alerts.
|
| The Website and Admin Tabs |
|
Click the WEBSITE tab on the top right to preview your website. Click the ADMIN tab to return to the Admin view and edit the page you are previewing. |
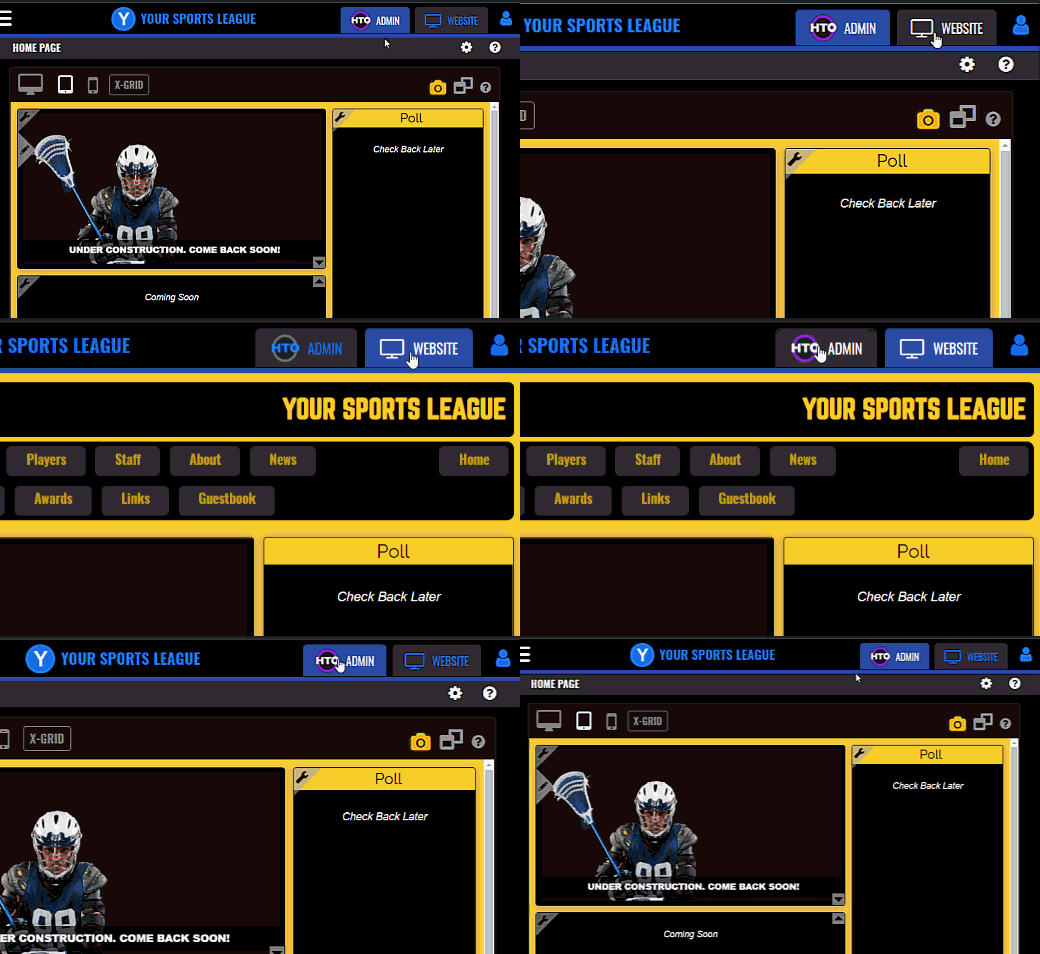
| Upcoming Schedule Module |
|
The schedule displays the current month & date by default. Click the icon in the upper right-hand corner of the module to change the view. |
| People |
|
Click 'Send a Message' to go to the Message Center, where you can quickly message the people in your organization. Convenient links quickly take you to 'staff' (Coaches & Staff) 'players' (Roster) and 'overview' (People Overview).
|
| Other Dashboard Modules |
|
Team Links |
| How to Get Help & Support |
|
Click the Headset Icon "Contact HTO" at the bottom of the menu to email or call the HTO Support Team! |
| More Video Help |
| Advanced - Add Icon to Home Screen on iPhone |
|
Note that iPhone is restrictive - home screen icons can only be created manually.
|
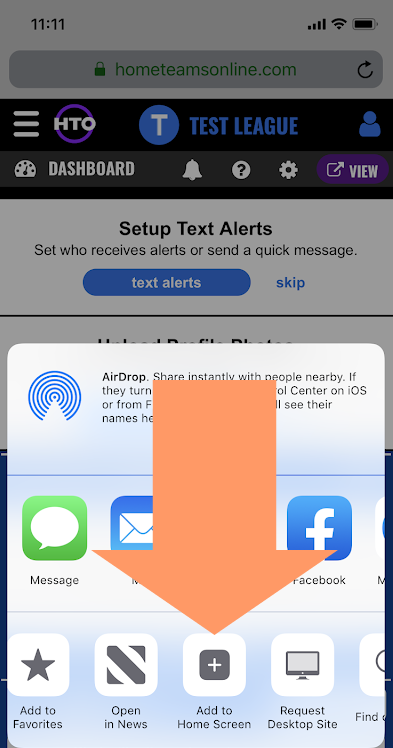
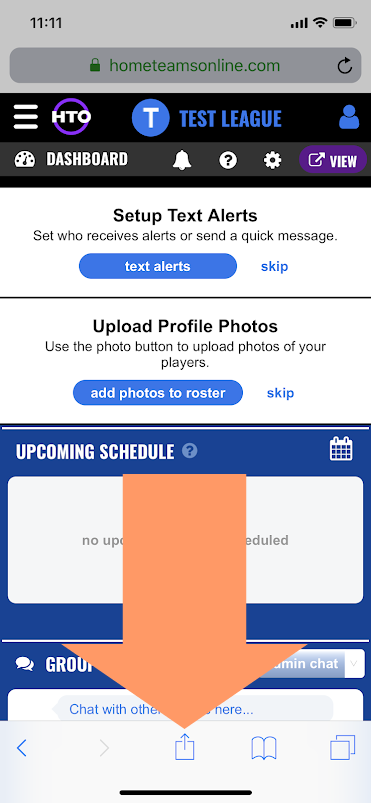
Below is a list of 3rd party plug-ins that you may wish to try on your website - it is based on plug-in code popular with other users. Contact us to recommend a 3rd party plug-in that you have had good results with (or to suggest removing one from the list) . More Help | Send Your Suggestions
Animoto - Produce videos from your photos, video clips and music.
BannerSnack - Create your own flash and gif banner ads.
HTOtournaments.com - HomeTeamsOnline Dedicated Tournament Management Service
Cincopa - Enhance your website with videos, photos and music.
Facebook - Connect and share with people in your life.
Flickr - Organize your photos and create slideshows.
GoogleAnalytics - Track your website traffic.
GoogleCalendar - Organize your schedule and share with others.
Google Photos - Photo storage software from Google that allows you to organize and share photos.
ImageShack - Image hosting with photo and video sharing.
Instagram - Post photos and connect with fans
JotForm - Create web forms and post it on your website.
LuckyPotLuck - Create, manage and share your potlucks.
NetVibes - Choose from thousands of widgets to display on your website.
phpBB - Open source bulletin board used to stay in touch with people.
ProBoards - Customize and manage your own forum.
Twitter - Real-time information network that lets you share and discover what's happening with people.
Ustream - Platform for live video streaming of events online.
Vimeo - Community of people passionate about sharing their videos.
YouTube - Video sharing website to upload and share videos.
HomeTeamsONLINE is not affiliated with the companies listed here and is not responsible for problems resulting from inserting their code on your page. Use 3rd party plug-ins at your own risk.
Boards2Go - Create message boards that integrate into your website.
Chatango - Add live chat to any web page.
phpBB - Open source bulletin board used to stay in touch with people.
ProBoards - Customize and manage your own forum.
HomeTeamsONLINE is not affiliated with the companies listed here and is not responsible for problems resulting from inserting their code on your page. Use 3rd party plug-ins at your own risk.
There are a number of 3rd party software programs that will allow you to embed their code onto your HomeTeamsONLINE website. This allows you to take advantage of their unique service and display it on your website. An added benefit is that you do not use MB space on your HTO website. Your files are saved on the 3rd party website.
To display a 3rd party plugin on your website you will need to copy their "embed code" and paste it on your HTO website. You must first click the "Edit HTML Source" button in the text editor toolbar before pasting into your page. To automatically embed your code into HTML you can click the "Paste Code" button in your text editor. This will allow you to paste your code where you want without having to decipher code.
If you still need assistance implementing your 3rd party plugin contact us.
HomeTeamsONLINE is not affiliated with the companies listed here and is not responsible for problems resulting from inserting their code on your page. Use 3rd party plug-ins at your own risk.
All | Photos | Videos | Clocks | Forums | Social Networks | Other
Challonge - Service for creating advanced Tournament Brackets.
EBracket - Service for creating advanced Tournament Brackets.
Feedjit - Traffic monitoring tool for your website.
FormSmarts - Create web forms, publish them online, and get form results.
GoogleAnalytics - Track your website traffic.
GoogleCalendar - Organize your schedule and share with others.
JotForm - Create web forms and post it on your website.
LuckyPotLuck - Create, manage and share your potlucks.
NetVibes - Choose from thousands of widgets to display on your website.
Sign Up Genius - Service for creating online sign up sheets.
HomeTeamsONLINE is not affiliated with the companies listed here and is not responsible for problems resulting from inserting their code on your page. Use 3rd party plug-ins at your own risk.
All | Photos | Videos | Clocks | Forums | Social Networks | Other
BannerSnack - Create your own flash and gif banner ads.
Cincopa - Enhance your website with videos, photos and music.
Flickr - Organize your photos and create slideshows.
Google Photos - Photo storage software from Google that allows you to organize and share photos.
ImageShack - Image hosting with photo and video sharing.
Instagram - Share photos and connect with fans.
Slideful - Create slideshows to embed into Text modules.
HomeTeamsONLINE is not affiliated with the companies listed here and is not responsible for problems resulting from inserting their code on your page. Use 3rd party plug-ins at your own risk.
All | Photos | Videos | Clocks | Forums | Social Networks | Other
Facebook - Connect and share with people in your life.
Instagram - Share photos and connect with fans.
Twitter - Real-time information network that lets you share and discover what's happening with people.
HomeTeamsONLINE is not affiliated with the companies listed here and is not responsible for problems resulting from inserting their code on your page. Use 3rd party plug-ins at your own risk.
All | Photos | Videos | Clocks | Forums | Social Networks | Other
Animoto - Produce videos from your photos, video clips and music.
ImageShack - Image hosting with photo and video sharing.
PhotoBucket - Host your images and videos and share them on your website.
Ustream - Platform for live video streaming of events online.
Vimeo - Community of people passionate about sharing their videos.
YouTube - Video sharing website to upload and share videos.
HomeTeamsONLINE is not affiliated with the companies listed here and is not responsible for problems resulting from inserting their code on your page. Use 3rd party plug-ins at your own risk.
An auto-swap has been implemented to revert to the TinyMCE editor for IE 10 users only. We recommend TinyMCE for IE 10 users to avoid issues. If you are an IE 10 user and you really want to use CKeditor, you can temporarily flip to "compatibility" mode in IE by clicking the "broken page"icon in the browser address bar - but we recommend clicking back when done.
There are a number of popular web page text editors available. Since each has unique features and drawbacks, we have installed several options for our users:
- CKeditor - This is the default editor. It has many features, and generally leaves the existing HTML code as is.
- TinyMCE - This editor has some advanced features, but also will reformat HTML code which may result in unwanted effects.
- HTML_code - A pure text only editor. You can view and edit the HTML code directly. Great for power users, cutting and pasting code, and troubleshooting.
- IE_Legacy (Internet Explorer users only) - This was our original editor, but it only works in IE. It still is a good editor, and if you have complex pages with embeded code you may want to continue using it.
We have designed the pages to allow you to "hot swap" your editor while you type. This will allow you to use certain features found in one or another editor, and give you a chance to review before you finally click "Save". Note that after you save the editor will reset to the default.
IMPORTANT: When you switch editors your page content will be reformatted! - Back up all you work before making this change. (You can usually cut and paste into Word or a formatted Email, or you can switch to the code view and copy the code as plain text to be sure you make a complete copy.)
CHANGING THE DEFAULT EDITOR: Contact support and we can change the setting for the default editor. Changing the default will affect all the pages on your website that have a text edit area.
 CKeditor
An "Advanced Editor" with many features, and it doesn't reformat the page the way the TinyMCE editor does. We have linked it to the Image Manager that lets you view thumbnails of your images, and even rotate and crop them. It also allows multiple files to be uploaded at one time. There are many other new features, for example you can insert special characters such as ®, or emoticons, plus powerful tools such as a CSS editor, as well as an option to download a spell checker.
TinyMCE
This "Advanced Editor" has the most features, including all the features of the CKeditor plus some additional media embedding tools. However this editor tends to reformat the pages, and has some issues that cause it to fail for certain browser situations. We made it available for power users, however be sure to backup work, especially when changing to and from this editor.
HTML_code
A clean text only editor that simply shows the code. There are no styling and formatting features, you will need to have some understanding of HTML and CSS to use it. This is great if you want to be 100% sure you are copying all the code on the page exactly as it is. Since many programs (such as email) interpret and format HTML code on the fly, be sure you copy into a text only program, such as "Notepad".
IE_Legacy
The original "IE Legacy Editor" does not have as many features as the advanced version, however existing users, or users with older browser may want to keep using this version to avoid unexpected formatting changes. It is a very stable editor.
NOTE: This editor does not wok on preview pages such as game or event previews. Also, it is not compatible with IE 10 on WIndows 8.
FAQS:
What if my page gets messed up!?
If you try an Advanced Editor and your page content unexpectedly gets reformatted, contact support and we should be able to resolve the issue.
Why can't the TinyMCE editor just leave my code as is?
The same reason this editor has more features is the reason it "messes" with your code. The auto-reformatting is "built in" - otherwise the program and its features cannot function and work in all broswers.
Why can't we just add the features to the IE_legacy editor?
This is a similar issue as the last question - the additional features can only function if the page content (HTML and CSS code) adheres to the most strict webpage standards. Internet Explorer has different standards than other browsers. This is an unfortunate result of the "browser wars" - browser developers each have their own special "features" that only function when using their software. Advanced modules won't work until non-standard code is removed.
| Photo | |
|
Click photo to add a photo that will appear at the top of the About page, above any text you choose to add.
Add a Photo Caption that will appear directly below the photo. |
| Story |
|
Use the text editing tools to enter the information you'd like published on your website. See the Using the Text Editors help topic for detailed info on these tools.
Be sure to click save in the upper right-hand corner to make your changes live. |
The HTML Editor is available by switching to the HTML editor at the bottom of any text areas, ore pressing the Source button in the toolbar. Those who prefer HTML only can set the HTML editor under Teams & Schedules > Schedule & Results > Options > Editing Defaults.
What is HTML?:
HTML stands for Hyper-Text Markup Language. It is a simple formatting language created for the Internet. Most of the formatting you see on the Internet is created using HTML, including your HomeTeamsONLINE website. In the early days of the Internet, you would have to understand how to use HTML to create even simple documents for display. Now there are many tools which allow you to create documents in sophisticated formats without having to know anything about HTML. HomeTeamsONLINE has included a special editor so you have further control over the formatting of the text you place on your website; this editor actually creates the HTML code for you.
Using the HTML Editor Features:
You can format text by simply highlighting the characters and words you wish to format, and clicking one of the formatting icons on the HTML editor's menu bar. Clicking a second time will remove the formatting in most cases. The menu bar has the following features as shown in this picture:
Bold, Italic, Underline, Justify Left, Center, Right and Full, Bullet List, Number List, Left Indent and Right Indent.
HTML Errors:
If you try to edit using HTML codes directly and make a mistake it may cause problems displaying the rest of your page. If you suspect a problem, the easiest solution is to delete all or most of the text in your text entry box and resubmit it.
There are many things that can "break" your Home Page, causing loading issues or preventing some modules from appearing.
Causes: Pasting text
Use "Paste From Word" to paste text from ANY source. This includes text copied from other sites, emails or even documents like Word documents. Pasting text using "Paste" or Ctrl+V on your keyboard can paste bad code in the text area. This code can immediately break your Home Page or even linger and case issues later on. When text is pasted from multiple sources, the bad code starts conflicting and causing major issues.
Tip: the Clean HTML tool can be used to clean an entire text area of bad code, but it will also remove your formatting that you'll have to re-apply.
Causes: HTML
Make sure to paste HTML code using the "paste Code (or plain text)" button. Pasting code directly into the text area will not work, and will often break your page.
Solution: The Home Text Debug Page
There is a link to the Debug Page at the bottom of the Edit Home Page, and also in the loading message if you page is not loading. Use the debug page to access the code directly. Most often, this is to find and remove the last ting you pasted that caused the break.
I don't see the Debug Link?
Try pasting this URL in your admin pages to open the Debug Page:
https://www.hometeamsonline.com/baseball/HomeEditText.asp?
Trick to fix broken code
Often, a broken Home Page is due to missing code. In order to fix this, follow these steps:
1. Access the Debug Page
2. Copy everything in the area causing issues.
3. Delete everything you copied, and save.
4. Open the blank text area normally by pressing Edit above it.
5. Press Paste Code (or Plain Text). Paste all of the code, and Insert
6. Save
The program should automatically fix broken code, and often fix the page, though some of your text elements that were broken may need to be deleted.
For assistance with your HTML, contact Support.
HTML Basics
There are many common HTML codes that you can add to your text entries.
Click here for a summary page with a few examples.
Adding Images and Files to your text areas
You’ll first have to go to Layout & Media > File Manager to upload your photo or file. Right click/Shift click the image in the preview section to open the properties of the image. Copy the link/URL from the properties. Next, go back to the text area you would like your photo. Press the Insert/Edit Image button in the text options, and insert the URL you copied form the properties.
The URL should look like this:
http://www.hometeamsonline.com/photos/SPORT/USERNAME/NAMEofFILE.jpg
Enter your correct sport, username and the full name of your file as it appears in your File Manager for the image URL.
You can also insert videos, documents and other files using the same procedure.
| DEFAULT SETTINGS |
|
The default size when uploading images is 600 x 800 pixels, which is a good size for viewing on a website. To change the default size for a single upload, click Upload Files and in the popup, use the max image size dropdown to select a size. To change the default size for every upload, go to Design > My Files and click the gear icon on the far right. Click File Uploads and use the Auto Image Size drop-down to select a size. |
| IMAGE FILE SIZE LIMITS |
|
Uploaded images must be under 15 MB. Larger images are rejected by the uploader and need to be resized before uploading. For viewing on the web, images do not need to be larger than about 800 pixels wide. Typical sports photos fit well within 100-300 KB, so even small storage allocations hold hundreds of images. |
| CHANGING AN IMAGE FILE SIZE |
|
We recommend using Google to search for the best solution for you to resize your images. The internet offers many free online resources along with many forums that offer step-by-step instructions using the program you choose to use for resizing. A good resource that many Windows users have access too is Microsoft Paint. Search "resizing images using Mircosoft Paint" for current information on resizing using Paint. |
The original IE_Legacy editor in Internet Explorer does not have as many features as the advanced CK version. However existing users, or users with older browsers, may want to keep using the original to avoid unexpected formatting changes. Whichever editor you use, make sure you have the latest updates for your web browser.
The CKeditor has many powerful file and image management features, as well as some enhancements to basic features.
Text input and format - Standard tools for changing font color and size, using bold, italic, etc. are available. There are also options for text alignment, bullet and number lists, and indenting. These tools are similar to those found in programs like Word. Try the various options on text you have typed to see the effects.
Edit CSS Style - This feature allows very fine control over your text format using standard CSS to define the styles. Those not familiar with CSS can still try the various styling options. Be aware that CSS (Cascading Style Sheets) can get very complex and you may often get unexpected results!
To use, first highlight your text.
Press the Edit CSS Style button.
Choose your options, then click “Apply”.
Press “Update” when have finished making changes.
 Image Manager - Built into the editor is a very advanced image manager. When you click this tool you will see thumbnails of all the image files currently uploaded onto your website. Non-image files are handled in the File Manager (or change the Type in the dropdown). When you left-click on an image you can Insert Into Page.
Image Manager >  Upload Files-The Upload feature in the Image Manager allows you to upload several files at the same time! Additionally, your image files will automatically be resized for the web as they are uploaded!
-The original photos on your computer are not effected.
- The sizing options can also be changed on the bottom right.
- Change the default sizing in the Options tab on the Layout & Media > File Manager Page.
It is very easy to upload a group of photos from a digital camera, and in most cases, you don't have to worry about oversized images.
Image Properties - You can place a URL (web address) of an image to link to here to put a new image in or edit various formatting settings for an existing image, such size, alignment for text-wrapping and adding a border.
 File Manager - For non-image files. Many common formats can be uploaded
including:  pdf,
 swf,
 word,
 ppt,
 movie,
 excel, and more.
Table - Use the table features to place a basic table onto your page.
TIP: Enter at least 1 for the Border Width to make the border lines visible.
 Insert Special Character - This handy feature lets you find special characters and place them in your page.
 Paste Code (or plain text) - Mainly used for inserting HTML into your text area.
 Paste From Word - Cleans out some of the formatting to make text from Word compatible with the web.
TIP: Any time you are pasting text into your text area, you’will want to use this as there will be extra formatting that needs to be removed. This is not just for Word, but for any source such as from another website or from any text document.
 Undo & Redo - Yes, there is an undo button! Click this handy lifesaver of a button after you make a mistake.
 Spell Checker Plug-in (IE Only) - You may download the "IE Spellchecker" plug-in if you use Internet Explorer. (This is a third party plug-in, so use it at your own discretion.)
 Remove Formatting - For text already placed on the page that has formatting issues, click this to remove certain formatting.
 Clean HTML - A special mini-app developed by HomeTeamsONLINE. This gives you more control of which formatting elements to keep or remove. Another lifesaver in certain situations.
This is good for resolving issues when you are unable to properly edit your text due to formatting/code issues. It can also be used as an alternative to Paste as Plain Text/ Paste from Word.
View Source for HTML (code) View - For those power users that want to get right into the code, you can still view and edit the HTML directly. Use this only if you have experience with HTML. (A common mistake is removing a closing HTML "tag" which may result in seeing a blank page or odd formatting.
Switch to the HTML View to paste EMBED code, such as for a YouTube video, or code for an external module. Make sure to switch to the HTML View whenever pasting code.
THE HOME PAGE TEXT EDITOR

1. Article Heading: For a "News" style title for your text area. You can also skip this section and type the title in the body.
2. Text options: Tools for editing your text areas, as described above.
3. Body: This is where you enter all of your content that will display on your site.
4. Editor: Switch to different editors if you have issues with the CKeditor or prefer a different editor.
5. Add a Photo: Add a "News" style photo that will be cropped n the top right of the editor on the Visitor Site. (For larger images, use the Image Manager in the Toolbar.
6. Photo Caption: A caption for your "News" style photo.
7. Save Changes
8. Archive Story to News: Erases all content in your text area and moves it to a News Article in the "Home Page Archives" category. (Available for All-Star or Champion users)
9. Cancel your changes. All changes since editing the text area are erased.
10. Help Topic regarding the editors
11. Minimize the toolbar
12. "X". Works the same as Cancel.
Clicking this link will permanently delete this team. There will be no going back. We're warning you now.
ALL OF THE DATA ASSOCIATED WITH THIS TEAM WILL ALSO BE DELETED including:
- players on the rosters & all of their profile data
- games including scores and stats
- links that go to this team's website
|
HOW TO FIND YOUR FEATURES WITH THE MAIN MENU |
|
Once you log in, you can find all the features by clicking the menu icon on the top left corner. Features are grouped in the main categories of PEOPLE, SCHEDULES, WEBSITE, and DESIGN. For example, anything to do with Coaches, Players, Web Admins, Staff, Mailing Lists, can all be found by tapping the PEOPLE category. |
|
HOW TO FIND YOUR ACCOUNT |
|
Tap the blue "person" icon on the top right corner to view your personal account information. You can enter your email and text number to receive and send communication from your sports program. (Note that contact information can remain hidden and you can still receive schedule alerts, and team notices.) |
|
HOW TO ADD TEAMS & SCHEDULES |
|
Use the TEAMS & PACKAGES feature to add and edit teams one at a time, including creating divisions and other groupings. However, the IMPORT and SCHEDULE WIZARD feature both can automate that process, so see the sections below. – You can find the TEAMS & PACKAGES feature in the SCHEDULES group when you open the MAIN MENU.
Use the SCHEDULE & RESULTS feature to add and edit games and events to your schedule one at a time. However, the IMPORT and SCHEDULE WIZARD feature can be used to automate the scheduling process, so see the sections below on using those options. – You can find the SCHEDULE & RESULTS feature in the SCHEDULES group when you open the MAIN MENU. |
|
SETTING UP TEAMS & SCHEDULES USING THE SCHEDULE WIZARD |
|
You can use the Schedule Wizard feature not only to make a league schedule, but it can also create your teams. There is an option to enter all the team names, and even the location of their home field. Once you create the schedule and you are satisfied with it, you can import it into your website with access to all the great schedule management features, like text alerts and of course scores and stats. – You can find the SCHEDULE WIZARD in the SCHEDULES group when you open the MAIN MENU. |
|
SETTING UP TEAMS & SCHEDULES USING THE SCHEDULE IMPORT |
|
If you already have a spreadsheet or email with your schedule listed, you can use the SCHEDULE IMPORT feature. You can paste your list of games into the SCHEDULE IMPORT and follow the steps to match your columns up so it knows how you listed your teams, locations, dates, etc. You can even import additional games, and it will help you match up your new list to your existing teams. On top of that, it will even create new teams for you if you need to add them when you import! – You can find the SCHEDULE WIZARD in the SCHEDULES group when you open the MAIN MENU. |
|
ADDING ROSTERS TO YOUR TEAMS |
|
Use the ROSTER feature to add and edit players one at a time, however there is an IMPORT PEOPLE feature to automatically do this. See below for using this feature. – You can find the ROSTER feature in the PEOPLE group when you open the MAIN MENU. |
|
ADDING COACHES & STAFF TO YOUR TEAMS |
|
Use the COACHES & STAFF feature to add coaches, staff, and even officials to your teams and leagues. To automate this process, there is also an IMPORT PEOPLE feature. See below for using this feature. – You can find the COACHES & STAFF feature in the PEOPLE group when you open the MAIN MENU. |
|
SETTING UP COACHES & STAFF USING THE PEOPLE IMPORT |
|
If you already have a spreadsheet or email with your various players, coaches, etc, listed, you can use the PEOPLE IMPORT feature. You can paste your list of people into the PEOPLE IMPORT and follow the steps to decide what type of people (coaches, players) and match your columns up so it knows how you listed names, titles, contact info, etc. – You can find the PEOPLE IMPORT in the PEOPLE group when you open the MAIN MENU. |
|
SETTING UP YOUR PUBLIC WEBSITE |
|
HomeTeamsONLINE has amazing tools to set up and customize your sports program's website. You can click the purple "ACTIVATE" button on the right (under the blue icon) to quickly make your website live. Your schedule, scores, rosters, etc., will be posted automatically. You can then use many advanced customization features to do just about anything you want! IMPORTANT: if required, you can password protect your site or even specific pages. |
|
POSTING PAGES |
|
HomeTeamsONLINE has many standard pages that you can use for your webpages, and you can also create CUSTOM PAGES as well. All your games and events will have their own page, along with player profiles, coaches, and much, much more. Everything designed to work on all different devices automatically, from older phones to big screen computers! – You can find the WEBSITE group from the MAIN MENU and start posting the pages you want. |
|
DESIGNING YOUR SITE |
|
HomeTeamsONLINE has amazing tools to design the look of your website. We provide many levels of customization (power users love us!). Keep it simple or get into advanced customization, its up to you!
– Click the main menu and go to the DESIGN group to see the many options for customizing the look of your site, including making your own banner and choosing your links. |
Customize settings for the confirmation email that is sent to the registrant after they submit their form.
| Enable Confirmation Emails |
|
Toggle this option to enable or disable confirmation emails for form submissions. Important: Confirmation emails require the "Registrant Email" field to be active in the form. If this field is missing, emails will not be sent, and a warning will be displayed. |
| Email Settings |
|
Configure the sender and recipient information for confirmation emails:
The "To" field is automatically set to the Registrant Email. You can include multiple emails in the CC and BCC fields by separating each email with a semicolon and space. For example: "[email protected]; [email protected]" |
| Confirmation Message |
|
Write the message that will be sent to registrants upon form submission:
|
| Restrict sent Information to Registrant Name |
|
Check this option to limit the confirmation email content to only the registrant's name and the information relevant to them. This is useful for forms that collect sensitive or multi-party information. |
Transaction Status
Note that PayPal & Stripe will send transaction data back to your site for tracking - therefore you normally will not need to update payment status for PayPal & Stripe.
However, other payment methods will not return the status of payment. For payment systems other than PayPal & Stripe you will have to check your payment account to update whether the payment was received or not.
| Allow Multiple Packages to Be Selected |
|
Enable this option to allow users to select more than one package from your product offerings:
|
| Allow Multiple Packages in Each Category |
|
Enable this option to allow users to select multiple packages within the same category:
|
| Require One Selection From Each Category |
|
Enable this option to make at least one selection mandatory from each category:
|
| Request Total Number of Registrants |
|
Enable this option to request the total number of registrants for cost calculation:
|
| Formatting Text |
|
The text editor supports standard formatting options:
Tip: Highlight text to apply formatting directly. |
| Adding Links, Images, and Tables |
Note: The file and image manager buttons open custom tools for managing and uploading assets. Refer to their specific help sections for more details. |
| Using the Clean HTML Tool |
|
Click the red Clean HTML button to remove unnecessary formatting and clean up your code:
Tip: This tool is especially useful for cleaning up items you cut and paste from websites, if you just need the basic text. |
| Source Editing |
|
Click the Source button to view and edit the raw HTML code of your content. This is useful for:
Warning: Editing raw HTML can impact the display of your content. Ensure you have knowledge of HTML before making changes. |
| Saving and Canceling |
Tip: Always preview your changes before saving to ensure the content appears as intended. |
| CREATE A NEW FORM |
|
To create a new registration form, click the + add new form button. See the Help tab on the EDIT FORM page for details and tips on creating a form.
|
| EDIT COLUMN |
|
Click the pencil icon for any form to:
|
| REGISTRANTS COLUMN |
|
The button displays the number of registrants that have used this form.
|
| REGISTRANTS, LAST & PAYMENTS COLUMNS |
|
The button in the Registrants column displays the number of registrants that have used this form. Click the button to view the registrants on this form.
The Last column displays the date of the most recent registration.
The Payments column displays an icon for the form(s) of payment that are set to be accepted on this form. Click the pencil icon then select edit to change the payment options for the form.
|
| OPTIONS TAB (Gear Icon) |
|
Click the gear at the top right to view dozens of custom options! We often add new options as customers make requests.
Note: The custom settings apply to all your forms. If you'd like any of the Options settings applied to only a specific form, contact support. |
The View Registrants page provides a record of submitted forms and their status.
IMPORTANT: Currently, only PayPal and Stripe integrate with our website to return transaction results for payment verification.Payment verification for checks and other services like Zelle and Venmo is NOT sent back to this website. You must log in to those accounts to verify payment.
| EMAIL RECEIPTS TO REGISTRANTS |
|
Receipts are automatically sent to registrants for PayPal and Stripe transactions. For other payment methods or unpaid forms, receipts are not sent because we do not receive confirmation from those payment processors. Manual Actions:
|
| EXAMPLES OF PAYMENT STATUS |
|
PayPal Example: The PayPal column shows payment status when PayPal is used. For example: 
Other Payment Services: Payment statuses for services like Zelle or Venmo must be tracked manually since confirmation data is not sent to the website. For example: 
Statuses like "Pending (venmo)" are shown but must be updated manually after verifying payment.  |
| OVERVIEW |
|
Tools: On the far right, search for a Registrant by name, quickly edit the form, or download all registrants to Excel. The page organizes data into a table with 9 columns: |
| SENDING EMAIL INVOICES AND RECEIPTS |
|
Use the tools in each registrant’s listing to send invoices or receipts:
Tip: Once an email is sent, the button’s text color changes from bold black to white, helping you track who has been contacted. |
| PRINTING A SINGLE REGISTRANT |
|
Click the pencil (Edit) button at the start of a registrant’s row, then click print. A list of everything on that registrant’s printout comes up, such as name, address, each of your form’s fields, the package, and the waiver or terms.
|
| FEATURES |
| Overview & Requirements |
| 1. You must have a Zelle account to add Zelle payment option. Your Zelle account can use EITHER your phone number OR your email as the account ID. You can provide both, but only one is needed, and it must match the number on your Zelle account. It's up to you, if you prefer not to disclose one or the other. 2. When you receive a payment, it will normally show the Zelle account NAME. The Zelle account will not always match the registrants name. We have implemented a way for the registrant to send that information, and this will also tie into the registrant ID that is created when they submit a form. However, its possible that the registrant skips that step, so check your Zelle payments carefully to match them to your registrants. 3. Zelle payments are collected after the form is completed, and are not logged in the REGISTRANTS page payment table. Similar to pay-by-check, you will have to check your Zelle account for completed payments, and manually update registrants payments on the REGISTRANTS page. |
| How to Add Zelle |
| 1. Log into your Zelle account and verify the phone and/or email your used for your account if you are not sure. 2. Under the payment section of the form, you will find an option to add Zelle. Enter your Zelle phone or email. 3. IMPORTANT: Test your link to confirm it shows the correct Zelle account information. In the PAYMENTS section of your form you can test by clicking the Pay with Zelle link and double checking the number. |
BEFORE YOU BEGIN...
Use the Text Alerts feature to send a text message to Players &/or Coaches & set defaults to send alerts when the Schedule is updated.
|
IMPORTANT INFORMATION |
|
Use the Text Alerts feature to send a text message to Players &/or Coaches & set defaults to send alerts when the Schedule is updated.
The text message feature pulls information from the Player and Coach/Staff Profiles. Before a message can be sent, Players need to be added to your Roster; and Coaches need to be assigned to your team (People > Roster | People > Coaches & Staff). Accurate Mobile Number & Provider information needs to be saved in the profiles.
|
| SEND A TEXT MESSAGE |
|
By default, the From field will be the owner's email address. Click to update the field. The From email must be a valid email address or emails/texts will not be sent.
Use the To drop-down to identify who you'd like to send the text to. Note that only players and coaches/staff members can receive text messages.
Enter the information you wish to send and click Send Text.
Keep in mind that the Texting feature uses SMS, which has a 160 character limit.
|
|
THE LINK BUTTON |
|
Use the link button to easily place a link to any page on your site. This is a convenient way to link anywhere on your site, but you can also paste a URL directly into the message. Any properly formatted URL should be a clickable link in any email or text received.
|
| SCHEDULE NOTIFICATION SETTINGS |
|
Click the toggles to send people notifications when the Schedule is updated. Toggles that are blue will be set to receive notifications by default, but can manually be unchecked when an admin is updating the Schedule. Be sure to click Save As Default. Text Alerts will be sent to Players & Coaches. Contact Support to add Contact Lists to receive email notifications when the Schedule is updated. Go to People > Manage People to create a list.
|
|
NOTES |
|
| CONTACT SUPPORT TO.. |
|
For example:
- Varsity, JV, & Freshman Football teams who play for the same school
- Boys Basketball & Girls Basketball
- U8, U10, & U12 teams
| League/Club/School Name |
|
Enter the name of your program. A school Baseball team could use the name of the school + "Baseball". A Soccer League would enter the name of the league.
|
| Team Names |
|
Add up to four team names in the fields. More teams can be added after the conversion & the team names can be changed later if necessary. |
| Group Teams |
|
Separately: teams do not compete against each other (example: a club with different age groups, a High School with different levels like JV). Together: Teams are grouped according to those competing for the best record in their division for the Standings. This is the usual format for sports leagues. |
| Assign existing games, players, and coaches |
|
If your organization has already added Rosters, Coaches, &/or Schedules, choose which team this info should be moved to. If none of this info has been added, skip this section. |
Contact support and we will assist you in setting up your websites.
Multi-sport account pricing is handled with a custom invoice, since there are countless possible combinations of team and league websites. Contact our support specialists and we will determine the best package and price for your organization's requirements.
When you first set up your account, each sport website in your bundle has its own unique username, a dash and the sport name is added after the main username like this: "myaccount-sportname"
Next, the password you used is initially assigned to each sport account as well.
When you are logged into the main account, you can change the password by choosing:
Account Info & Upgrades > Admin Password
You can jump to all your accounts from the main site's admin pages by choosing from the drop down selections at the top right of all the pages. This way you can jump to any site in your account and change the pasword as needed.
If you have others in your organziation managing one of the team or league accounts in your bundle, they could change the password as well (once they log in with the default password). As the main administrator, you will always be able to jump to any site in your account from the main website.
Note that changes appear GREEN until you save them, including deleted teams. Renaming or moving teams and adding divisions doesn't affect the subscription price.
During the free trial, you can add teams and upgrade packages without payment. After the free trial ends, adding teams or upgrading packages will change the subscription price. Your setup is stored, but won't be applied until you purchase the additional teams and packages.
| ADDING DIVISIONS AND SUBDIVISIONS |
|
Click "add division" to group your teams. Changes can be reviewed and don't take effect until you click "save". You can make other changes later, such as adding new divisions, moving teams around, changing their order, and deleting them.
|
| ADDING TEAMS |
|
Type or paste a list of your teams. Imported teams and teams created using other features will also be listed on the Setup Teams page for easy editing.
|
| TOGGLE "BULK EDIT" TO MOVE OR DELETE TEAMS |
|
Use bulk edit mode to drag and drop teams and groups to re-order or re-arrange your team structure. Tap or click the "drag and drop" symbol next to each team to move it. Check boxes also appear so you can select multiple teams to move or delete them.
|
| ADDING SPORTS AND TEAMS IN MULTI-SPORT ORGANIZATIONS |
|
Multi-Sport Organizations ("ORGS") provide a top level organization site for all your different SPORTS sites.
TIP - EDITING ORGS: If you need to make changes to your Multi-Sport Organization (after the free trial period), it's best to start by editing the sports where you are removing teams. This way, you can avoid any unnecessary costs. After you have removed the teams, adding new teams may have no cost, so you can save without having to make any purchases.
|
The Teams & Packages panel, often called the "Setup Tree," provides a comprehensive interface to manage your sports organization. Whether you're organizing leagues, creating divisions, or setting up individual teams, the Setup Tree ensures everything is structured logically. This tool also lets you choose package levels (ROOKIE, PRO-STYLE, ALL-STAR, CHAMPION) for each team or sport. Use the comparison cards below for package details.
| About Divisions & Sub-divisions |
|
| About Team & Multi-Team Sites |
|
| Adding Divisions |
|
Divisions help structure your organization by grouping teams under logical sections (e.g., age groups or skill levels). To add a division:
Note: Divisions can only go two levels deep and must be placed above or alongside teams, not next to them. |
| Adding Teams |
|
Teams represent the individual units within your organization. To add a team:
Tips:
|
| Managing Items in the Setup Tree |
|
Click on any item in the Setup Tree to access its management options. Depending on whether it's a team, division, or sport, you'll see different tools:
Use these tools to ensure your organization reflects your league’s structure accurately. |
| Inactive Teams |
|
The Inactive Teams option is ideal for leagues with rotating teams or teams that are temporarily not in use:
Tip: Use this feature to save money while retaining historical data and team setups for future seasons. |
| Checkpoints: Save and Load |
|
Checkpoints allow you to save and share Setup Tree configurations without finalizing them. To use checkpoints:
This feature is perfect for collaboration, enabling support staff or league administrators to test different setups before making a purchase. Note: You can save multiple checkpoints to explore various configurations for your league. |
Multi-Sport accounts are actually made up of any combination of team, league, or club sites linked together from the “main” account.
This allows many possible ways to organize your account, with the following key points:
- Logging into the main site (home, HQ) allows you to easily “jump” to all other sites in your account from the Sports HQ dropdown.
- Certain features are assigned to a specific TEAM or SPORT (league or club). For example there is no “main” roster or game schedule, as these must be assigned to the teams involved.
- From the main account, you can easily add sports & teams during the 30 day free trial. Once added, you can jump to them from the Sports HQ dropdown. (After the trial period contact support to add credits for more teams & sports).
BANNERS, NAVIGATION AND STYLING
Multi-Sport sites have a special top navigation (Nav) menu with a listing of all the sport & team sites you create for your account. It is set up automatically as you add sites. This allows visitors to go to any sport or team in your account, and return to your main site easily. The link for the sport or team stays highlighted while they are on that part of the site.
Banners and site styles are also very flexible. When you add sports & teams they “inherit” the style of the main site. However, each site can edit and customize their banner and style independently. Contact support to discuss your organization site and we will help you get your site looking and working the way you want it.
GETTING STARTED
Once you create your new multi-sport account, you begin on the administration page of your “main” site. You start out with no sports or teams, but you can easily add them from the main account during your 30 day free trial. It’s up to you if you want to first try out features on the main (home) site, or start adding more sport/team sites to your account. There are a lot of options, so feel free to contact our support specialists to discuss your site.
PRICING
Pricing for a multi-sport account receives a special discount. Basically the price for each sport and team is added, and then discounted based on the total size of the account. During the trial period you can freely add sports & teams to get the set up you want. Contact us and we will be happy to help you get the best set up to fit your requirements and your budget.
TEAM, SPORT, or MULTI-SPORT?
Sports organizations operate in many different ways, and each customer uses their account in a unique way. We’ve designed HomeTeamsONLINE sports sites to be very flexible, using a few basic types of sites:
- TEAM: A TEAM site is simple, it is one team of one sport. A single TEAM site can easily be converted into a multi-team SPORT site.
-
SPORT: A SPORT site can have multiple TEAM sites, with divisions and sub-divisions. A SPORT site can be a League or a Club for example.
The SPORT site allows lots of flexibility, but all teams must be playing the same sport. The reason only one sport is allowed is to keep game scores, rosters, schedules, league leaders, and statistics compatible. (A SPORTS site may be a League, Club, or Multi-Team site.)
- MULTI-SPORT: A MULTI-SPORT account can be made up of any combination of SPORT and TEAM sites. Examples would be a regional sports program that is made of of several large leagues, or a school athletic department that may have a single team for many different sports. MULTI-SPORT accounts are extremely flexible. (A MULTI-SPORT accounts may be any large Organization, Athletic Program, Sports Complex, or a School or University.)
TIPS
-Some miscellaneous sports use common scoring and do not have player stats. In effect, they are all the same sport, so you could combine them into one “SPORT” site. This is a great way to simplify certain sites, and reduce prices. For example, a school might have one “sport” site called “after school clubs” and combine a variety of activities into one site.
-Some Org users will track sports in a Custom Page (Page Editors > Custom Pages) You could customize a page for the team, like a Word document with text, pictures and information lists like schedules and rosters. Since custom pages are free, this would lower the cost of your subscription. This is popular for sports that typically don’t have a lot of information like Cheerleading.
-In order to input separate rosters for different age groups (example: Varsity, JV) you would need a multi-team site for the sport. Each of your sport accounts are single-team sites at this time. Let us know if you need multiple teams for any of your sports (the number of teams affects the pricing).
-You can mix and match upgrades. For example, you could have Pro-Style sites for sports that you will track stats, and Rookie sites for more basic sports
Contact Support if you have any questions
For the admin page, you can arrange the order of stats to match the sequence on your score sheets.
- Note: On the visitor page, stats will follow the standard order for the sport, not the custom order set for the admin page. The visitor site also includes calculated stats, like per-game averages, and will automatically hide any stats without entered data.
- Important: Player data is stored using the Stat ID. Changing the abbreviation only alters the label, not the data. Avoid changing a Stat ID to a different custom stat unless you’re certain the original stat wasn’t used.
Important: Stats are displayed in the standard order for the sport on the visitor page, and not the order set for the admin pages.
This is because the visitor site also includes calculated stats (such as per game averages) and also hides stats that have no data entered.
- Softball Scoresheet
| Free Printable Soccer Score Sheets |
| Free Printable Basketball Score Sheets |
| - Basketball Scoresheet |
| Free Printable Hockey Score Sheets |
| Free Printable Football Score Sheets |
|
- Football Scoresheets (single team) |
| Can I get score sheets made for flag football? |
| Flag football scoring is much different than standard football. At HomeTeamsONLINE we developed a score sheet to make flag football scoring much easier. We know it might be snowing or raining during the game, so the score sheet is designed to simply check off the result of each play - if weather is rough you can even poke a hole in the sheet! You can even list each player and check off their stats for detailed flag football statistics.
Here is a link to the official NFL Flag Football rules: |
Here are the current minimum requirements for each sport:
Baseball / Softball
Batting: 1/3 the at bats as leader
Pitching: 1/3 the innings pitched as leader
Basketball
All categories: 1/3 the games played as leader
Football
Passing: 1/3 the attempts of the leader
Interceptions: 1/3 the INTs as the leader
Rushing, Receiving, Tackles, Sacks, Kicking: (no minimum requirement)
Hockey / Lacrosse / Soccer
(no minimum requirement)
Stat leaders are only available for sports with the player statistics feature.The Statistics Feature is available for Baseball, Softball, Football, Basketball, Soccer, Hockey, Lacrosse and Volleyball.
Please take great care when creating your structure. If done incorrectly you can cause a lot of errors in your structure, especially for larger Leagues with a lot of Teams. It is easy to get your information mixed up.
Keep these tips in mind to prevent any problems when setting up your League Structure:
When deleting a team it removes the team from the League, but doesn't actually delete the team data. Removing a team still stores the team in the data, and can be added back later on. Contact Support if you wish to permanently remove a team.
Leagues have 4 Team Credits by default. To add more teams, you must purchase more credits. There is no limit on the amount of credits you can have.
You can create any number of Divisions and Subdivisions within a Division. Even if teams aren't technically in a Division, you can separate them by Division if they don't compete.
When you remove a team from a Division, the next team you add to another Division will be the team you removed. This does not create a good way to move your teams around to different Leagues. In order to move a team from one Division to the next, highlight a team you want to move and press Ctrl+X to cut it. Then go to a blank line in the Division where you want to put it, and press Ctrl+V. This is the best way form moving teams you created around to different Divisions.
Make sure you review the changes on the top right. Try to do less than 10 changes between each save.
Creating the League Structure can be quite tedious, especially if you are creating a large League. Use these tips and take it one step at a time and you should come up with a well organized and accurate League Structure.
#showhelp-794-notitle#
| Scoreboard |
|
Use the fields in the Scoreboard to enter the results per period, any overtime and final scores based on your sports.
Tip: Go to Account & Upgrades > HQ Details to update the number of periods.
Scores entered will automatically be reflected on the Visitor's website. |
| GAME SUMMARY, PLAY-BY-PLAY Tab |
|
Click Edit to enter detailed information about the game. |
| SPECIAL SETTINGS Tab |
|
Game In Progress will let Visitors know that the game isn't over. Use the selections in the Forfeit dropdown when needed. Leagues/Multi-Team sites can Lock Scores on This Game so that teams cannot make any further updates. |
| HTO Scorekeeper App |
|
Update scores as they happen using the HTO Scorekeeper mobile app from your smart phone or mobile device.
For more info, Read the FAQ |
| League/Multi-Team Site Tips |
|
We currently support importing GameChanger single game stats for baseball and softball.
You must first have your players entered into your HomeTeamsONLINE website account. The names and player numbers are required to import stats. Then you have to have entered a game, as the stats are imported into a game by editing the stats for the game.
The import feature matches player numbers, but missing players can be added as you import.
Note: If you have a GameChanger College Account, you can export an XML file. This allows import of scores and stats for both teams, as well as the play-by-play in one file. (Your school would need to be entered with the correct division code and your NCAA college code number in your GameChanger account.)
| Exporting a CSV File from GameChanger |
|
GameChanger CSV Export Format The import feature matches player numbers, so you will want to be sure those have been entered correctly. Missing players can be added to your HTOsports site as you import. For standard GameChanger accounts, you can only export stats one team at a time.
Note: If you have a GameChanger College Account, you can export an XML file. This allows import of scores and stats for both teams, as well as the play-by-play in one file. (Your school would need to be entered with the correct division code and your NCAA college code number in your GameChanger account.)
More detailed step-by-step process below.
|
|
Importing Into HomeTeamsONLINE |
|
1) Select the game in HomeTeamsONLINE you want to add the data to. 3) Click to upload your file. If the format is correct you will see a preview
|
|
Sample CSV File |
|
Click to download a sample CSV file you can preview and test with:
|
| Exporting a XML File from GameChanger (College Account Export) |
|
How to download GameChanger statistics:
1. Log in to Gamechanger (via computer) 2. Check your “Downloads” folder Confirm location of GC file on your computer (most likely in your “Downloads” folder) 3. Log in to your HomeTeamsONLINE web site (as administrator)
|
To understand how scoring rules work, the default settings are explained here. Once you understand the default settings, it will be easier to decide whether you wish to customize certain settings.
| Disable Team Editing |
|
By default, team-level admins have the ability to enter their own Scores. Multi-Team HQ managers have the option to prevent teams from entering scores. If the teams cannot enter scores, no rules are needed because the Main HQ is controlling all input.
To disable teams from entering scores: 1. Go to Teams & Schedules > Schedules & Results and on the far right, click Options. Select Team Posting Rules. 2. Set restrictions and X out of the Options and click OK to refresh with your new settings. |
| Default Scoring Rules |
|
1. After a game on your schedule has been played, either team can simply edit the game and enter data. Once either team enters data, the results will appear on the scoreboard on the visitor's site, and both teams will now see the scores entered on their admin Schedule & Results page.
- No notices are sent if there are no data conflicts (default setting)
Note: Game Summary and Play-by-Play are unique to each team. They are not compared for conflicts.
2. Either team can edit a score that has been posted.
If they are adding NEW information which does not conflict with previous entries, they can Save, and the data will be auto-posted to both teams. (For example, one team could enter the final score, and later, another team could input the score for each inning or period.)
If either team decides they want to CHANGE previously entered data, certain alerts are triggered: - A red question mark (?) with the numeric value from the opponents site will appear next to any score entry box with a conflict. (Note: it compares the data from the OPPONENTS site)
Attempt to remove conflicting data: The team can still can manually edit and possibly resolve the conflicting entries. if "AUTO-UPDATE OPPONENTS SCORE is not the default, the team will also have a button to fill the scoreboard with the opponents scores. If they do not attempt to change these scores, there will not be any conflict. 2b. Place game in dispute: If the team admin believes that their data is correct even though there is a conflict alert, they can save the data anyway, but it will NOT be posted to the opponents site. There is a message box where they can explain the dispute, which will be emailed to the opponent's Website Administrator AND the HQ Administrator. The game is now "in dispute" and will trigger a "score not final" message on the website. 3. Since the opponent is notified with an email, they will know about the conflict and can edit the game. 3a. The most common situation where there was simply an error, and they can apply the other team score and resolve the conflict. If the conflict is resolved this way, a follow up email is sent to the other team's Website Administrator and the HQ Administrator, notifying them that the conflict is resolved. 3b. If they do not agree, they can also write a message and click "Send email only". 4. At this point, the HQ Administrator has override privileges, so they have the ability to end the dispute and stop further score entry if they wish to. - Press the Info button for the game and check the box next to Scores to Lock Team Editing for that game only.
|
| Football Team Stat Entry |
|
Football users have stat entry fields on the Scores Edit Page (In the Admin Schedule) for the Team Cumulative Stats.
There are entry boxes for both the Home and Away team's information (football teams often use this data to know how good both the offense and defense are).
If both teams have Team totals entered, it will use the home teams data for Home stats, and away team data for Away stats. - Sacks Allowed will update from the defensive team.
Teams will show conflicting opponents stats to the right in red similar to the scoreboard. There are also some stat categories that can be calculated by summing the player stat totals. If these calculated values conflict with the entered value, it will be shown to the right of the entry box. - These calculated value conflicts will have a = in front instead of a ?. If both the opponents value and the calculated value differ from the entered value, both the = and ? will show with their values. |
| HTO Scorekeeper App |
|
Update scores as they happen using the HTO Scorekeeper mobile app from your smart phone or mobile device.
For more info, Read the FAQ |
| League/Multi-Team Site Tips |
|
| Customizing Your Scoring Rules |
|
Using the Options tab on the top right of the Admin Schedule page, you can change many of the SCORE ENTRY RULES Settings. Some examples of custom settings are: - Various options for sending email notices whenever any score is updated. - Set a deadline for editing, up to 21 days. (If you set 2 days, each game will become locked from any team editing, 2 days after the game was played.)
Refer to the help topics for the Schedule page Options for more details. Some settings may cause other settings to deactivate or cause conflicts, so you may wish to contact support for help with these advanced settings.
|
| Options - Score Posting Options |
|
The Auto-Update Opponents Score option (default)
This is the default. Teams can post scores for each other. When a team posts the scores, they will update the other team and the HQ site as well. The other team can review the stats entered for them, and report a dispute if the numbers are incorrect.
Each Team Enters Their Own Score option
With this option, each team can still enter the scores for both teams, which will update on their site and the HQ site only. - The record will update for only the teams that entered their scores. - When the opposing team edits the scores, they will still have empty boxes to enter the scores. If they attempt to enter something different than what was posted by the other team, it will notify them. If they save the disputed scores, the game will go into dispute. - On the HQ site, the Scores button will either be pink or yellow (Home or Away) if only one team has entered the scores. When both teams enter the scores, the button will turn green. - The HQ administrator can edit and finalize scores for both teams. |
| Creating a Schedule |
|
The Schedule Wizard will help you calculate matchups for a Round Robin schedule. We recommend downloading the results to Excel so that you can make any changes and updates and then quickly import your schedule once it's perfect.
|
| Adding Games and Practices |
|
Click the +new game or +event or practice button to begin. Use the fields and drop-downs to enter the details about the game or event. Adding a new game will allow admins to enter scores and stats* after the game has been played. Adding a new event will allow you to enter more details to define the event as a practice, team meeting, or other occasion. Once you save your game or event, the Schedule page and Schedule module on your public website will automatically be updated.
|
| Individual Results for Meets |
|
#showhelp-1130# |
| Changing/Updating a Game/Event or Deleting a Game/Event |
|
Click the info button to the right of any game or even to make an update or change. Click the trash can icon on the far right of any game or event to delete.
|
| Deleting an Entire Season |
|
Click the gear icon, and on the General tab click Delete Current Season. You will be asked to request a security code, which is sent to your email, and enter it to confirm. This permanently deletes every game and event in the season you are viewing, including scores and stats. On a league or Sport HQ it includes all of its teams' games. A deleted season cannot be recovered. Only the site owner and webmaster see this option. |
| Using the Calendar |
|
#showhelp-1002# |
| Entering Scores and Stats* |
|
Click the scores or stats buttons to enter the results for a game. See the Help tabs on the right-hand side of these pages for more details on adding scores and stats. |
| Bulk Score Entry |
|
On any game's scores page, click bulk score entry to enter scores for every game on that date on one page. Use the arrows at the top to move between dates, and click save on each game you update. To show each team's division under its name, click the gear icon on the Bulk Score Entry page and set Show each team's division under its name to Yes. This helps when teams in different divisions share the same name. |
| Stats Import |
|
Baseball and Softball accounts can now import stats from GameChanger. 2. Next, edit your Schedule and edit stats for any game. 3. There will be an IMPORT button in the header, where you can upload your file.
|
| Scores and Stats Status Key (Multi-Team Sites) |
|
The scores and stats buttons will indicate if the teams have entered information:
|
| Scores and Stats Key (Single-Team Sites) |
|
When info has been entered for scores and/or stats, a blue checkmark will appear on the button. |
| Video: Archiving & Changing the Season |
|
#showhelp-802# |
*Minimum Pro-Style membership level required for Stats
ADVANCED SETTINGS
Set Your Time Zone - Required for visitors to merge schedule into Outlook
-This is a link to the Info Page where you can enter information such as your Time Zone, which will then add a "Download/Subscribe" link to the bottom right of your Calendar Pages on your Visitor Site. - This link will not be visible if you have already set your time zone
Edit Locations - Save location details for easy selection when adding games. - This is a quick link to the Locations Page
Change Current Season - Start a new season with archive options for past seasons. - This is a quick link to the Season Info & Update Page, where you can change your season.
Entering past season stats - How to add past seasons stats as one game entry.
SCHEDULE DISPLAY
Calendar View / List View
- Change the view of your Schedule on the visitor site.
Current Week / All Weeks
- Change the view of your Visitor Schedule (List View) to default to either the current week or show all weeks of the entire schedule.
Match Display
Choose whether the Home team or Away team should be listed first in game matchups.
- All sports except soccer will default to "Away First". Soccer will default the display to "Home First".
Show this game type (default)
Every game you enter in your schedule is assigned a Game Type. This setting changes which game types are default. For example, if you choose "Playoffs" for the game type, only Playoff assigned games will show up in your schedule, until the viewer chooses a different game type in the Game Type dropdown menu.
-The default is Regular Season. Regular Season games are all games with "Regular Season" in their name and also "Tournament (Season)". Also note that, by default, the scores for games that are not Regular Season game types will not affect the win/loss record in the standings.
Default Team/Division Filter
(League Sites Only)
- This is a special setting to change the schedule view so that only one team is picked by default. For example, in a High School site with Varsity, JV and Freshmen teams, you can default the view so that only Varsity appears by default. Visitors can still pick any or all teams using the Select Team dropdown menu.
League/Team Events and Games
(League Sites Only)
When entering events, you must choose to assign the event to either the entire program, or one team. If you choose the program, these events will only appear in the full view. If you choose to assign an event to the team, this will only appear when viewing that teams schedule only, and also in their team site (if you create a team site for the team).
Show league events on team sites will make it so the league events also appear on the team schedules and team sites.
Show league events only (hide team games) on league site is a special setting that will hide the games from the default schedule view.
-You can still pick one team to view their games.
-This will not hide the games from the mini-schedule on the Home Page.
Show team events on league site will take your team events, which normally only appear when filtering your schedule view to view one team only, and post them up to the full schedule as well.
- Make sure to name your events so you can tell which team they are for (Example: Change "Practice" to "Team A Practice". This way you will be able to tell which team the event is for on the full schedule.
- There is an option in the mini-schedule on the Home Page as well, to "Show Team Events". Click Edit above the Mini-Schedule to edit the options.
Google / MapQuest
If you have properly assigned a game or event to a location with full address information, a Google map will appear in the preview on the Visitor Site. You can also change this to MapQuest instead.
Show / Hide End times
You can toggle "Show End Times" to show the end times in your schedule list and calendar view.
- This affects the Mini-Schuedle on the Home Page as well
Start Day for Week
(Not Available for Team Sites within a League Site)
Each game week starts on Monday by default. You can change this to start any day you like.
OT & 2OT
(This is visible for sports that have periods only)
Simply type the new name in the box. When entering scores in the OT or 2OT columns, these numbers will appear under your custom heading on the visitor site. For example, if your site has 4 periods only, and you want to include a 5th period, rename "OT" to "5".
TIP: you can also contact support to make the values entered in the 2OT column add up in a custom column in your standings.
Include typed directions in subscription notes
If activated, this setting will change your schedule events when visitors download/subscribe. Future events in the downloaded schedule will show your typed directions. Normally, these events will only display the location name.
- Only effects future events in the downloaded schedule. Events must have a location assigned, and the location must have typed directions.
STANDINGS DISPLAY
(League Websites Only)
Remove Links for teams - If you have created team sites, each team name in the standings will be a link to their team website. This setting can remove these links.
Sort - This changes how your teams are sorted in the record. This is typically win% for most sports.
Tie Breaker - This will determine the order of the teams that have tied in your standings.
-Head to Head compares the tied teams and places them in order of which team has the most wins against the other.
Standings Points (Hockey Only)
Set the point value for Win, Loss, Tie, OT loss, Forfeits or reset to the defaults.
STATS DISPLAY
Show OPS
Activate the Baseball stat OPS
- OPS is the sum of a player's on-base percentage and slugging percentage. It measure the player's ability to both get on base and hit for power. (OPS = OBP + SLG)
Show Zeroes in Stats
This will show zeroes for every stat with no point value instead of leaving a blank spot.
Game Type Filter
Every game you enter in your schedule is assigned a Game Type. This setting changes which game types are default in the Stats Page. For example, if you choose "Playoffs" for the game type, only stats assigned as Playoff games will show up in your Stats Page, until the viewer chooses a different game type in the Game Type dropdown menu.
-The default is Regular Season. Regular Season games are all games with "Regular Season" in their name and also "Tournament (Season)". Also note that, by default, the scores for games that are not Regular Season game types will not affect the win/loss record in the standings.
Players Per Page
Change the number of players that are displaying per page in the Stats Page.
Show League Totals
(League Websites Only)
This will add or remove the "Totals" column at the bottom of the statistics on the Stats Page which adds up the league totals.
TEAM POSTING RULES
(League Websites Only)
Leagues who create websites for their teams can modify how the scores and stats can be entered by the Team Administrators on their team websites.
VIEW THE FAQ
EDITING DEFAULTS
Current Week / All Weeks
(League Websites Only)
- Change the weekly display on the Admin Schedule Page
Loop to Selected Date after Save
(League Websites Only)
- Forces the Admin Schedule to stay on the current week you have selected at the top in the Week: dropdown. First, select the week and update the schedule view. Then press "Loop to Selected Date after Save". Your Admin Schedule will now always return to the same week, so you can edit multiple games and event in the current week without having to continually re-select the week. When done, press the "Release Loop" button.
Auto-Fill With Last Lineup
- This will automatically always fill the same lineup when adding players to Stats. Otherwise, choose "Start From Scratch" if you wish to change the lineup every time.
Default Game Type for new games
Change the default Game Type when adding any new game.
Every game you enter in your schedule is assigned a Game Type. This setting changes which game types are default. For example, if you choose "Playoffs" for the game type, only Playoff assigned games will show up in your schedule, until the viewer chooses a different game type in the Game Type dropdown menu.
-The default is Regular Season. Regular Season games are all games with "Regular Season" in their name and also "Tournament (Season)". Also note that, by default, the scores for games that are not Regular Season game types will not affect the win/loss record in the standings.
Always receive notice when team makes a game info update
(League Sites Only)
This will notify the league administrator every time a team presses the "Info" button for a game and saves changes.
Notification list for game updates (default):
Set the default check boxes for the Email Updates for Schedule Changes. You can also define a CC email here.
- Contact Support if you would like to add a custom contact group from your Contact Lists to this feature. Note that your list must be under 100 contacts.
Use the Schedule Import feature to instantly publish your enitre season schedule so that it's live on your site. Once live, you can esily edit the Scores, Stats, Standings or make Scheudle changes as needed.
| Preparing Your Spreadsheet (Video) |
| #showhelp-757-notitle# |
| Preparing Your Spreadsheet: Compatible Formats |
|
| Preparing Your Spreadsheet: Date & Time Format |
|
Start and/or end times should include AM or PM. For example, in this date, it's impossible to determine AM or PM: 10/16/17 8:30
The correct format is: 10/16/17 8:30 AM |
| Preparing Your Spreadsheet: Column Headings |
|
The system will need column headings set so that it understands where to put the information you're importing. Set column headings such as:
Date|Time|Home Team (or Practice description)|Away Team|Location|Game Type (Game/Practice)
Your prepared spreadsheet should look similar to this sample:
Multi-Team Website Tip:Save time by making sure that the team names in your spreadsheet match the team names in your multi-team website. Contact Support to include up to 50 characters to the Game Preview in your import. |
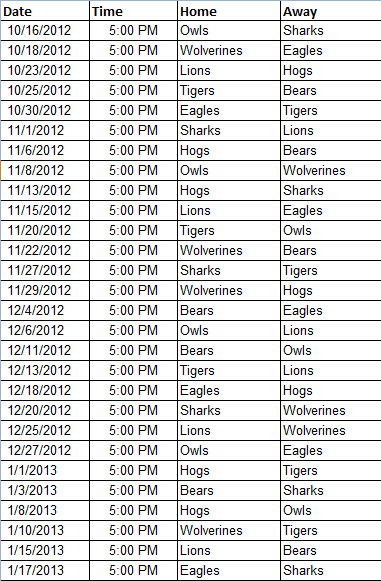
| Preparing Your Spreadsheet: Home vs. Away |
|
In order to add a Game, two teams must be listed with one team being a part of your structure.
Set one column as Home and another column as Away and list the teams for the game in the appropriate column. If one of the teams is not a part of your structure, they will be identified as a "non-league team" during the import process. |
| Importing Your Schedule (Video Above) |
|
Once you've prepared your spreadsheet for import, multi-team sites will start with the Select the type of Import dropdown. If you're importing a Schedule for more than one team in your multi-team website, choose Multiple Teams (League). If you're importing for only one team in your organization, choose the single team from the dropdown.
Click import my data. Copy the data from your spreadsheet and paste it into the large white field. It's totally fine if it looks strange - click Submit Pasted Text to move on.
From here, the system will compare the data from your spreadsheet to the data within your website. If it is not sure about any of the data you've submitted, you'll receive an error message & will not be able to move on until you tell the system what the data is or select to ignore the data completely. Ignored data is skipped & will not be added through the import.
Once you've matched all of the data, you will move on to reviewing the teams, game types, & locations. In each step, you may need to identify or ignore data before going to the Final Review. |
| Tips & Notes |
Tips & Notes for Multi-Team Sites
|
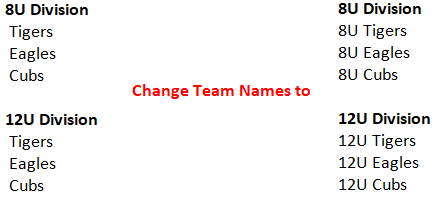
| Troubleshooting |
|
#showhelp-880-notitle#
| Creating a Schedule |
|
You can create a schedule for the teams that are already in your structure, specific divisions of teams in your structure, or even create a schedule for teams that are not a part of your structure.
|
| teams tab |
Choose which teams you'd like to create a schedule for:
*The teams who are not a part of your structure will automatically be listed as "Inactive" & will not have access to some HTO features
|
| locations tab |
Chose to skip or specify where games will be played:
|
| time tab |
|
| review tab |
Review the schedule that has been created & choose what to do next:
|
| import tab |
|
If you're ready to publish this schedule on your website, click the START IMPORT button to see a review of what will be added.
|
| Tips & Tricks |
|
|
What is the Schedule Wizard? |
|
The Scheduler is a FREE program to help you create your league schedule. You input the information such as how many teams and locations, and your schedule is automatically generated for you!
After you have created your schedule, you can then print your schedule, and/or download it into Excel. |
| What if I need help? |
|
Refer to our Scheduler FAQ for assistance with creating your schedule.
You can also email us at [email protected] and we would be happy to answer any questions you may have. |
| What is the "Manage my Schedule Online" option? |
|
Get started by creating a Free website. We'll import your schedule right into your website for you!
Your schedule is then live online and can be viewed from any computer. |
| What are the benefits of having my schedule online? |
|
There are many benefits to having your schedule in a live website.
- You can view your schedule in Calendar or List format - Updates can be made easily and are instantly live. You can also send out email blasts automatically to notify everyone of schedule changes. - You can track scores for your games and show the standings for your league. |
| Are there any other benefits? |
|
HomeTeamsONLINE offers many useful tools for your league in an easy to use template with available support.
- You can update your site with content such as announcements, pictures, News and videos. - You can manage your registration online to organize your forms and collect payment online. - You can track the statistical information for all the players. - We can set up a domain name for you (Example: Mysite.com). This makes it easy to find your site online. - And much more! Check out the Features Page for a listing of all our features. |
If you have any questions, you can also call our support department at 800-486-0505
(Mon-Fri, 9AM-4PM EST)
This page lists your tournament events. Everything else in HTOtournaments hangs off one of them, so it is worth knowing how the pieces nest before you add your second event.
| Organization Homepage | Your public page listing the tournament events you have coming up. Visitors start here and pick their event. | |
| Tournament Event | The whole tournament, for example your Fall Classic. An event awards several trophies, one per competition. Create one from Add-Edit Events. | |
| Competition | A group that competes for one trophy, usually a division or age group such as Boys 14U. An event can hold many competitions. | |
| Bracket | A Competition can have one or many brackets: round robin, match play, pool play, single elimination, double elimination, and custom brackets you build yourself. | |
| Teams and Pools | The teams in a competition, and Pools if you split them into groups. Teams can be made available for the Competition, and then assigned to a bracket slot. | |
| Advance to the next stage | A competition can run in stages. We use the term rounds for matches within a bracket, while a Stage is a new bracket. You can set up advancing rules, and you can override the advancing teams before you finalize which ones advance. | |
| Advance to the finals | The last stage, where the qualifying teams play for the championship. |
| Adding an event |
|
An event is the tournament itself, your Fall Classic. Add a new one whenever you run another. Give it the name people will search for, the dates, and the venue. Those three are what show on the card here and on your public page. Events do not interfere with each other. Spring, summer and fall can all sit in the system at once, and you can start preparing a later one while an earlier one is still running. |
| What sits inside an event |
|
An event holds one or many competitions, usually a division or an age group such as Boys 14U. Each one plays for its own trophy. A competition holds one or more brackets: round robin, pool play, single elimination, double elimination, or a custom bracket you lay out yourself. A bracket can run as a single stage or several. A common shape is a group play stage feeding a championship stage, with the qualifying teams advancing between them. |
| Your events webpage |
|
Your organization gets a public page listing the events you have coming up. Visitors start there and pick the one they want. Brackets, schedules and scores appear on it as you build them, so there is nothing to copy across or keep in step by hand. |
| Getting more events | |||||||||||||||||||||
|
Your plan includes an allotment of events. get more events adds to it when you need another. Archiving a finished event releases what it was holding, so a club running the same tournament each year is not paying for last year's. |
| What is the quickest way to get my tournament set up? |
| 1. Create your event. Go to Add-Edit Events and create it. Name it after the tournament, not your organization. Pick the sport and a date. A tentative date is fine and gives the schedule something to work from, and you can change it later. |
| 2. Add a competition. One for each division or age group, for example Boys 14U. Each competition has its own brackets, teams and schedule. |
| 3. Set up the bracket. Choose round robin, single elimination, double elimination, or a custom bracket. For pool play, set how many pools, how many teams in each, and how many advance. |
| 4. Add your teams. Open Add Teams and type or paste your team names, one per line. This costs nothing. |
| 5. Assign teams to slots. Teams can stay as placeholders. An unfilled slot shows a seed number and everything downstream still works, so you can build your whole event before a single team is confirmed. When you are ready: click a slot and pick a team, or click a team then click a slot. For a full event, use bulk edit from the gear on the Available Teams panel, then fill slots. A team credit is spent only when a team goes into a slot. |
| 6. Build the schedule. Four steps: how many courts or fields, which dates, what times, then adjustments. Quick fill lays out the whole day from your start time, game length and gap. Locations can stay as placeholders too, and dates can be changed later. |
| 7. Enter scores. Within a bracket the winner moves to the next round on its own. Standings calculate themselves. Moving teams from one stage to the next, such as pool play into the finals, is yours to review and accept. |
| 8. Share it. Your tournament website is live as you build. You can also embed your brackets on a website you already have. |
| Short on team credits? Your event still works. Any slot you have not filled keeps its seed number as a placeholder, and the brackets, schedule and scoring carry on around it. |
| Getting Started: Creating a Tournament |
Once created, your tournament will remain connected to your league site unless you choose to unlink it. |
| Your Team Setup is Automatically Linked to Your Tournament |
|
Because your league site is connected, your teams and divisions are available inside the tournament for quick setup:
This allows you to create full tournament brackets without manually re-entering team information. |
| HTOsports Home Page Modules and the Tournament Page |
This gives players, parents, and visitors a consistent place to view both league and tournament activity without switching sites. |
| Navigating Between League and Tournaments |
During tournament setup and live scoring, you can easily switch back and forth between the league and tournament site as needed. |
| Tips and Tricks |
|
| How Tournaments are Structured | |||||||||||||||||||||
|
| Scheduling | ||||||||||||
|
| Common actions | ||||||||||||||||||
|
| Status and alerts | ||||||||||||
|
| People and registration | ||||||||||||
|
When a bracket runs in more than one stage, Pool Play into Finalists for example, the standings page is where teams move up.
| waiting for scores | This team is in position to advance, but the scores that decide it are not all in yet. | |
| not advancing | On the standings as they stand, this team does not go through. | |
| advance to the next stage | Used between two stages, as in Pool Play to Finalists. | |
| advance to the finals | The curved arrow with the trophy is the last stage, where the qualifying teams play for the championship. |
Standings only appear once scores are entered. Enter a single game score and the table starts filling in.
| Quick start: advancing teams |
Changing your mind afterwards can mean resetting and redoing the settings, so it is worth a look before you click. |
| Setting your advancing rules |
|
If you have finals or qualifying brackets, set the rules before you need them. Under How Many Teams Advance there is a wide rounded button reading something like Pool Play → Finalists 4 teams. It does not look like much, but it is the button, and clicking it opens Advancing Rules. In there you set how many teams come out of the stage. Either give a total and let it divide, or set each pool separately, so Pool A sends four and Pool B sends four. The dialog shows the receiving stage next to it with its slot count, so you can see straight away whether the numbers line up. Eight teams advancing into eight slots is right. Four advancing into eight leaves half the bracket empty. |
| Ties, overrides, and going without scores |
|
Tiebreakers are applied for you, on point differential. To override any of it, click the pencil under Notes. That covers a tiebreak you want decided differently, disqualifying a team, or simply handpicking who goes through. You can also force teams through without the scores. Useful when a game will never be played and you are not going to wait for it. |
| Seeding the next stage |
|
Teams that advance appear in the next stage's standings list, and you decide the order they are seeded in. Set it with the seeding drop-downs, or leave them unseeded if the draw does not need it. Nothing is live until you click confirm seedings. Until then you can rearrange as much as you like, so it is safe to experiment. |
| Finishing up |
|
Once every bracket setting is done, including the advancing brackets, carry on to the schedule games step. |


 Image Properties - You can place a URL (web address) of an image to link to here to put a new image in or edit various formatting settings for an existing image, such size, alignment for text-wrapping and adding a border.
 Link/Unlink – Turn an image or text into a clickable link to any URL. Use the Target and Advanced tabs to control how the new page pops up. Tip: when linking images, choose the Target Tab and select New Window (_blank) to make your links pop-up in a new window.)
 Anchor – Create a clickable link that "jumps down" to specific word or area you have selected. For more details see
 Insert Horizontal Line – Click to insert a horizontal divider line within the page.
 Insert Special Character - This handy feature lets you find special characters and place them in your page.
 Paste From Word - Cleans out some of the formatting to make text from Word compatible with the web. TIP: Any time you are pasting text into your text area, you'll want to use this tool as there will be extra formatting that needs to be removed so that it will not break your site. Note that this tool is not just for pasting from Microsoft Word; it should be used when pasting information from other sources such as websites, text documents, etc.
 Templates – You can use these templates to control the text, photo, and table layout on your page. When using this tool, you will need to upload the image or table you wish to display to the File Manager first. Then, click the image or table and in the popup, copy the URL at the bottom center. Click the area where the image or table will appear, paste the URL and select Save.
 Table - Use the table features to place a basic table onto your page. TIP: Enter at least 1 for the Border Width to make the border lines visible.
 Source for HTML (code) View - For those power users that want to get right into the code, you can view and edit the HTML directly. Use this only if you have experience with HTML. (A common mistake is removing a closing HTML "tag" which may result in seeing a blank page or odd formatting.) Tip: Switch to the HTML View to paste EMBED code, such as for a YouTube video, or code for an external module. Make sure to switch to the HTML View whenever pasting code.
 Spell Checker Plug-ins – These 3rd party plug-ins can check your spelling as you type or check the page for you when you're finished.
 Undo & Redo - Yes, there is an undo button! Click this handy lifesaver of a button if you make a mistake.

 Insert/Edit Image – You can place a URL (web address) of an image to link to here to put a new image in or edit various formatting settings for an existing image, such size, alignment for text-wrapping and adding a border.
 Insert music (mp3) & video - Unused. Use the File Manger for uploading video/mp3 files, or use Paste Code (or plain text) to post video code.
 Link/Unlink – Turn an image or text into a clickable link to any URL. Use the Target and Advanced tabs to control how the new page pops up. Tip: when linking images, choose the Target Tab and select New Window (_blank) to make your links pop-up in a new window.)
 Anchor – Create a clickable link that "jumps down" to specific word or area you have selected. For more details see
 Insert/Edit Table - Use the table features to place a basic table onto your page. TIP: Enter at least 1 for the Border Width to make the border lines visible.
 show/Hide Guidelines/Invisible Elements – This is used to show the borders of your tables when the border is set to 0
 Insert Horizontal Line - Click to insert a horizontal divider line within the page.
 Edit HTML Source for HTML (code) View - For those power users that want to get right into the code, you can view and edit the HTML directly. Use this only if you have experience with HTML. (A common mistake is removing a closing HTML "tag" which may result in seeing a blank page or odd formatting.) Tip: Switch to the HTML View to paste EMBED code, such as for a YouTube video, or code for an external module. Make sure to switch to the HTML View whenever pasting code.
| Browse Styles |
| At the top in the purple section, use the left and right arrows to browse themes and pick a style that you like. All of the information that you enter for your sports program will display in the style you choose. Scroll down to see how a Style looks on your website! |
| Lock-in your Look |
| If you want to create a fully customized look, use the green Keep Locked box to select pieces of a Style that you like. For example, if you like the look of the Nav Links in one style, but not anything else, click the green Nav lock to save the look. The lock will close and turn gold & you're free to keep scrolling through to put together different elements to create your unique look! |
| Tips |
|
IMPORTANT!
• Your account is for YOUR use. Never give the password to anyone else. Use the People & Roles feature to send an invite to another person to access a website to make updates.
• ONLY addresses that only you have access to should be listed in your contact info.
Giving anyone access to your email address, password, or My Account page gives them access to your website. Use caution with any addresses you list on this page!
| My Contact Info |
|
Click the pencil icon to update any of the information in this module.
|
| An important word on Secondary email addresses |
|
Secondary email addresses are for your email addresses only. Do not use this section to add other people's addresses. Doing so will comprise the security of your admin site.
If there are other people who would like to help edit your website, use the People & Roles feature to send them an invitation to create their own account and access your website. Go to People > People & Roles and click the question mark icon for more details.
Note: if you do not have access to the People & Roles feature, contact your website admin and request access. |
| LOGIN METHOD |
|
Choose if you'd like to login with your email address or with your Facebook account. Choosing the Facebook option will automatically log you into your HTO admin site wherever you log into your Facebook account. |
Options (gear icon)
| General |
|
|
Session Time Out |
| Select how much time must lapse before you are automatically logged out. |
| Remove Me |
|
If you are a Coach or Staff member who would like access to edit and update this page, have your website admin contact HTO Support for assistance.
The options above the schedule filter the information or change the view.
- Click on a Team to view the details of a game.
- Click on an Event Name to view details of the Event.
If you would like access to edit, update, or add Scores or Stats to a game, have your website admin contact Support.
If you have access to edit, update, or add Scores or Stats to a game, click the info, scores, or stats button.

Toll-free Support Hotline
(800) 486-0505
Weekdays 9:00 AM - 4:00 PM (EST)
Phone support not available on federal holidays.

Email Support
HomeTeamsONLINE continues to expand and improve its features thanks to the feedback and comments from our users. Please let us know if you have any questions or suggestions.